Imagine yourself at an important job, maybe a big, beautiful wedding by the beach. You open your bag and reach for another lens. It’s windy, and sand is blowing in your eyes, but you power through and switch lenses. As soon as you start shooting again, you review your images and see a tiny little speck on the same spot in all of the recent pictures you took. Those specks probably mean that your lens has a grain of sand or two stuck inside it.
There are many situations when you have to go out of your way to clean your expensive lens other than getting rid of the dust stuck inside of it.
After all, these types of hardware can be as expensive if not more costly than the actual camera body (especially those telephoto zoom lenses that a lot of events and wildlife photographers use.) Lenses deserve extra time and effort to take care of because its condition will have a significant effect on the quality of your images.
Sure, you can hire a camera lens cleaning service to have your lenses professionally cleaned. These services have employees with expert hands well-trained in making sure your lens is cleaned carefully and thoroughly. However, those services can set you and your wallet back a great deal. You can clean your lenses yourself. We’ve compiled a few quick tips on how to do this, but first, it is essential to know a little bit about the different parts of lenses.
A Brief History of the Camera
Camera technology has advanced so much in the past couple of decades. People have ultra-powerful cameras that fit inside their pockets. That’s crazy to think about when you consider that the first ever attempt at photography had a camera which was almost as big as a house.
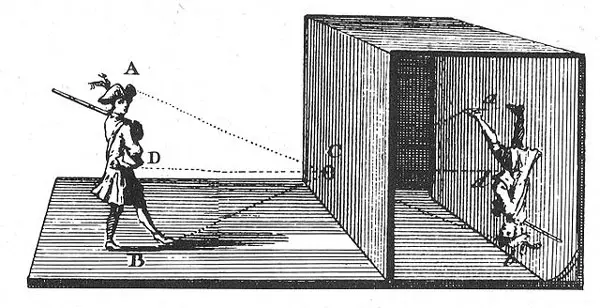
Painters utilized a natural optical phenomenon called camera obscura, in which an image from the other side of the wall would be projected onto a surface opposite the opening. They would then trace over this projection to reproduce the image. This would eventually serve as a basis for Louis Daguerre as he worked with his mentor Joseph Nicéphore Niépce to eventually invent the Daguerreotype.
The daguerreotype process involved a sheet of silver-plated copper to be polished to a mirror surface, and then treated with light-sensitive iodine vapor. After exposure to light, the plate would be exposed to mercury vapor and fixed with sodium chloride. This process involved chemicals and materials that were too expensive for general use, and so was experienced only by the elite few.
Eventually, George Eastman created a camera that didn’t need tripods. Because of this, photography went from being exclusively professional to something that the general public could turn into a hobby. Eastman would go on to manufacture Kodak Blacks and Kodak Brownies, cameras that would become household names in the camera industry due to their accessibility and portability.
The Parts of a Lens
Cameras lenses come in different lengths and zoom capabilities, but they all share a basic structure. The very first camera lens that developed to the lens that we all know today was invented by Charles Chevalier who also invented the first ever camera. The lens that he created had the same basic parts that lenses of today have. Understanding what these components do and where they go will help in knowing how to go about the cleaning process. These parts are the following:
- Optical Lens – This component, also known as the ‘elements’ of a lens, focuses light into your sensor which will then be processed into an image.
- Filter Threads – This is where lens filters are screwed into.
- Focusing Ring – This ring controls where the lens is focused. The depth of focus depends on several factors, such as aperture, light, the distance of the subject, etc.
- Focal Length Ring – the focal length ring enables you to adjust how close or far the lens zooms depending on the framing the photographer desires.
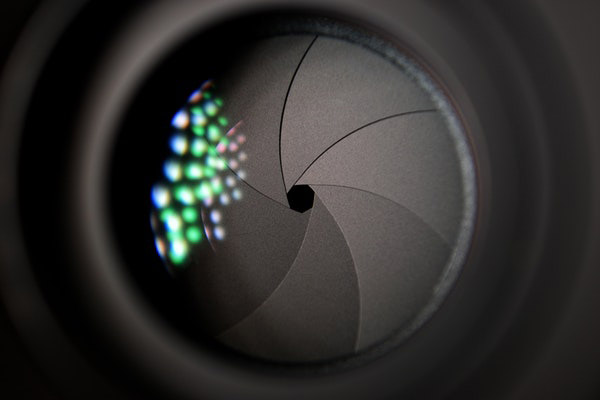
- Aperture – This is an adjustable opening used to control how much light passes through the lens. The aperture is also one of the factors that determine how thick or thin the depth of focus is.
- Aperture Ring – This adjusts the size of the aperture. Kit lenses don’t have this component while professional lenses come with rings that stop in tiny increments.
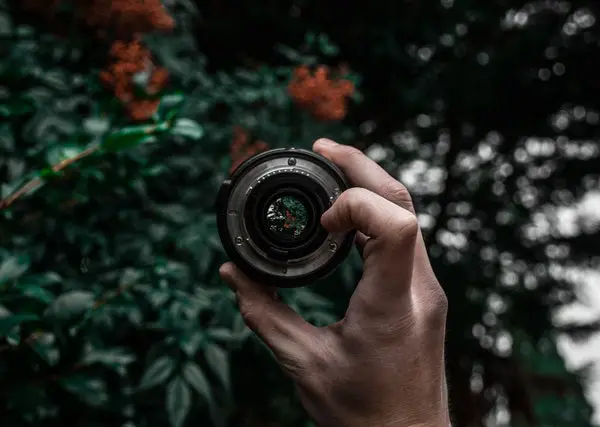
- Lens Mount – This is the metallic part that’s shaped to fit into the camera’s mount. Each brand has its own distinct lens mount design.
How to Perform a Dirt Test
Sometimes you won’t be able to know that your lens needs cleaning until you do a deliberate dirt test. Here are some steps on how to properly test your lens for dirt and other unwanted debris:
- Set your focus to infinity. Take your focus ring and adjust it such that the focus is at its farthest. This will allow you to see any dirt in your lens due to the law of the hyperfocal length.
- Take a photo of a plain surface. Do this with both a light and dark subject, and make sure that this surface is clear of any debris to get accurate results.
- Examine your recent photos. Turn on your camera and put it on playback mode. You may also opt to do this from a laptop. Carefully examine each photograph for specks of dust that appear in the same spot in multiple pictures.
- Check for other signs of a dirty camera lens such as oil smudges and residue from improper handling.
This test will help you determine whether the dust is on the lens or the sensor. If they appear as small black dots, then the contaminants are most probably in the sensor. Cleaning the sensor of a camera lens is best left to the experts due to how sensitive and delicate they are.
Tools Needed for the Job
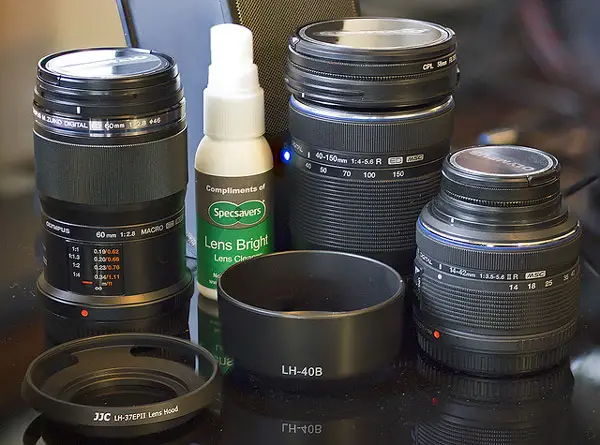
Photo by David Kynaston, Flickr
Oil and dust are the most common contaminants you have to look out for when cleaning lenses. Wiping your lens with regular fabric or blowing into them with your normal breath would do more harm than good for your lens. For delicate jobs like this, it is best to have a proper lens cleaning kit.
- UV Filter – It’s a good idea to prevent any dust or oil from getting to the front part of your lens instead of spending your hard-earned cash on any of the other cleaning items listed below. Prevention is the best cure, and the same can be said in maintaining the condition of your camera lens.
- Air Blower – This tool can be used to blow dust and other minute debris off your lens without making contact to the delicate parts of your lens. While this blower comes in many sizes, it is much better to go for the bigger ones to allow you to blow more air. Using this tool should be your first measure in cleaning your lens.
- Lens Brushes – Don’t confuse this brush with makeup brushes or other similar-looking items. These brushes use camel hair which gives them a very soft and delicate texture. While it does make contact with the glass, it does so with the utmost softness due to the softness of the camel hair. This is definitely a must-have in any camera lens cleaning kit.
- Lens Cleaning Fluid – If the brushes don’t work, move on to lens cleaning fluid. You can pair this up with microfiber cloths to ensure that you don’t scratch the glass.
- Lens Cleaning Paper Tissue – Sometimes even microfiber cloths can carry unwanted oils and residue from your fingers and previous cleaning sessions. An alternative for using microfiber cloths would be using these disposable paper tissues that are specially made for lens-cleaning, making sure that each wipe is uncontaminated.
How to Clean Camera Lenses
I assure you that if you follow these simple steps on how to clean a camera lens, you won’t break or ruin anything. These steps make sure even beginners who are worried that they may damage their lens will be able to clean their lenses easily and adequately.
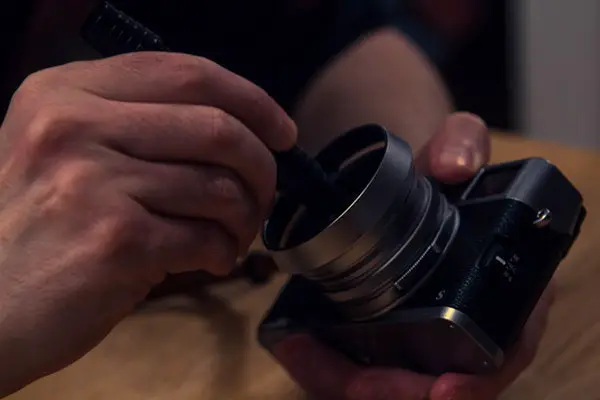
- Find the lens release button. This is the button that is usually situated to the left side of the base of your lens. Press this to unlock the lens from the mount.
- Turn the face of your camera towards the ground. This is to make sure no specks of dust float into your camera’s sensor.
- Twist the lens with the release mechanism unlocked and pull it away.
- Use the different tools enumerated above to rid your lens of dirt, dust, and oil.
- Re-attach the lens and perform the Dirt Test explained previously. If there aren’t any noticeable debris in your images, then you have successfully cleaned your camera lens!
- If debris is still showing up on your photos, then your sensor must be contaminated. Send your camera lens to experts for further cleaning.
The Do’s And Dont’s of Cleaning Camera Lenses
Do:
- Clear your lens blower of any potential dust stored inside by squeezing out a few puffs before using it for cleaning.
- Hold the lens blower close to the glass without touching it to prevent airborne particles from being blown into the lens.
- Cap your lens brush after use to prevent contamination.
- Store your cleaning cloth in a sealed plastic container to prevent contamination.
- Wipe the lens with your cloth in a circular motion.
- Always use cleaning fluid with denatured alcohol.
Don’t:
- Refrain from using your breath in place of a lens blower. Your breath is moist and will cause the surface of the lens to condense, making your job even harder.
- Avoid using air compressors as this may blow oil that is harder to wipe off into the lens.
- Try to save on money by buying smaller blowers. The air might not be strong enough, and you will end up buying the bigger kind anyway.
- Never jam the bristles of your brush onto the surface.
- Avoid touching the brushes with your fingers as this will transfer unwanted oil into the bristles.
- Refrain from washing your microfiber cloth with fabric conditioner as this leaves chemicals that may worsen the cleaning process.
Quick Tips on How to Preserve the Cleanliness of your Lens
No matter what you do, getting dust on your lens is inevitable. You can, however, decrease the number of times you clean it. After all, the time of a photographer is precious and having to wipe or blow away dust in the middle of an important gig is a big setback. Here are some tips on how to prevent this from happening:
- Protect the front of your lens with a lens filter. It doesn’t matter if this filter is UV or Skylight because they both protect the outer element from dust, oil, and scratches.
- Another way to preserve your lenses is with proper storage. There are storage compartments called camera dehumidifying cabinets that help keep your lens and other photography equipment free of fungus and corrosion that may be caused by humidity. They also help in preventing dirt and dust from getting in your camera.
- Practice proper lens switching, especially when shooting outdoors. Always point the sensor face down even before twisting off the lens, and replace it as quickly as possible.
- Having extra cameras eliminates the need to replace lenses since you will have one for each lens. Professional photographers typically use two cameras, one for zoom lenses and one for a prime lens.
- Choose a camera bag that will be able to protect your gear from the elements. It is essential to base your decision on what kinds of jobs you usually do. Proper padding is a given, but if you work in a place that is often wet or humid, it would be much better to go for waterproof bags.
Cleaning Your Lens Makes a Difference
Photography is not as glamorous as people make it out to be. It isn’t all about camera flashes, pretty models, focal blur and bokeh, and free passes to the best events.
Photography, like any other job, requires serious and consistent maintenance to have cameras that last long enough to make the most out of your hard-earned money. Next time you get some dirt or oil on your lens, you know what to do!


7 comments