Preparing for a fashion shoot sounds easy on paper, but in reality requires a lot of thought out planning – namely for the equipment you’ll need. There’s flexibility within this, but there are certain elements that are necessities (such as your camera and lighting).
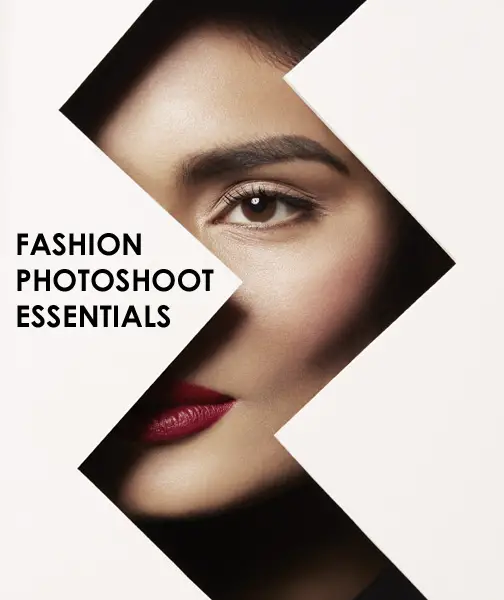
Luckily, we’ve written up the perfect guide to help you, and to make your own fashion shoot a breeze.
To begin, creating a moodboard will help the preparation of the shoot, and the shoot itself, run more smoothly and efficiently than without. It allows for a clear creative direction to be communicated, and acts as a great visual tool to reference – meaning your end result will be just as you imagined it.
We like to use Pinterest to create our mood boards, as it offers an endless supply of inspiration, as well as allowing you to upload your own images (such as pictures of your clothing collection). It’s also easy to share your curated boards with other members of the team, so everyone is on board with your ideas! Some good categories to include might be model poses, styling, lighting and hair and makeup.
With your moodboard complete you can begin to plan what equipment and resources you’ll need, and how to source them. This will range from the essentials, such as camera gear, to things less obvious, like computer programs and lighting accessories. If you need to hire lighting and camera equipment a few great places to do this from are Wex Rental, Direct Digital and Pro Centre.
Copyright Blend Studios
Starting with cameras, it’s important to remember that the quality (and therefore price) of this equipment shouldn’t dictate your ability to produce great images. If you know your shoot is going to be displayed on billboards or large prints, then it’s necessary to have a camera that can ensure your pictures will be consistently sharp at this size.
An indicator of the this will be whether the camera has a full frame sensor, and how many megapixels it shoots. A full frame sensor provides a broader dynamic range and better ISO performance, and the amount of megapixels correlates directly to the resolution of your images – so these are two important factors to consider.
A couple of examples of camera bodies that meet these criteria would be the Canon 5D and the Sony A7 series. If you are looking to be at the top of the game though, you may want to consider stepping up from a DSLR to a Medium Format camera. These cameras have a much larger sensor size and can capture up to 400 megapixels, thus resulting in incredibly detailed images that retain their quality to a size up to 70% larger than DSLRs can produce. Buying one of these however might require you to take out a small loan, as they range from £10,000 to £50,000.
Copyright Blend Studios
Lenses, likewise to cameras, vary greatly in price but also differ considerably in purpose. There are two main groups they fall into, these being zoom lenses and fixed lenses (sometimes referred to as prime lenses). A zoom lens can zoom from one focal length to another (so for example 24mm-70mm), whereas a prime lens has only one focal length (eg. 50mm or 100mm). Other categories such as wide angle, macro and telephoto fall into these two groups depending on their focal lengths.
Which lens you choose will depend on the context of your shoot – some questions to consider might be the distance your subject will be from you, are you shooting e-commerce or beauty closeups, and what depth of field do you require? Choosing a zoom lens gives you much greater flexibility, as it means you can manipulate the framing of your subject without having to move. This is particularly helpful if your model is moving, or you have limited freedom to change position yourself.
The downside of zoom lenses however is that they aren’t quite as sharp as fixed focal lenses. The additional glass and elements inside the lens, which allow them to move, create more diffraction that in turn reduces the sharpness of an image. In a fixed focal lens these extra parts to the lens don’t exist, and consequently the quality is noticeably higher.
In regard to what lens to use when, fixed focal lenses are usually reserved for portraits or beauty shots, as the model will typically be still. The higher quality is also more significant when it comes to capturing images where the subject fills the frame – sharpness will be especially obvious in skin texture and additional detail will give the image a more dynamic feel.
In addition to context it’s also important to note the F-Stop number on a lens. This number refers to the aperture of a lens, something which will affect your depth of field. This term indicates how blurry the area is around your model, and is something that you may want to increase or decrease. A low F-Stop on a lens means you can achieve a shallow depth of field which is great for portraits, or when you want the background of an image to be out of focus. Most lenses will have high apertures, but not all will go below f/4.5, which could prevent you from capturing the image you want. A low aperture is also better for low light situations, as more light is let in.
Copyright Blend Studios
The second most important aspect, after your camera and lens, is your lighting. In a studio it’s necessary to use artificial light, as generally there’s limited or no ambient light. Using additional lights also allows you to manipulate how your image looks. With studio lights you have complete creative freedom to create different stylistic effects, which in turn will allow you to achieve a unique image.
The two types of studio lights are flash and continuous. Flash lighting syncs to your camera and fires a burst of light (usually around 1/1000 of a second) whenever you take an image. Because the light is only fired for a fraction of a second it helps to ensure your images are incredibly sharp, even when the model is moving. This is great for getting action shots or capturing movement of clothes without blur. Flash lighting is also very powerful, more so than continuous, which means your image will always be lit at the right exposure and without having to shoot at a high ISO (a high ISO will add digital noise (grain) to your images and reduce the quality). A few brands who specialise in flash lighting are Profoto, Bowens and Broncolor.
At Blend we use Profoto lights because of their consistent high quality during shooting (flash recycle time can be as quick as 0.2 of a second), reliability and user friendly design. The brand also produces a wide range of light modifiers, such as soft boxes and dish reflectors, that are all compatible and are designed to a faultless standard.
The main benefit of using continuous lighting is that it can be used for shooting video. Whereas flash lights can only be used for shooting still images, continuous has the flexibility to provide lighting for both scenarios – allowing you to easily switch between the two. The constant light source also allows you to easily see straight away how the light appears on the subject and therefore what adjustments you need to make to achieve your desired look.
Continuous lights can be designed with various bulbs to give different effects – the most common being LED, Tungsten and Fluorescent. They all have their own advantages and disadvantages, however LED is paving the way forwards as the most popular option. This is due to their ease of use (in comparison to tungsten bulbs which get extremely hot), wide range of light, and ability to safely run off a main electricity supply. Reputable brands to source this equipment from are ARRI, Kino Flo and Briese.
Once you’ve decided on your lighting it’s important to ensure you have suitable stands to support them. C-Stands are highly recommended because of their stability in supporting lights, but also their flexibility in uses within the studio. As well as lights they’re also great for holding additional equipment, such as scrims or flags, as the design of the legs allows them to be placed very close together.
If you require your light to be raised, and with the stand out of shot you may need a wind up stand and a boom arm, to allow the light to be safely suspended. Alongside your basic stands, you’ll probably need a few additional pieces of grip equipment to allow items to be attached. These might include A clamps, knuckles – a type of clamp for equipment on arms or poles, and super clamps. Poly boards are also an essential part of every photographer’s set, as they can act as a bounce to illuminate your image, or a flag to cast shadow. You’ll need to make sure these come with a poly stand so they can be free standing. If you’re doing a fashion shoot in Brooklyn, instead of carrying all this equipment with you, you can opt to rent tools like Grip and Electric Brooklyn.
With all this equipment comes an element of health and safety on set that has to be accounted for. Trip mats are an essential piece of kit to have, to prevent falling over trailing wires. Sandbags are also vital, to help secure light stands and to balance any lights on boom arms. Without these in place equipment could potentially fall, or easily be knocked over – likely injuring someone and definitely causing damage to your gear.
Once all the basic equipment is prepared you can move onto thinking about creative direction – this namely being in backgrounds and props. By bringing additional elements into the shoot your images will stand apart from anybody else’s, and be instantly recognisable as belonging to you or your client’s brand. You may decide to choose backgrounds in the form of paper if you’re looking for a solid colour. Brands such as Colorama offer these in a wide range of shades, from Carnation Pink to Riviera Blue.
You can also create your own coloured background by using CT gels in front of your lights to cast a colour onto plain white or grey – this can give a more neon effect. If plain backgrounds aren’t your thing, you may be more interested in using fabrics which can beautifully bring texture to a shot and act as a contrast to whatever the model is wearing.
When it comes to props – let your imagination run wild! You can use anything from plants to food to enhance the set, draw points of interest, or add visual associations to the brand image. If your shoot is for e-commerce then props may not be necessary, and you might want to stick to a plain background in order to keep the focus on the clothing. However this is entirely up to interpretation and whether a prop adds to the image or takes the attention away is completely at your discretion.
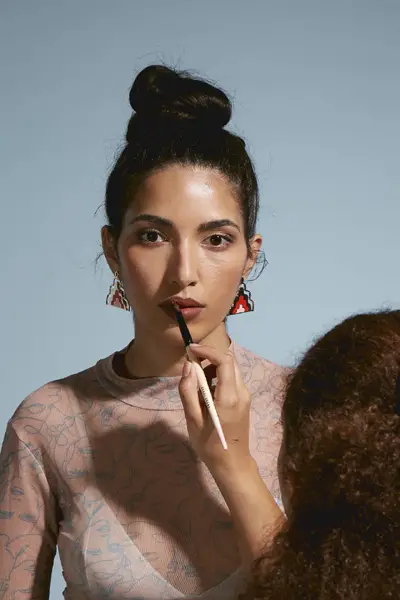
Art direction can also be significant in hair and makeup. It’s always important for your models to have a face of makeup, even for e-commerce shots where the model needs to look natural. This is because your images will look a lot cleaner and more high-end if the model has good skin, and makeup to accentuate their features, or hide anything unflattering. Even male models should have a light makeup application to conceal any skin blemishes and tone down oily areas that may be highlighted under studio lights.
Copyright Blend Studios
Using a trained makeup artist to do this will also make your retouch process a lot easier, as less work will have to go into clearing up skin in photoshop. This can often be time consuming, and is better if minimised before the shoot. If you’re working to a budget you can always ask models to come in with their makeup already done, however using a professional MUA will usually generate better results.
If your fashion shoot is more on the editorial side, or you’re shooting beauty then it’s essential you hire a MUA, and sometimes a hair stylist as well. This will allow you to create high quality, technically skilled hair and makeup looks that will bring together an image and your concept.
The final stage of your shoot – retouch. Editing your images will help refine them, give a professional feel, and can even add additional creative elements (such as filters or text). A basic retouch of a fashion shoot will usually include adjusting exposure and contrast, sharpening the image, and cleaning up the background, clothing and model’s skin. To edit photos we typically use photoshop as it is a reliable software that has everything we need, allowing us to make basic changes but also vast adjustments when needed.
Lightroom is also a popular choice, and is useful if you want to work on images collectively, rather than individually. It allows you to easily copy and paste adjustments to your album, and has the option to create “presets” which you can save in a library and apply whenever necessary. This may be particularly useful if you want to apply a filter to all of your images, or you only need to make basic adjustments. Lightroom can also be used if you’re shooting tethered to your computer, however at Blend we prefer to use Capture One – a software developed by Phase One.
Whilst both programmes can give you the same results, Capture One is superior when it comes to working in a studio environment and with clients. Unlike Lightroom, you have the ability to make annotations on your images which will prove useful when coming to editing later, and you can also rate images before export, allowing clients to make selects at the time of shooting. Additionally, there is the option to customise your workspace which allows you to speed up your workflow as all your preferred tools are in one place.
We hope that this article has given you all the information you need to confidently start planning your own fashion shoot. If you’re in need of a photographer, studio hire, or have any further questions please don’t hesitate to contact us at Blend Studios and we’ll be more than happy to help!
Here is the video:
Click the link for an article on how to get the most out of a model shoot.


1 comment