A cinemagraph is “more than a photo, but not quite a video.” Or at least that’s how Supermodel Coco Rocha summed them up.
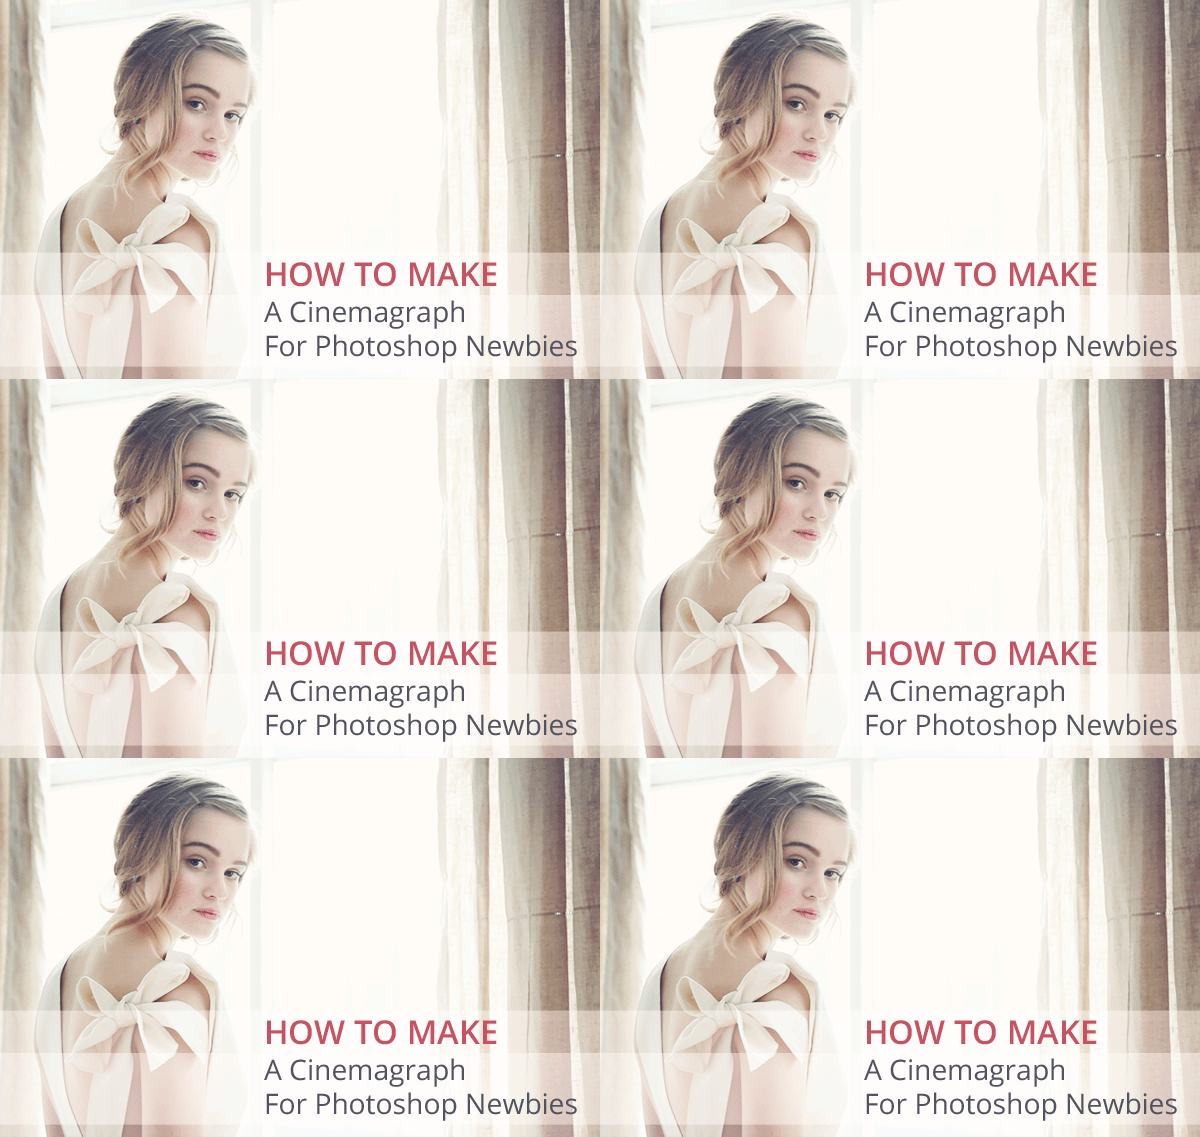
Technically, a cinemagraph is just a GIF or a Graphics Interchange Format. Basically, a short, animated file that is everywhere online these days. You’ve probably seen them on Tumblr, Reddit or 4Chan. Maybe you even remember them when they were blowing up on Myspace (or is that just this guy :).
The beauty of a GIF is that you can share more than a photograph, so you’ll often see them used in memes. This is what’s great about cinemagraphs, too. Except unlike GIFs, this new art form is more sophisticated, subtle and often mysterious.
It’s like GIFs have grown up, moved out of their mom’s basement, and are even trying to be sexy. Often, it works, too, as you can see below. Adding a subtle animation can make a photograph come to life.
Graphics artist Kevin Burg and photographer Jamie Beck coined the term, cinemagraph, when they collaborated on a story for New York’s Fashion Week. Since then, this format has gotten pretty popular. There are even a number of apps and software to instantly create you’re own cinemagraph without any Photoshop skills (go ahead and cheat if you want!). 😉 However, if you want a custom-made look, you are going to have to work for it.
Before we start, there are countless ways to make cinemagraphs, but this tutorial is designed for those using Photoshop with basic skills.
To start, you’ll need a:
- Tripod
- Video camera
- Photoshop (CS5 Extended is used for this tutorial)
- Quicktime Player
How to make your own cinemagraph:
1. Shoot Your Video
For my cinemagraph, I’ll use a clip from a trip I took with my girlfriend at the time. You can use a short video you already have or shoot a new clip, too.
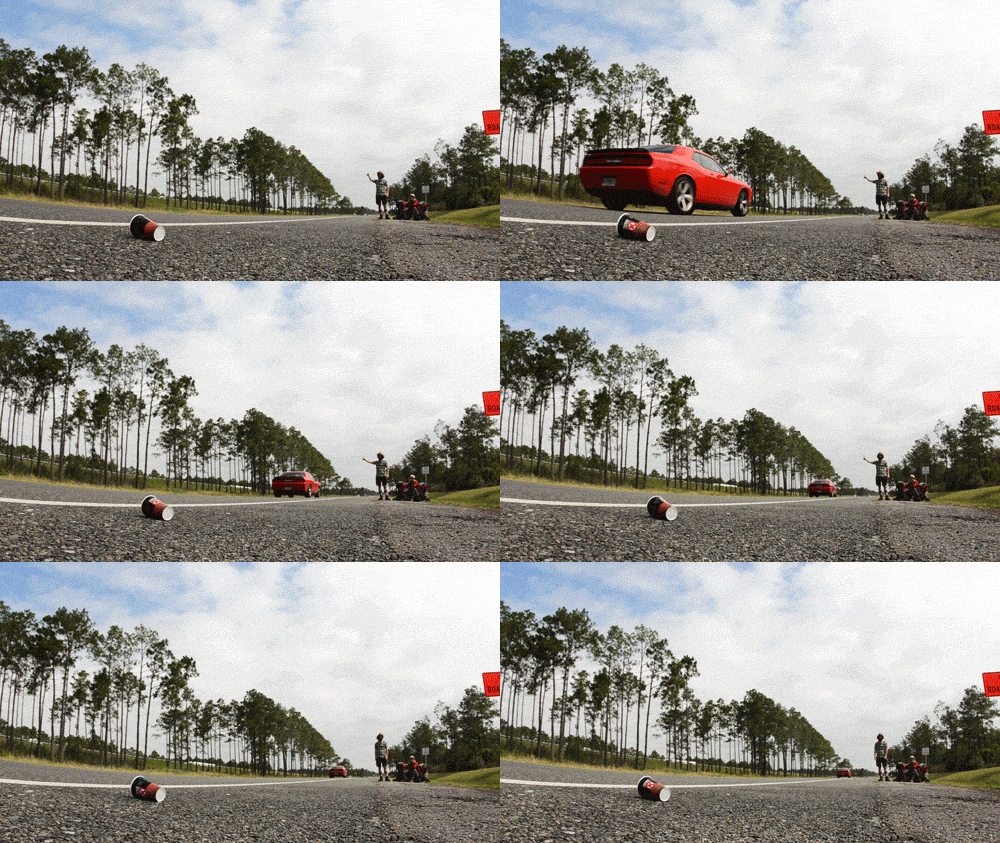
A. Select your subject:
Your goal is to keep most of the photograph still, while one or more subjects subtly move. To do this, choose subjects whose movements don’t cross paths with other moving objects. Simple examples are often swaying tree branches, the changing expression on a face, hair blowing, a dress billowing, a reflection or flickering candles.
For this example, I’m going to isolate the coffee cup on the road.
B. Isolate Your Subject:
Test your clip to be sure your subject doesn’t overlap with anything else in your shot. In my example, you’ll notice the cup comes very close to the sports car, but there is enough space to work with.
C. Shoot:
Use a tripod to keep the camera steady and only shoot a few seconds of footage. Each second of video has at least 24 frames, so, if your clip is too long, the file size will be huge.
2. Trim
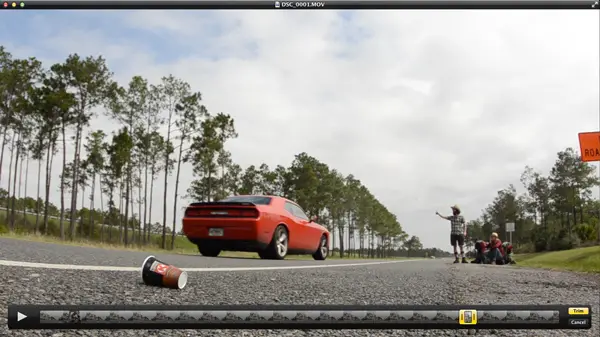
If you are using a longer clip, use a program to trim the footage before you open it in Photoshop. I used Quicktime Player 10.3 to trim by selecting Edit > Trim. Then I exported the footage at 1080p resolution by selecting File > Export > 1080p.
3. Open Your Video in Photoshop
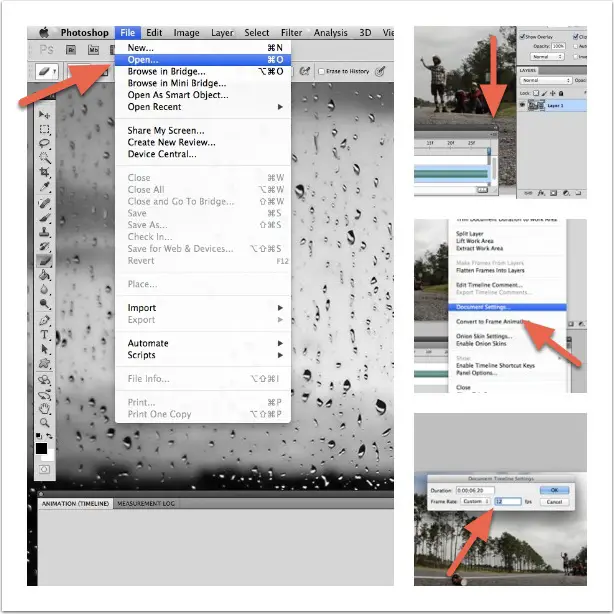
A. Before you import your clip in Photoshop, make sure you’re using the Motion Workspace by selecting Window > Workspace > Motion.
B. Then, open your clip with File > Open, and it will automatically open in the Animation Timeline.
C. In the upper right hand corner of the Animation Timeline, open the drop-down menu and select Document Settings. Then, lower the frame rate to between 10 to 15 fps. I chose 12 fps for mine. This will help keep the file size from getting too big.
4. Choose Your Animated Section
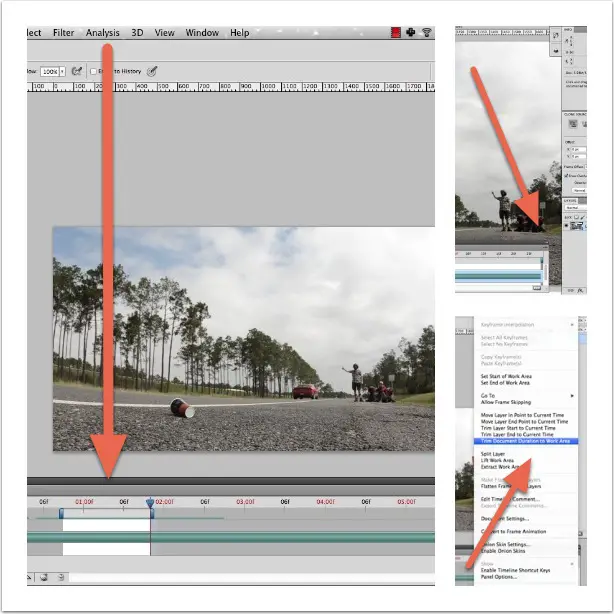
A. In the Animation Timeline, use the two blue scrubbers to select the frames you will use for your animation. Try to end the animation when your subject is stopping or moving out of the frame. In my footage, I selected frames when the cup was slowing and starting to roll in the other direction.
B. Open the Animation Timeline Menu again, then select Trim Document Duration to Work Area. This will get rid of the extra footage, so you can focus on the section you want to animate.
5. Choose Your Still Moment
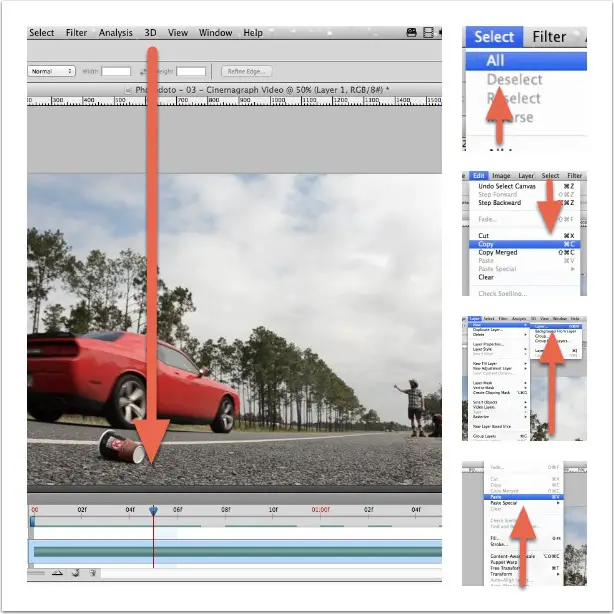
A. In the Animation Timeline, use the scrubber to select the frame that you want to freeze. This will be the “mask” for your animation.
B. Once you’ve chosen the frame, leave the scrubber there, then create a new layer by selecting:
- Select > All
- Edit > Copy
- Layer > New > Layer
- Edit > Paste.
C. Name this layer “Still Moment” or something else you’ll remember. Then, you’ll notice this layer in the Layer Widow.
6. Create Your Mask
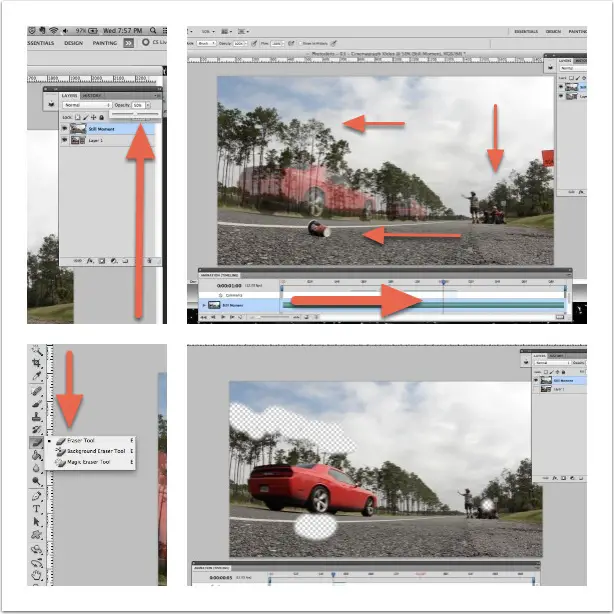
A. Change the Opacity of the Still Moment layer to 50%.
B. Using the scrubber and the Eraser Tool on the Still Moment layer, erase around your subject. You are essentially creating a hole in the mask, so you can watch the rest of your animation.
For mine, I’ve erased every area where the cup rolls, and I also erased my girlfriend’s face and the tops of the trees.
7. Watch Your Cinemagraph
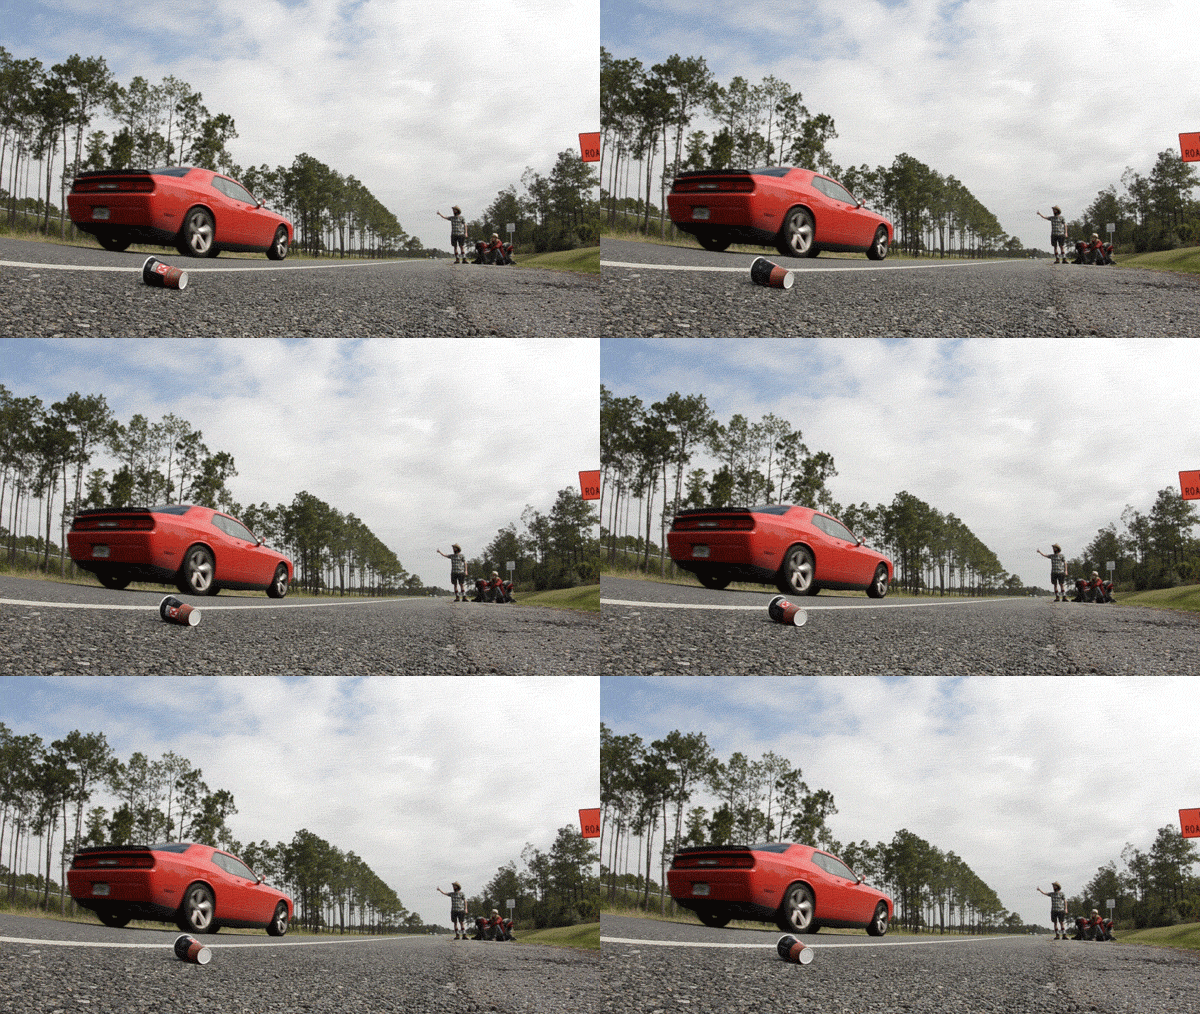
Now play your creation and check it out. Some cinemagraphs will be complete here, and if that’s you, congrats :). But for mine and many others, you’ll want to reverse the animation so there’s a seamless loop. This will make your cinemagraph look more realistic (hopefully more sophisticated too).
8. Make Layers from Frames
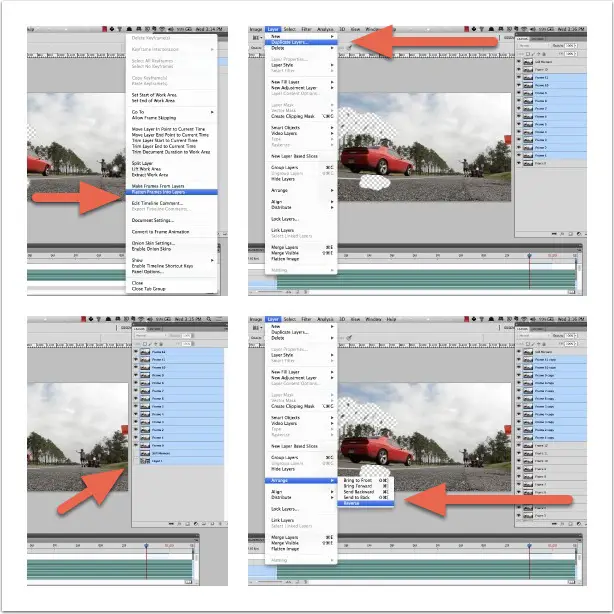
You need to change the frames of your video into layers. Then, you’ll duplicate the layers and reverse them, so a seamless loop is created.
A. In the Animation Timeline Menu, select Flatten Frames Into Layers. Then check the Layer Window, and you’ll see a new layer for each frame in your animation (and here you’ll see why it’s important to keep your animations short).
B. Delete the bottom layer named Layer 1, which is the layer with your imported video.
C. Highlight every layer (except the first and last one; since the animation will loop, you won’t need to duplicate those layers), then select Layer > Duplicate Layers.
D. Move all of the highlighted duplicated layers almost to the top in the Layer Window, yet be sure the Still Moment layer is on top.
E. With all the duplicated layers still highlighted, reverse their order by selecting Layer > Arrange > Reverse.
9. Make Frames From Layers
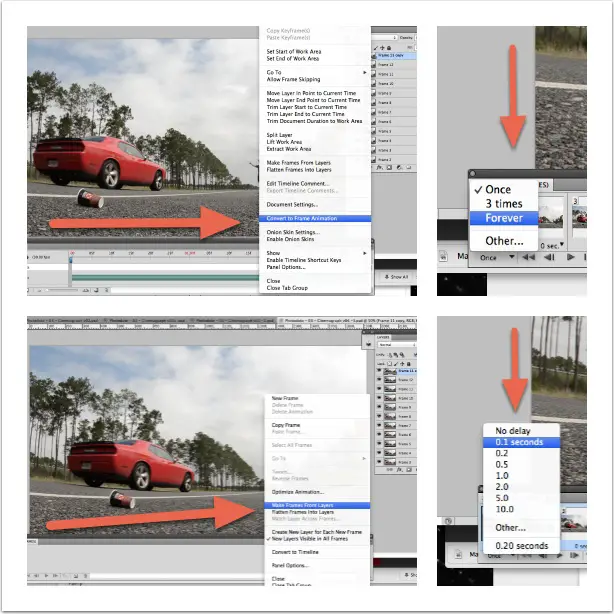
Now, you have all the frames for a seamless loop, but you need to convert them back to frames and tweak the settings.
A. Open the Animation Timeline Menu, and select Convert to Frame Animation.
B. Re-open the Animation Timeline Menu, and select Make Frames From Layers. This will make a frame from each layer.
C. Then, in the lower, left-hand corner of the Animation Timeline, open the drop-down menu that reads Once, and choose to play the animation, Forever.
D. Then highlight all of the frames in the Animation Timeline and open the drop-down menu below each frame, and select 0.1 seconds.
Advanced tip: For smoother action, customize the animation speed by slowing the beginning, middle and end to 0.2 seconds.
10. Save for the Web and Enjoy
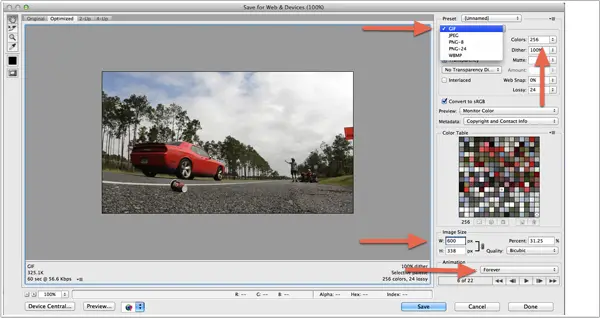
If everything looks how you envisioned, then save and enjoy. Cinemagraphs can be large files, but to host them on a website, keep yours as small as possible.
A. Select File > Save for the Web & Devices.
A. Choose GIF in the upper, right menu.
B. Be sure to set the Colors > 256.
C. Select a width at a maximum of 600px.
D. In the lower, right-hand corner, be sure Forever is still selected.
E. Then click Save and enjoy your new cinemagraph.
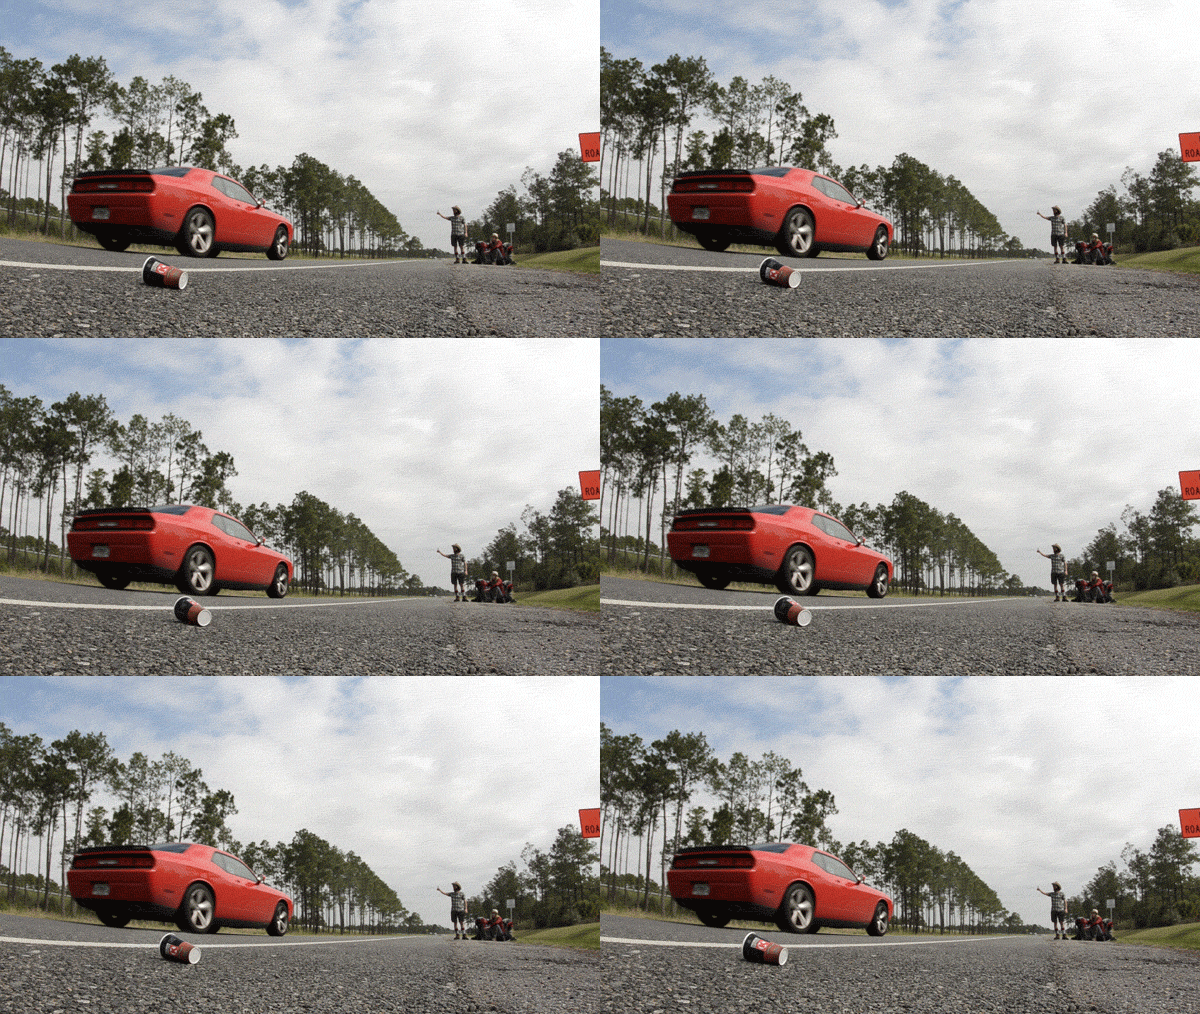
Have you made a cinemagraph before? If so, what did you make yours about? If not, is there a subject you think would work well with this format? Please take a minute and share your thoughts in the comments below. We’d like to hear from you and will try to respond personally, thanks.



Brilliant! Thank you for the step-by-step instructions. I’ve always wondered how to isolate the motion from the still. Can’t wait to try making my first cinemagraph!
It does not work…. In the end the ‘still’ frame remains so you can see it in the animation 🙁
Totally doesn’t work. Lame.
works like a dream
thanks for this! awesome, I’m going to try this on my next shoot!
Thanks for sharing!!
…or do it in 30 seconds with Flixel 😉
…Or waste your money on a Mac, then do it with Flixel lmao
Didn’t work for me. It plays my 3 seconds of footage in super slow motion and then “plays” my 50% opacity erased still image right after. Fail.
You have to know how to shoot for the final result. Sorry you guys couldn’t get it to work – it works absolutely perfectly. Thanks for posting this – needed a ton of these delivered and your tutorial helped me keep a client and deliver ahead of schedule.
Thanks, will try this out and give feedback soon
Thanks so much! I don’t even know how to use photoshop, but I was able to make the cinemagraph with a few tweaks of your post. Very easy to follow. <3
Glad it helped
hi, what did you do for the last frame? the still frame that has holes D:
I still think this is the best tutorial although the photos of the instructions are too compact – I prefer to look at photos than read hahaha but thanks all the same!