Learning Composition: The Rule of Thirds

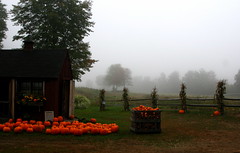
Whether you’re feeling artistic or not, good composition is important for making images that resonate with viewers. Everything else being equal, poor composition can create an itch in a viewer—a subconscious and annoying one that can’t be scratched.

Composition in photography refers to the arrangement of elements in an image. Those elements can be subjects, foreground, background, and props. They can also be color, focus, and balance.

rule-of-thirds-1

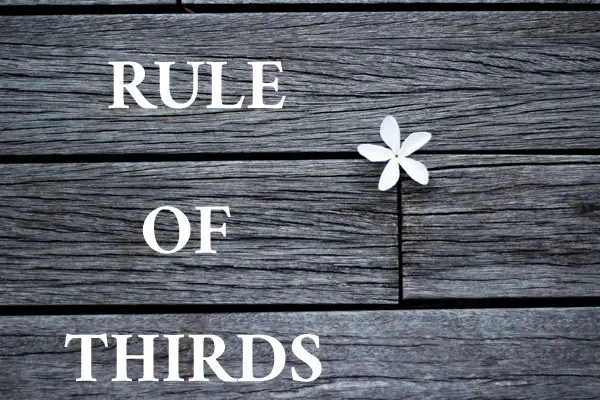
It can be a difficult concept to grasp which is why people invented “the rule of thirds.” In this article, I will explain everything you need to know about this rule, along with all the examples you will need to become a master at it.

Continue reading Learning Composition: The Rule of Thirds

Stringpods: Pocket-Sized Camera Stabilizers

On the off chance that I’m not the last photographer in the world to hear about stringpods, allow me to introduce them. A stringpod is a pocket-sized alternative to a tripod or monopod. It is a way to stabilize a handheld camera using a piece of string, a 1/4-inch bolt with a #20 thread, and a few washers. Essentially it works like this: the photographer secures one end of a string to the bottom of the camera. The other end of the string drops to the floor and the photographer steps on it. By pulling up on the camera gently, the string gets taut and helps to stabilize the camera.

I suspect that the MacGyver-quality of this little tool is what gives it such broad appeal (MacGyver is a television action hero known for inventing quirky tools from common items). Last week I found at least five images of stringpods, as well as numerous instructions how to make them. At least one flickr photographer showed a simple stringpod, while another showed a similar tool made using a thin chain instead of string. I even saw a video showing not only a stringpod,

Continue reading Stringpods: Pocket-Sized Camera Stabilizers

Black & White Is the Key to Better Color

Lately, I’ve found a great way to use black and white to improve my color photographs. So, you say, that doesn’t make any sense, right? Well, I understand your confusion, but it’s really quite simple. What I mean by this, is you can convert your photo temporarily to black and white and perform some editing to make your photographs more appealing in color.

sunbathing.jpg

This is a photo I took at Hanauma Bay in Oahu of a lady sunbathing. It’s a nice photo. I’m actually fairly happy with how it turned out. I had taken it a couple of years ago, so I though I’d try reworking it using my black and white trick.

Continue reading Black & White Is the Key to Better Color

Learning Photoshop

For more than a year, Photoshop was the bane of my photographic world. I wanted to learn it, but each time I tried, I came away feeling frazzled, inept, and not too bright. I just wanted to master the basics. Perhaps I could learn to remove small distractions from an image or brighten a dark spot. For example, I took a picture of a couple with their dog, and an upturned chair in the background made it appear as if the dog had horns.

Picture before PhotoshopPicture before Photoshop
Many of my friends could use this program, so I began with optimism. First, I took a class. The instructor cheerfully zipped though his list of topics, while I watched, listened, took notes, and tried to follow the steps on my laptop. That didn’t work, though, because while I took notes, I missed details, and while I was trying to find a tool or command, he was often moving on the next topic. I finished the class but recognized that I needed to find another way to learn the program.

Continue reading Learning Photoshop

Shooting Outdoors in Wet Weather

While the fainthearted may see grey skies and feel trapped inside, the rest of us need not be stopped by wet weather. Taking pictures in mist and rain can be very satisfying, especially when the rain is light and feet stay dry. Often, grey skies intensify certain colors, while changing others.

I really noticed this last week when I went outside to get my morning paper and saw the pumpkin stand across the street from my house. The pumpkins practically glowed. Luckily, I was only steps from my camera and managed to capture the rich orange.

farmstand in mist

The last few days have been damp and grey where I live. While friends and neighbors bemoan the lack of sun, I happily take advantage of the overcast skies and wet surfaces. I put on my waterproof shoes, grab my slicker, and out I go.

Continue reading Shooting Outdoors in Wet Weather

Workshop at the Ranch

Dave Black has a wonderful website. One of his monthly features is called Workshop at the Ranch. There he gives insightful tips on how to use off-camera flash in creative ways. Although anyone using wireless flash units can benefit from Dave’s experience, his series is of particular interest to Nikon shooters using SB-800s and the Nikon Creative Lighting System.

I make it a point to check back each month to learn more from this master of Nikon flash. I particularly like his method of using warm gels with SB-800 Speedlights to create warm subject lighting and a cool blue background. I think it works particularly well for sports portraits, but I’ve used it for a variety of subjects.

Alicia with Basketball

This is an example using Dave’s technique for a Senior Portrait.

Continue reading Workshop at the Ranch

Mastering a Subject

daisy showerDo you take the same types of pictures over and over again? You know what I mean—hundreds of flower images (or cars or cats or whatever) fill your photo albums, but no portraits, buildings, action shots, or street scenes. One school of thought urges you to push yourself to shoot what does not come naturally. However, I have another suggestions: stick with what you love, but work to perfect that subject.

There is a vast difference between lacking the imagination to try new subjects and deliberately working on one subject to develop skills. The first is a type of laziness; the second is a path to mastery. I like to think that I’m following the second path, but I’m too close to tell, so I’m going to use another example, flickr photographer Steve Wall.

Now, I’ve never met Steve; I know nothing about his life; he isn’t even an online correspondent, or at least he wasn’t until I asked permission to use his photos. But I have been following his photography on flickr for a few years because I saw some pictures of his that I liked and marked him as a contact.

Continue reading Mastering a Subject

Negative Space Can Have a Positive Effect

Many elements work together to create a pleasing photograph. One such elements is negative space. Negative space is all the space inside the picture that is not the subject. The edges of any picture form a frame for that picture. Within that frame, the subject is considered the positive area; the rest is called negative space.

The word negative is used descriptively; it is not a value judgment. Negative space is not something to be avoided. However, it is something to be considered, because it is an important part of a picture’s composition. It is a design element in your image.

A stencil can help you recognize this importance. Here the subject is the brass object, but the negative space that forms the letter is equally if not more important.

Negative space has several functions. It helps define a subject. In many cases, it also provides a vital element in the design of your image. Since a photo is two-dimensional, the space around a subject appears on the same plane as the subject. Negative and positive spaces are side by side.

Continue reading Negative Space Can Have a Positive Effect

Getting the exposure right

One of the most common problems people have when taking photos is that part of the photo (usually the part that they want to see) is too dark or too bright. For example, when taking a photograph of a friend in front of the sunset, the sunset will show perfectly but the friend is a dark, unrecognizable blob. The problem is that the range of brightness in the scene is too much for your camera to record. So it has to “decide” which parts of the photo it wants to keep (the sunset, in this case) and which parts aren’t as important. And it often gets it wrong.

Continue reading Getting the exposure right

Playtime!

Some days are rushed, but others present a perfect opportunity to play with your camera. Last week, a friend gave me a bouquet of daffodils. They looked so bright and springlike, that I decided to shoot some pictures of them.

The hour was early, and light came in only one window. First, I stood by the window to shoot the flowers, which jumped out against the darkness of the room behind. Later, though, I tried other positions, such as standing in the room and shooting toward the window. Then I wondered how the flowers would look in my upstairs room with the skylight, so I dragged the bouquet up there to shoot some more.

Continue reading Playtime!