Get Stable Without a Tripod

I recently bought my first tripod. More than a year after I first started making money with my photography, and two years after I got my first decent camera. I finally got one because I’ve been asked to do photography at several night time events over the coming months but I had resisted buying one for so long because I find them (the affordable ones anyway) too heavy and bulky to be practical. For those of you who may also be making do without a tripod here are a few other options for getting stable:

Monopods. These are little poles that you mount your camera on top of. They are lightweight and easy to move and some of them come with velcro straps so you can attach them to fence posts and the like. However they’re not great for long exposure and some monopods may not be strong enough to hold a larger SLR camera.

Beanbags. Very cheap, light weight, and easy to squash into an overstuffed camera bag. Beanbags make excellent camera supports and almost never break! Simply put a beanbag between your camera and a rock/bench/tree/car roof and it’ll support your camera perfectly.

Continue reading Get Stable Without a Tripod

Photo book buying guide

Last year I worked for a family with two wonderful children and when I left I wanted to make a photo book for them with some of the hundreds of photos I’d taken during the year. Well, things got chaotic as I packed up my life to move 3, 429 miles across the country, and in the end I simply didn’t have time to chose the photos, upload them to a suitable website, order the book, and wait for it to be delivered.

The idea came back into my head recently as I was thinking about Christmas gifts and this time I was just about organised enough to pull it off. But, man are there a lot of website offering photo books out there! So for those of you who might be looking for a quick comparison of prices here’s the little table I made while I was searching for the best deal.

Company

Book Size

Cost

Shipping

Other Info

Shutterfly

12×12

$54.99
for 20 pages

$1.50/extra page

$9.99

25% off
extra books if you

order more than one.

Continue reading Photo book buying guide

I’m ready for my closeup: 6 methods for perfectly focused self-portraits

Self-portrait shooters usually rely on the trial-and-error method of focusing. Shoot, shoot, and shoot again until the perfect combination of pose, exposure, and focus are achieved. But there is a better way (several, in fact)! All of these methods are quick and easy and will give you accurate focusing without a lot of frustrating trial and error.

Before you begin, you’ll just need to acquaint yourself with how to put your camera into manual focus mode. You won’t actually use manual focus for focusing—you’ll just use it to keep the focus once you’ve got it set just the way you want. For each of the methods below (except the last one), you’ll auto-focus first and then set the camera to manual focus so that it won’t attempt to re-focus when you take the shot. You’ll also find that having a remote shutter release helps immensely.

Continue reading I’m ready for my closeup: 6 methods for perfectly focused self-portraits

Why are my photos of moving subjects blurry?

There are two primary kinds of blur in photos (well, three, but we’ll assume you keep your camera fairly clean): focus blur and motion blur. Here are examples of focus and motion blur, respectively (click to enlarge):

Focus blur Motion blur

Focus blur happens when the subject of your photo is simply out of focus. The solution to that is to make sure your autofocus is on and try again. If it’s out of focus, re-focus and shoot again. Pretty straightforward. On point and shoot cameras, the most likely reason you’re out of focus is because the subject moved or the smart focusing system wasn’t so smart and focused on the wrong object.

Motion blur, on the other hand, doesn’t happen because your subject is out of focus. It happens because your subject is moving relative to the camera frame while the exposure is being made AND the shutter speed isn’t fast enough to freeze it. Let’s tackle those two aspects separately.

Continue reading Why are my photos of moving subjects blurry?

Ten Tips for Photographing Pets

This time of year, many photographers are trying to take pictures of their pets wearing fake antlers, Santa hats, or other seasonal trappings. Although I don’t indulge in that sport, I do love taking pictures of my pets and other animals, and I thought I’d share some tips that have worked for me and for others.

1. Be patient. Pets don’t often pose. Sometimes they sniff your camera or your sleeve. At other times they decide to crawl under a table or fly on top of a dresser. Just wait quietly until they settle down.

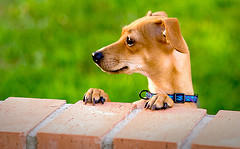
<i>Scanning the Neighborhood</i> by Michael Fletcher 2. Try to capture a characteristic action or activity. If you’re shooting your pet, you know its personality. Try to take a picture that reflects some characteristic, such as curiosity, goofiness, adoration, or self-possession. You do not have to include every inch of your pet, only the parts needed to express what you’re trying to capture. This image by Michael Fletcher certainly shows how alert this little dog is!
Continue reading Ten Tips for Photographing Pets

Photography and magic and Nikon CLS

A friend of mine calls me up every week or so with a photography question. Usually, he’s looking for the magic incantation or editing technique that will make his photos turn out in a particular way. Sometimes there is such a thing (e.g. wait for the the flash to charge, use manual focus, etc.). But usually there isn’t. Usually, getting a particular effect in a photograph, either at the camera or in post-production, requires experience, artistry, experimentation, and work. And a lot of the stuff you learn on one photo can’t just be applied blindly to the next one. School portraits aside (ha!), every photo is different.

Continue reading Photography and magic and Nikon CLS

Playtime: Using Mirrors

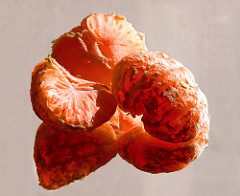
I try to take pictures every day. Some days, of course, I’m inspired by something I see. At other times, I need to inspire myself and come up with an idea. This week, an idea was prompted by discovering an old discarded medicine cabinet that had mirrored doors. The doors were removable and provided me with two relatively large rectangles of mirrored glass.

One day, I decided to play with the mirrors, and it certainly was fun. First, I washed them to eliminate distracting blotches and spots. Then I tried laying various objects on them. I found that some objects are pretty boring on a mirror. For example, most thin flat objects do not produce interesting reflections. All you see are the edges. Plump or rounded objects reveal more of their undersides. If the underside is a different color from the top side, you can get interesting images. Although you can create the appearance of reflections using software, you will have far more fun experimenting with real ones.

clementine pieces
Irregularly shaped objects make the most interesting reflections, I think. It’s hard to tell where the object ends and its reflection begins.

Continue reading Playtime: Using Mirrors

Black & White Is the Key to Better Color

Lately, I’ve found a great way to use black and white to improve my color photographs. So, you say, that doesn’t make any sense, right? Well, I understand your confusion, but it’s really quite simple. What I mean by this, is you can convert your photo temporarily to black and white and perform some editing to make your photographs more appealing in color.

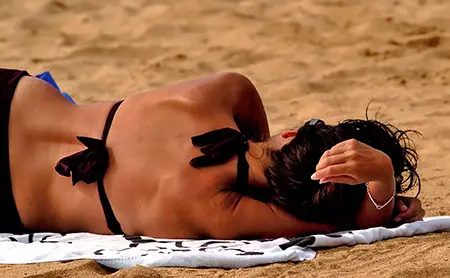
sunbathing.jpg

This is a photo I took at Hanauma Bay in Oahu of a lady sunbathing. It’s a nice photo. I’m actually fairly happy with how it turned out. I had taken it a couple of years ago, so I though I’d try reworking it using my black and white trick.

Continue reading Black & White Is the Key to Better Color

Learning Photoshop

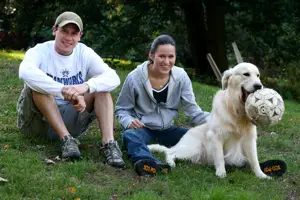
For more than a year, Photoshop was the bane of my photographic world. I wanted to learn it, but each time I tried, I came away feeling frazzled, inept, and not too bright. I just wanted to master the basics. Perhaps I could learn to remove small distractions from an image or brighten a dark spot. For example, I took a picture of a couple with their dog, and an upturned chair in the background made it appear as if the dog had horns.

Picture before PhotoshopPicture before Photoshop
Many of my friends could use this program, so I began with optimism. First, I took a class. The instructor cheerfully zipped though his list of topics, while I watched, listened, took notes, and tried to follow the steps on my laptop. That didn’t work, though, because while I took notes, I missed details, and while I was trying to find a tool or command, he was often moving on the next topic. I finished the class but recognized that I needed to find another way to learn the program.

Continue reading Learning Photoshop

Shooting Outdoors in Wet Weather

While the fainthearted may see grey skies and feel trapped inside, the rest of us need not be stopped by wet weather. Taking pictures in mist and rain can be very satisfying, especially when the rain is light and feet stay dry. Often, grey skies intensify certain colors, while changing others.

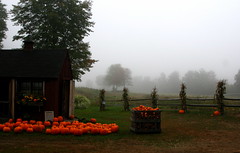
I really noticed this last week when I went outside to get my morning paper and saw the pumpkin stand across the street from my house. The pumpkins practically glowed. Luckily, I was only steps from my camera and managed to capture the rich orange.

farmstand in mist

The last few days have been damp and grey where I live. While friends and neighbors bemoan the lack of sun, I happily take advantage of the overcast skies and wet surfaces. I put on my waterproof shoes, grab my slicker, and out I go.

Continue reading Shooting Outdoors in Wet Weather