iPhone/iPod Photo Apps

So during my hours of train journeys last week I checked out a couple of photography apps on my iPod. I’ve given them a brief review below but I should also point out a couple of things. Firstly I randomly chose a few from the top rated free photography apps in the iTunes store. I also reviewed two from BigCanvas who gave me free copies of those two paid apps. Secondly most of these apps were really designed for the iPhone rather than the iPod so even though I don’t have an iPhone I kept that in mind while testing them. The main features that the iPod lack are a camera (you can still use all these apps but need to import photos from your computer) and an internet connection (which the iPod is capable of but only if Wifi is available) although not all these apps need internet access.

iSynth This is just fun to play with, if you like photosynth then this is the app for you. I passed the better part of an hour on a train viewing Obama’s inauguration and other exciting events from a huge variety of angles. Using the touch screen actually makes this a little bit more intuitive to use than the original photosynth.

Continue reading iPhone/iPod Photo Apps

A Very Basic Guide to Textures

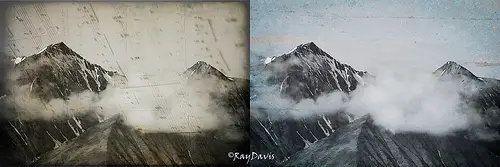
First off what do textures do? Well, things like this…

music-mountains
drive-in-liqour

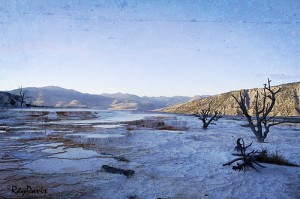
yellowstone

Some are more subtle than others, obviously! So how do you add them to your photos? The easiest way is to use textures that other people have created. Some are free and some you need to pay for but either way this is what you need to do with them once you’ve downloaded them:

1. Open both the texture and the photo you want to edit in Photoshop. Click on the photo and check it’s dimensions.

2. Change the dimensions of the texture so that it’s as close to the same size as you can get it ( you can uncheck the constrain proportions box if you need to).

3. Still with the texture selected (rather than the photo) press Ctrl+A or Cmd+A (or go to file, select all) and little running lines should appear around the texture.

4. Press Ctrl+C or Cmd+C (or go edit, copy).

5. Select the photo and press Ctrl+V or Cmd+V (or go to edit, paste). The texture will be pasted over the photo so all you’ll see is the texture and not the photo underneath.

Continue reading A Very Basic Guide to Textures

Black and White with a Splash of Colour – iPod style

redflowerOne of my most frequently commented on posts is the little tutorial Black and White with a Splash of Colour. Well, I’ve just discovered a new super easy way of achieving the technique for those of you with an iPod Touch or iPhone. A little, at the moment free, app called ColorCanvas which couldn’t make it any simpler to create black and white photos with a little colour. I’ve been playing with it on my iPod Touch and it works pretty well. You simply import a photo from your library (or take one if you have an iPhone) and ColorCanvas will convert it to black and white automatically. Then wherever you touch on the screen turns back to colour. It takes a bit of practice to be accurate with the edges but you can vary the brush size and zoom in on the photo to make it easier. There’s the option to vary the opacity too.
I’ve just downloaded a whole bunch of free photography apps for my iPod and I’ll be trying them out on the 8 hours of train journeys I have this weekend so I’ll let you know if any good ones turn up.

Continue reading Black and White with a Splash of Colour – iPod style

Digital Black and White Photos

Sometimes a photo just looks better in black and white. You know, from time to time you’ll be digitally rifling through a folder of photographs and there’ll be one or two that just don’t suit being in glorious technicolour. So what to do? Well here are a few tips:

1. Don’t write the photo off just because it doesn’t work in colour. It may look fantastic in black and white.

2. Don’t just convert to greyscale or desaturate. This will most likely look boring and low contrast. Most programs (including free ones like Picasa) have some kind of  “filtered black and white” option (in Photoshop this is the channel mixers). This allows you to select a colour filter (some programs will have more choices than others) which will let you keep much more of the detail in your photo. Play around with the different filters and see which ones work best for your photo.

3. Play with the photo in colour first. Before you convert to black and white do any corrections e.g. red eye removal, exposure, contrast etc. while the photos still in colour.

Continue reading Digital Black and White Photos

Picasa for Mac

collagePicasa, Google’s free photo-editing software, recently became available for Mac users (running OS X 10.4.9 or above). It has a few nifty features that iPhoto (or iPhoto ’08 at least) doesn’t and is very easy to use. It’s got all the basic editing tools – crop, straighten, remove red eye, convert to black and white, convert to sepia, and so on that you’ll also find in iPhoto. The extras in Picasa include adding a a gauzy glow to your photos, adding a graduated tint (useful for sky portions of photos), and adding focal black and white (allowing you to keep one part of the photo in colour and covert the rest to black and white). Plus something simple I always wished iPhoto would do – allow you to add text to a photo. In Picasa there’s a button right there under “basic fixes” that says “add text” and that’s how easy it is!

You can also create collages (like the one at the top of this post), mosaics, contact sheets, & fun multiple exposure shots with the click of a few buttons (see below). It’s all very easy to use and I think would be a great fit for someone looking to do a bit of easy editing to family photos (you can upload them to Picasa Web Albums with the one click too).

Continue reading Picasa for Mac

Review: Practical HDRI

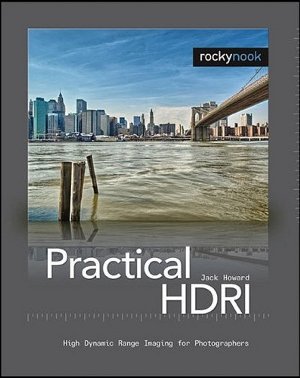
Practical HDRI by Jack Howard (Rocky Nook)Practical HDRI by Jack Howard (Rocky Nook publishing) is a no-nonsense guide to high dynamic range imaging (HDRI).

Read the rest of the review and find out how you can get a free copy of this book.

You’ve seen the photos. But hopefully you haven’t let the abundance of bad examples turn you off to HDRI in general—it is a powerful technique that can help you create stunning images that can’t be captured any other way.

I like this book because the author, in a scant 168 pages, has condensed a ton of practical advice and tips into a useful and unintimidating reference. Howard writes, “It is my goal to get you ramped up in HDRI as quickly and as painlessly as possible. This book focuses on pragmatic workflows, a healthy dose of tips and tricks, and real-world advice.”

The introduction lays a solid foundation for understanding HDRI and 8 bit vs 32 bit color spaces. It’s good information and I recommend reading it if you are serious about improving your craft… but if color space geekery makes your head swim, you could safely skip ahead to other topics.

Continue reading Review: Practical HDRI

Animoto for Photography

I created the above sample video in about 5 minutes using my photos and music from their commercially licensed stock library. Dead simple, nice results. Animoto is so easy because it allows you to exchange control over the video for incredible production speed. Although Animoto does most of the work, you can use the “Spotlight” feature to highlight certain photos and adjust the speed of the video. Animoto could be just the ticket for photographers looking for a secret weapon to help promote their business or as an add-on to sell to customers. It’s also a lot of fun.

Animoto says:

Created by TV & film producers, Animoto for Photography lets you turn your breathtaking photos into stunning video in minutes. Fast, award-winning production value plus a library of 175+ free, commercially licensed songs, gives photographers the most powerful video creation tool available.

Founded by MTV and VH1 alumni, Animoto for Photography automatically produces professional video from the photos and music that a photographer selects. Each video is stunning, completely unique, and takes only minutes to produce.

Animoto: Photography For Business

Continue reading Animoto for Photography

Photosynth

I’ve recently come across Photosynth, I had heard of it about a year ago when it was still in its tech preview phase and then I’d forgotten about it. Which I shouldn’t have done because it really is cool. Microsoft Live Labs, who own Photosynth, call it “an entirely new visual medium.” And they’re pretty much right, it’s a very cool new way of viewing photographs. Basically it works by analyzing a set of photos and using the data to build a model of the subject, then it re-creates the environment and uses it as a canvas for the photo. Which doesn’t sound as awesome as it is so head over to Photosynth where you can play about with creating and viewing synths yourself.

National Geographic is creating synths of global landmarks like Macchu Pichu, Stonehenge, and the Pantheon which you can view on the National Geographic Magazine webiste. The BBC also has a gallery called “The Future of Photography” on their website which has collections of synths built on locations from the BBC One series “How We Built Britain”, including Trafalgar Square, Ely Cathedral, and the Scottish Parliament Building.

Oh,

Continue reading Photosynth

Screencast: Creating black and white cutouts

We ran an article last month called Black and White with a Splash of Color. In this video I’ll show you a few additional simple but powerful techniques that will allow you to easily reproduce that effect.

You should be able to use these techniques in any image editor that supports layers and masks such as Photoshop, GIMP, Seashore, and Paint.Net.

Continue reading Screencast: Creating black and white cutouts

Black and White with a Splash of Color Photosop Tutorial

One of the techniques people most often ask me to teach them is making a photograph like the one on the right that is black and white with one other colour.

There are a few ways to achieve this effect but here are two ones I find easiest for Photoshop users.

Continue reading Black and White with a Splash of Color Photosop Tutorial