Once upon a time, every photographer needed a tripod. Early cameras were too bulky and heavy to hold by hand. Later, it was absolutely essential to have a tripod in order to get a steady shot. Indeed, tripods can help achieve sharp, crisp shots with your DSLR camera.

However, tripods aren’t without fault. They can be expensive. Tripods can also be heavy and bulky, and you may not want to carry a tripod with you to your shooting location. Many photographers opt not to use tripods in any of their shoots, and you might decide to go the same route.
When you’re shooting handheld with your DSLR, you may run into the problem of blurry photos, also known as “camera shake.” The same high sensitivity that allows our digital cameras to capture the amazing colors and detail of our world can also cause problems when there is movement or shaking during the exposure.
If you decide to ditch the tripod, you’re in luck. Here are 6 proven tricks for reducing camera shake, without using a tripod!
1. Steady it
Reducing the camera’s movement is your first goal in avoiding blurry photos, and it’s simple to do this. Try bracing your elbow against a wall or tree, or crouching down and using your legs to steady you. If your body moves less, the camera will move less, and you’ll automatically cut down on camera shake.
Alternatively, try placing your camera on any flat, steady surface to get a sharper shot. Rest your camera on a table, counter, rock, or fence. Indoors, try stacking up books or using a shelf to kiss camera shake goodbye.
2. Stabilize it
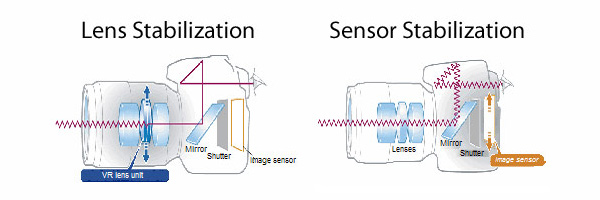
Many lenses (especially Canon and Nikon) have a built-in option for image stabilization. Usually a switch on the side of the lens, engaging this feature allows the lens to automatically correct any wiggling and jiggling that might occur during the exposure. Lenses with image stabilizers tend to be more expensive than those without, but the results are also more effective.
Some camera manufacturers, like Sony and Pentax, are less likely to use lens stabilizers. Instead, they rely more on sensor or body stabilizers. One benefit of in-body stabilization is that these cameras can be used with any lens type (assuming it’s compatible), lending more freedom to use older lenses while still retaining image stabilization capabilities. Additionally, the lenses without built-in stabilization are smaller, lighter, and less expensive than their fancier counterparts, so this option might work better for photographers on a small budget.
3. Up it
Your ISO, that is. This tip is especially for shooting without a tripod in low light settings, like at night or in a poorly lit room. Most cameras support high ISO performance that allows for a shutter speed fast enough to get great handheld shots even in low light.
By increasing your ISO setting by just one step, you can make a significant difference. If you’re not sure what ISO setting to use, try setting your camera on the maximum ISO setting possible and taking a few test shots to check out the results.
Higher ISO settings can cause some additional noise in your photos, however, so consider using your camera’s noise reduction (NR) settings to improve the quality. Many cameras have multiple NR settings, like low and high, so take some test shots at each setting and compare them. Look for noise in the shadow areas of your shot (you may have to zoom in to 100% to do this). The shots taken with noise reduction on “high” should be much clearer than those taken without any NR at all.
4. Delay it
Use your camera’s built-in self-timer feature to delay the shutter anywhere from 2 to 10 seconds. This allows you to set up your shot, press the shutter trigger, and then keep your hands off the camera during the exposure.
5. Trigger it
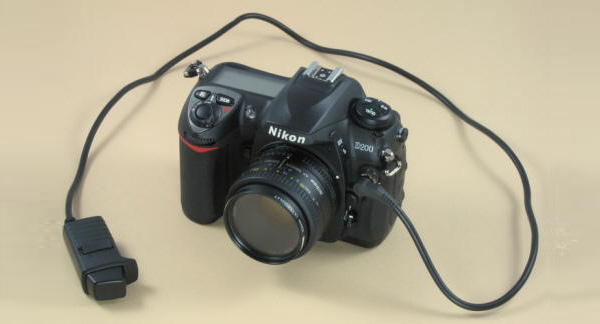
Use a remote shutter release to trigger your camera’s shutter remotely. Remote shutter releases, or shutter release remote controls, are available for most major brands of DSLR cameras, and they come in both wired and wireless models. For $20-40, a remote shutter release gives you the freedom to control your camera from several feet away without touching the camera’s body.
6. Breathe it
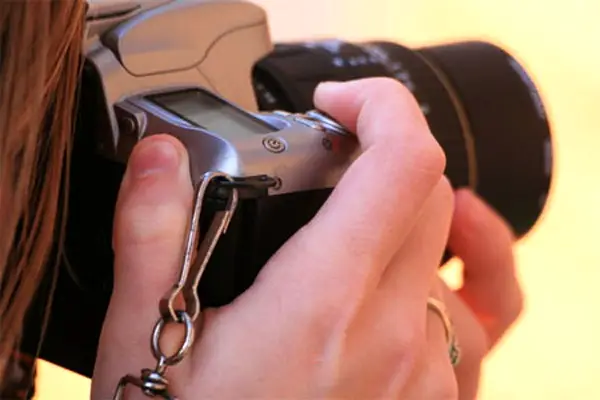
Finally, here’s a trick to steady yourself when shooting without a remote release or self-timer. After lining up your shot and adjusting your settings, place your finger on the shutter button and depress the button halfway. While your finger holds the button, take a breath in, and then breathe out slowly, depressing the shutter button completely during the exhale.
With these tricks, you should be able to banish camera shake from your photos forever!
About the author: Cat is a freelance writer, editor, marketing consultant, and personal chef. As a budding photographer, she chronicles her adventures in the kitchen on her blog, The Verdant Life. Cat lives in Columbus, Ohio.


How does ISO help in taking a steady shot? I dont think that is necessarily an important point when we talk about steady shots. Even at higher ISO there are chances for blurry shots. And I dont see the relevance of remote trigger too. When I read the title, I thought there was going to be something else. There is just one point that I can relate to with the topic. Holding the breath at the time of the shot, which I normally do when I take a slow speed shot without a tripod.
Great questions! When you increase the ISO, you can reduce your shutter time. A faster shutter speed makes it less likely to get a blurry shot, because there is less time for movement to occur. A remote trigger is probably one of the best ways to eliminate camera shake, since it allows you to take shots while the camera is completely stationary. Since you’re not physically pressing the trigger button, the camera will not move or shake during the shot.
I usually use the breath trick. Easy and simple.
Great post. I definitely recommend a remote shutter release or delaying the shutter, giving you time to get your hands out of the way. As far as increasing the ISO – unfortunately, I have a Canon t3i – the model before they enhanced the ISO performance. I’ll have to fiddle with the settings or get the T4i or later to take advantage of changing that settings. Thanks for the article.
Jay