Picture this. You’re on an amazing trip. You’ve been taking photos left and right. You’re absolutely ecstatic because of the incredible images you’ve been blessed to capture.
Then, on the last day of your trip, something happens. It could be anything, your camera gets stolen, or you lose the memory card, or you douse the whole kit and kaboodle in the river. It doesn’t matter what, but something destroys/erases/loses all your amazing photos.
What do you do?
If you’ve read this post and followed the tips we’re about to share on how to backup your photos even without a computer, you’ll breathe a sigh of relief because you were prepared. You haven’t lost all your incredible images — just maybe a camera or a memory card, which can be replaced.
If you haven’t read this post…well, then we’ll just give you a moment to mourn your incredible loss…
…then suggest that you read this post so that this awful occurrence never happens to you again.
1. Divide and Conquer
Some people may tell you that simply dividing up your photos is a great way to limit loss if the unthinkable occurs. For example, changing out your memory cards every day and storing them in different locations.
The obvious problem with this is that there is no actual second copy of your photos. If you lose a memory card, you still lose all the photos on that card. You won’t lose all the photos from your trip, but the goal here is to not lose any.
On top of that, keeping little memory cards in different locations can get tricky and almost certainly makes it easier to lose one or two — even if it’s just because you forgot where you put it! It’s also easier to misplace them in your luggage, or even leave one behind at a hotel. They’re little and slip out unnoticed really easily.
For this reason, we don’t recommend this (rather lazy) method of limiting your photo loss. Instead, we recommend one of the methods below to make an actual second copy of all your photos.
Because your trip is so amazing that even losing the photos from one day would be tragic.
2. Dual Cards in Camera
One simple solution may come already built-in to your camera. Some cameras, such as the full-frame Sony a7iii, have dual card slots in the camera, meaning you can put two SD cards in the camera at the same time.
Sony has it set up so you can use this feature in several ways. You can write JPEGs to one card and RAW files to the other, or shoot video on one and stills on the other. You can have one card roll over to the next, or you can simply write the same information to two cards, giving you an instant backup.
Store your second card in a new location and now you’ve got a running backup of all your images. It’s a simple, stress-free way to make sure your photos are always backed up. It’s also handy in case you ever have a memory card that goes corrupt (rare, but it happens). At least you’ve got a second copy of your photos!
Check out this photographer’s experience in Greenland and what he has to say about dual card slots.
However, if you don’t have a dual card slot camera, let’s see what other options you have.
3. Save to Your Phone or Tablet
Perhaps the easiest method for saving your photos without a laptop is to use a replacement device. You’re probably already carrying at least a smartphone with you and a tablet is even better.
Once you transfer the photos you can even use editing apps such as Snapseed or Lightroom Mobile to edit your images on the road. Then, you can share your photos to social media and give everyone a sneak peek of all the amazing images you’re getting on your trip.
There are two small roadblocks to this method. First, since you can’t generally just pop an SD card into your smartphone, how will you transfer them? Second, will your device have enough space? Smartphones and tablets generally have limited storage capacity and the heavy RAW files from your fancy DSLR camera will fill them up quickly.
Here is how to get around the first roadblock. We’ll talk about the second one a bit later on.
With an Adapter
In some cases, you can plug your SD card into your phone or tablet with a simple adapter. iPhone or iPad users can get the Apple Lightning to SD Card reader. Simply plug the SD card into one end and plug the other into your device. The Photos app will automatically open on an iPad and begin organizing the photos into Moments, Collections, and Years.
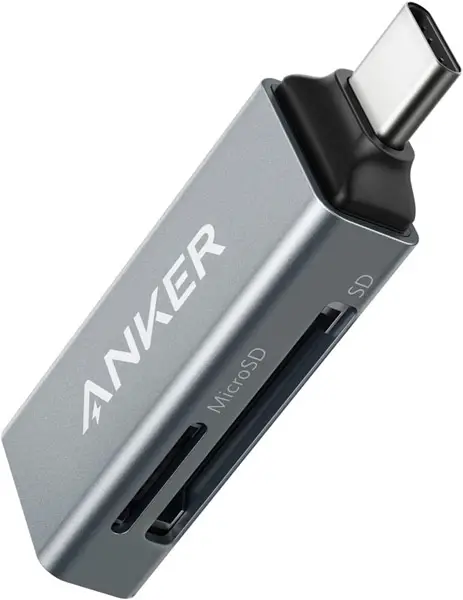
Those with an Android phone or device that has a USB C connection can use an SD card reader like this one from Anker. You can also get apps to automatically sort and store your photos as you transfer them.
Alternatively, Android users can get an OTG (On-The-Go) cable that you can plug into any Android phone or tablet that has an OTG (or micro USB) port. This allows you to plug in your card reader and access the SD card.
You can also use a USB hub to connect both the card reader and an external hard drive or USB flash drive and use your phone or tablet to manage and transfer the photos.
Keep in mind that your phone is responsible for powering all connected devices and not all phones will be able to handle the load. Definitely test your system before going out on the road to make sure it works. We recommend sticking with a flash drive to lessen the load on your phone. We’ll get more into hard drives and flash drives in a bit to help you decide what method is right for you.
With Wi-Fi
Many cameras now come with built-in Wi-Fi. Exactly how it works and what you can do with the Wi-Fi varies from model to model. However, most will allow you to at least connect the camera to your device via a wireless connection and transfer photos.
We suggest getting your connection set up before your travels to make sure you have it straightened out. You’ll usually need to download an app, then set up a Wi-Fi network from the camera to which you can connect the device.
Setting it up the first time is the most difficult. Once it’s been set up, you should be able to connect easily with the username and password and start transferring photos. If you have a lot of photos, this can take a while, so we recommend doing this frequently to avoid accumulating tons of photos between transfers.
These are both simple solutions to the connection problem, but how about having enough space? It’s likely that your smartphone won’t be able to handle even one day of your camera’s heavy RAW files.
For that, you need some kind of extra storage device.
There are a number of storage methods you can use to save your photos once you’ve passed them to your phone or tablet.
Let’s look at them here.
4. Save to the Cloud
The cloud is an excellent place to send your photos while traveling. In fact, it is perhaps the most secure place to make sure you don’t lose them. After all, it’s possible to lose even your photo backups to theft or lost luggage or whatever other eventuality when you’re traveling.

Once you have your photos uploaded to your phone, you can simply pass them along to the cloud. You can set your phone up to do this automatically.
Cloud storage is relatively inexpensive, for example IDrive, although you will usually pay a monthly subscription fee. Some companies charge more for more storage space, although many offer an unlimited option.
The nice thing about storing photos in the cloud is that some services will allow you to continuously back up your laptop and other devices. So if anything happens to your equipment anytime — not just when you’re on a trip — photos or data that you hadn’t had a chance to back up yet will be safely waiting for you in the cloud.
However, backing up to the cloud comes with a big problem when traveling. Internet access is not always reliable. On top of that, transferring heavy RAW files to the cloud requires a lot of bandwidth. It could take hours to upload a handful of photos depending on the connection speed.
For this reason, we recommend uploading to the cloud when possible but don’t depend on it as your only source of backup.
5. Micro SD Cards
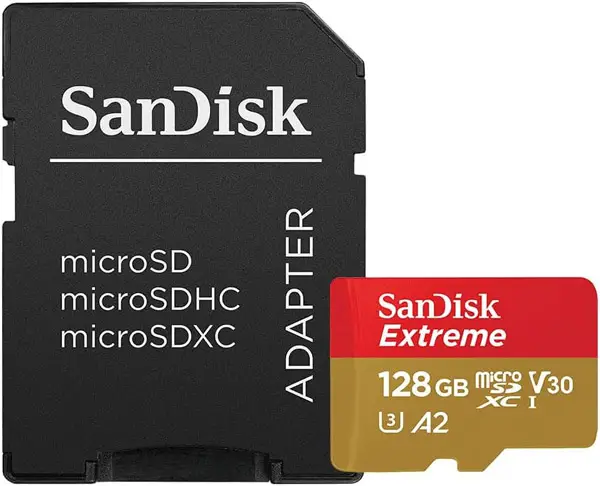
If your phone is equipped with a removable micro SD card, this could be a great option for backing up your photos. Micro SD cards like this Sandisk Extreme are inexpensive and can hold a surprising amount of information. You’ll see that 128GB and 256GB versions are common and if you’re willing to pay a little extra you can get a card that holds up to 400GB. Pretty good for a dinky little chip that you can stick into your phone.
However, because they’re so tiny, they can also be easy to lose if you’re storing them outside your phone. Be sure to have a dedicated spot for them where they won’t be able to easily slip through the cracks. If you decide to keep the card in your phone, be sure not to store your phone and your camera in the same place when traveling.
What if you’re not traveling with a smartphone or tablet? Or perhaps you would prefer a different method for backing up your photos than using relatively delicate SD cards and micro SD cards. There are a lot of options. Let’s take a look at some dedicated storage devices you can use.
6. USB External Hard Drive
First up, an external hard drive. For a cheap version of this, if you have an old unused hard drive lying around, you can enclose it and use it as an external drive. If not, you can get one relatively cheaply like this 2 TB Western Digital drive.

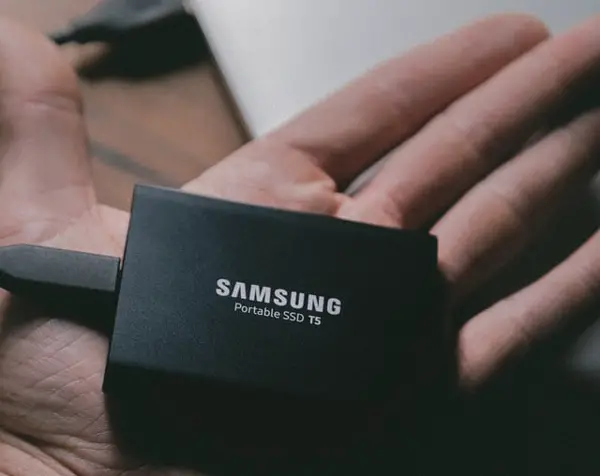
Keep in mind that external hard drives are not incredibly rugged unless you get a solid-state (SSD) one without moving parts like this 500 MB Samsung drive. Unfortunately, this pushes the price up a bit.
Once you get home you can plug your external hard drive directly into your computer to access and process your images.
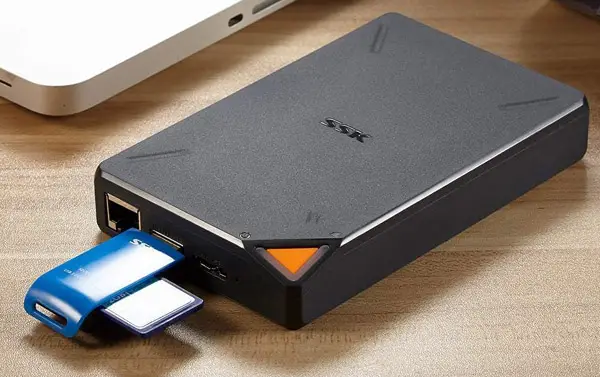
7. Portable Hard Drive with Built-In SD Card Reader
Of course, to get the photos on an external hard drive, you’ll need a device such as a tablet or the FileHub we’ll talk about in a minute to transfer them. That is, unless you get a hard drive that has a built-in SD card reader.
If you’ve got some money to burn, a Gnarbox 2 is a good option. This shock, water, and dust resistant solid-state hard drive allows you to plug the SD card right into the drive and transfer photos at the touch of a button.
It’s also equipped with USB-C ports to plug in other devices and has a built-in battery with a decent 6 hours of life, making it a pretty handy device. However, as mentioned, you’ll pay a pretty penny.
For a more budget-friendly option, check out this 2TB portable external hard drive that can run on a battery. You can plug the SD card into the drive with a card reader and transfer your files.
It’s not nearly as rugged as the Gnarbox, but if you’re willing to pay a bit extra it does come in a solid-state version which can take a bit more of a beating.
8. USB Flash Drives
Many travel photographers don’t want to have to baby their external hard drives. They’re already concerned about protecting their camera equipment and one more thing to worry about is a pain.
To that end, flash drives are a very convenient option. For example, take a look at this great 128gb Sandisk Cruzer flash drive.
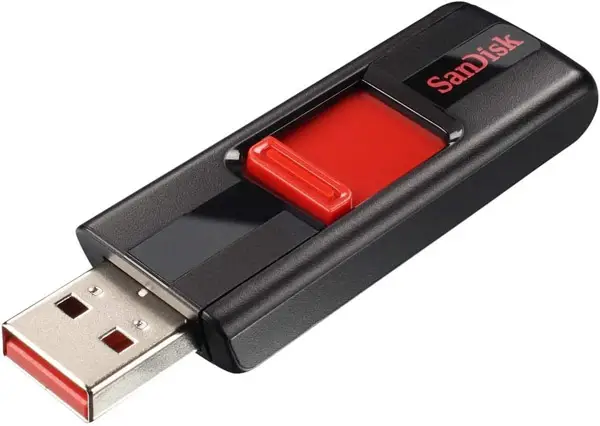
Flash drives are small, sturdy, and inexpensive. You won’t be able to connect them directly to the SD card or camera, but a suitable transfer device is cheap and easy to find. In fact, you can use the power bank that we’re going to talk about next.
9. Power Bank
Another great option for budget-conscious photographers is to use a power bank. This inexpensive hub can do several nifty things. First, you can wirelessly connect portable hard drives or SD cards to other devices for data transfer. Or you can use it as a portable router to set up a wireless network to share one wired internet access among several wireless devices.
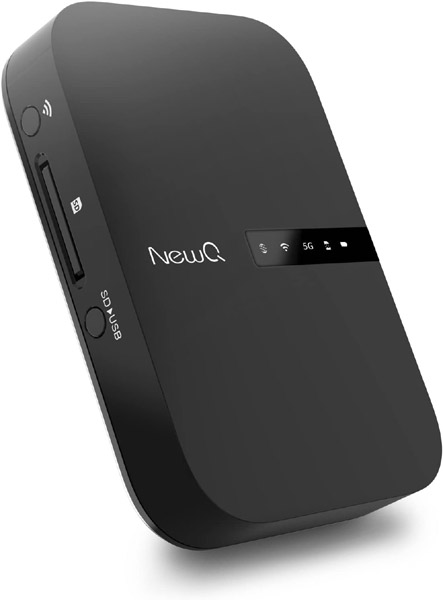
Don’t plan to do your wireless transferring on the plane. You may not be allowed to use the wireless features while in flight.
You can also get apps that will allow you to access the hub with your tablet, giving you the ability to preview your images as well as back them up. If you plan to use this feature, it may be a good idea to shoot low-quality JPEGs along with your RAW files. This will allow you to preview the JPEGs more quickly and easily. You will also be able to more conveniently upload lighter files to social media while on the go.
It doesn’t have any internal storage of its own, but it’s easy to connect your SD cards to an external hard drive or flash drive for data transfer. It also has a big enough battery to use as a portable charger for your phone or camera. Quite a bit of bang for very little buck!
Which Method Is Best?
Now that you have a few ideas of ways you can back up your photos without a laptop, which method will work best for you? For that, you need to think about your needs as a photographer, your habits as a traveler, and your budget.
Storage Space
First up is how much storage space you’ll need for your backups. This will vary considerably depending on your gear and how many photos you plan to take.
If you consider yourself a casual photographer and the purpose of your trip is not solely to take photos, you might only end up taking a few hundred images. However, serious photographers can easily come back from a dedicated photography trip with several thousand images!
Having enough storage space for your needs will be crucial. A backup method will be useless if you don’t have enough space for all your photos.
Before your trip, sit down and estimate your needs. First, find out your camera’s average image file size. File sizes will vary a little depending on the camera settings and file compression of each photo, but you can get an idea either by shooting a few images and reviewing the image info or checking your camera’s manual.
Keep in mind that if you’re shooting in JPEG, the file size will be significantly smaller than if you choose to shoot in RAW. Likewise, if you shoot in both, as some photographers like to do, you’ll need to combine the average file size of each to find your total.
To give you an idea of sizes, JPEGs average as follows:
- 3 MB on a 10-megapixel camera
- 4.2 MB on a 14-megapixel camera
- 6.6 MB on a 22-megapixel camera
In these examples, you can store 10,000 photos from a 10-megapixel camera or about 4,800 photos from a 22-megapixel camera on a 32 GB SD card. Not bad!
However, shooting in RAW and using higher end cameras with more megapixels will change things significantly. A 20.2-megapixel camera typically puts out a RAW file of around 25 MB. This sounds like a lot until you see that some cameras create RAW files around 46, 52, or even 65 MB per file!
When you’re taking 10,000 photos at 65 MB per file, you’ll need at least 650 GB of storage space.
Keep in mind that we’re only talking about taking stills here. Shooting video requires significantly more space.
Physical Space and Convenience
After you’ve determined your storage space needs, it’s time to think about how much physical space it takes up. If you need a lot of storage space and don’t have much extra room, SD cards are a great way to go. However, unless you bring along some kind of device with a screen you won’t be able to review or edit photos until you get home (unless you do it in-camera).
Flash drives are a little bigger, but still a small, convenient option. It takes a little more finagling to transfer the photos to the flash drive as we’ve explained, but the advantage is their durability. Flash drive can generally take quite a beating before you’ll lose any information. Again, you won’t be able to review photos unless you have a device.
A power bank, though it doesn’t have internal storage, is handy because of all it’s features. It makes it easier to transfer data wirelessly, as well as review photos on a tablet or other device. Finally, it serves as a portable charger in a pinch!
When you need a lot of storage space, SD cards and flash drives can start to lose their appeal. They’re still small and convenient, but keeping track of them can start to be a challenge, not to mention they can end up to be a disorganized mess that you’ll have to sort out when you get home — another potential spot for photo loss.
In that case, an external hard drive may be the way to go. A 2 TB hard drive isn’t too expensive, though you’ll have to be careful with it as it can’t stand up to significant abuse. You can also opt for a more sturdy solid state hard drive, but the price will go up significantly.
Budget
There are lots of fancy gadgets out there like the Gnarbox 2 we mentioned that will do an amazing job protecting your photos and come with an enticing list of features. While it’s nice to have a virtually indestructible way to store photos, it isn’t always practical for photographers on a budget — or photographers who would rather put their excess cash toward a new lens.
Once again, SD cards, microSD cards, and flash drives are all budget friendly options. They also come in a variety of storage sizes so you choose the one that best fits your needs.
External hard drives also aren’t too expensive and are good for when you need lots of storage, as we’ve mentioned.
The most important thing is to develop a solid system that works for you. The most expensive setup on the list won’t do you a lick of good if you don’t understand how to use it or it’s so complicated that it discourages you from using it.
Here is one photographer’s approach to traveling computer-less:
Keep Your Images Safe and Sound
The images you take while traveling may be some of the most incredible images you take as a photographer. Losing them is an inexplicable loss. Those of you who have already experienced this can attest, it’s a horrible feeling.
The good news is that with a little bit of inexpensive hardware, or a creative setup, you can easily create a portable backup of your photos while on the go. Let us know in the comments which one works best for you!
Now you know how your backup your photos while traveling without a computer. For more travel photography tips, check out this post on choosing the best photography gear to haul with you!


