Changing and missing flights, running to catch buses or hiking mountains is part of any beautiful trip story. But what can we do when we have at least 5 kilos in our backpack and we need all of it? You might already know what I am talking about. This is our HOLY photography gear. We can’t make compromises. We need to take it all with us. Every time I was traveling, I ended up with a sore back and arms (and probably I was not alone), until the day I decided to make some changes.
 I needed to optimize my gear bag and say goodbye to painful trips.
This article might be for you if:
- you are a passionate travel photographer
- you want to get familiar with my personal photography gear
- you want to know the reasoning why I chose certain equipment
Let’s start with the most common question among photographers…
Canon or Nikon?
Each photographer has their preference. I am not going to debate here the differences. I’ve always used the Canon equipment, since the very beginning of my adventure with photography and I respect the ones who chose Nikon. However, in my opinion, Canon offers the highest quality lenses which fulfill my requirements and I really like its image quality. When it comes to the bodies, I first bought the 20D, but I quickly switched to full frame 5D cameras. I shot with EOS 5D Mark I, Mark II, and now I use the Mark III for 3 years already.
Why I chose Canon?
After 10 years with Canon, it has never disappointed me and I wouldn’t change it for anything. It fits my travel photography needs perfectly, being the most comfortable, ergonomic and resistant to any conditions I experienced.
Lenses – my second pair of eyes
Moving to the lenses, my very favourite one when I travel is the Canon EF 17-40mm – f/4 L. It’s really wide, so I can see everything in the frame with it when I wander the narrow city streets of distant places. The other very important lens in my kit is the 70-200mm. I simply love how bright it is (f2.8). It’s perfect for portraits even when the light is low, but it’s also useful for panoramas, when I need to use zoom.
I also have two more lenses, which I actually use rarely, just to diversify my galleries a little. The Samyang 12mm – f/2.8 fish eye lens I have is fine for that, especially as it was relatively cheap for such a lens. The lenses are wide, have manual focus, full frame and they distort the world around. If you are passionate about astronomy and like to take photos at night, this can be a good addition piece to your photography kit. It takes amazing photos of the Milky Way and generally to a sky full of stars. On an every day basis, the lenses are perfect for architectural photographers. For the fair price (approx. 800 USD) and its size, the lenses are a good idea for any photographer who wants to diversify their gallery.
The second one is a Canon EF 50mm f/1.8 STM, which I rather choose for family parties than for travel photography. These lenses allow you to capture static images, with subjects that pop from the scene. These are the lenses to use if you want a perfectly clear subject with a blurred background. Perfect for portraits and low-light photography, the lenses can add an artistic air to everyday objects thanks to its wide f/1.8 maximum aperture and 50mm focal length. However, because I am a travel photographer and don’t take so many portrait shots on the road, I don’t reach for these lenses too often.
Why I chose Canon EF 17-40mm –f/4L and 70-200 mm – f/2.8?
In the past I experimented a lot with lenses. But after some time I found the perfect balance with those two lenses: Canon EF 17-40mm – f/4 L and 70-200mm – f/2.8 L. I use them for 5 years now and I must admit I’m not going to change them any time soon.
They are ultra-wide and sharp. They weigh much less, cost less and give me more consistently sharp results than for example, Canon 16-35mm f/2.8 L.
If we are to compare it with what Nikon offers, the Canon EF 17-40mm –f/4L are wider than Nikon lens on Nikon. It’s not quite as wide as the 10-22mm on Canon 1.6x cameras and not as wide as the 16-35mm. The 17-40mm L lens is for full-frame.
The 70-200mm has one of the most useful and most popular focal length ranges available. The 70-200mm focal length range is frequently employed to capture beautiful landscape shots. Therefore, if you like portrait photography, street photography, and often take a walk in the park, go to the beach, these activities are best captured with a 70-200 f/2.8 L. That’s why it is in my bag as well.
Filters – when details matter
Finally, the extremely important equipment for me are the Lee ND 03, 06 and 09 filters. They allow me to balance the sky light with the rest of the frame when it’s cloudy. Thanks to that I can avoid the highlight blowout effect of the sky and uncover the dramatic effect even when it’s raining. Neutral Density Filters and ND Grads have a neutral impact on the color of my images. By using ND Grads, you can control the contrast between a light sky and dark foreground, allowing the camera’s sensor to record the detail in both these areas. They can rescue a landscape image which would otherwise be spoiled by washed out skies or dark foregrounds. If you want to keep the details of your photos, I highly recommend you to get this set of Lee ND filters.
 Of course, all this gear is an investment of more than 5,000 euros. Most of us do not have this money when they start their career as a photographer. However, in order to start with the right foot in your career, it is worth sacrificing some needs and invest in the technology that will make your career easier.
“In my bag” Summary List
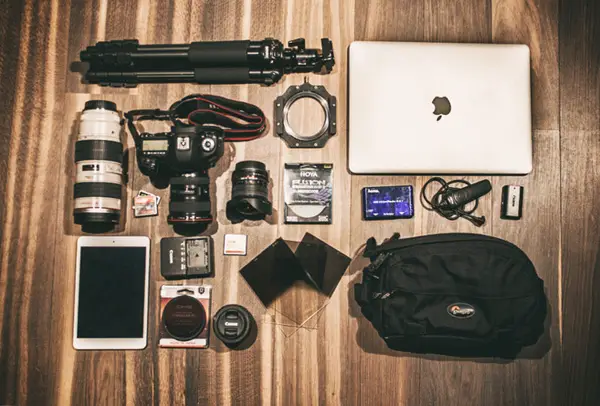
As you probably already figured it out, I travel with some other items as well. I made a list with all the equipment which I never leave home without.
- Canon EOS 5D Mark III
- Canon EF 17-40mm – f/4 L
- Canon EF 70-200mm – f/2.8 L
- Canon EF 50mm f/1.8 STM
- Samyang 12mm – f/2.8
- Marumi DHG MC CPL PL (D) 77mm 77 Slim Thin Filter Digital High Grade Japan
- Hoya Evo Antistatic Protector Filter
- Hard Neutral Density Grads: 03, 06 and 09
- Benro Active Aluminum Tripod Kit with Ballhead
- SanDisk 32 GB Extreme CompactFlash Memory Card
- Kingston 8GB CompactFlash Memory Card Elite Pro 133x
- SanDisk Ultra CF 16GB
- Hama 35 in 1 USB Card Reader
- MacBook Pro 15”
- iPad Mini 2nd Generation
- iPhone 6
- Lowepro Photo Runner Camera Hip Bag Green
- Lowepro Rover Pro 45L AW
Instead of a closing…
I want to tell you a story. As you probably noticed, I got 3 different memory cards. My favorite is Kingston 8GB CompactFlash Memory Card Elite Pro 133x because it has ultra-fast transfer rates, and my production workflow is shorter with 50% less time spent. All my cards are CompactFlash because I can capture continuous and high resolution images quicker, especially for large files. If you are a professional user of Canon and Nikon, I recommend you to get a CompactFlash instead of a SD card because it allows you to transfer large blocks of data all at once (very useful for video or high MP cameras). The highest speed transfer can get up to 167 MB/s. Also, the Compact Flash cards were built from the ATA standard for hard drives, so they can be used to replace disks in computers and store data in FAT16 or NTFS.
However, I also carry 3 different memory cards with me not only because they are extremely performant, but because they also save my life. The truth is, the fear of losing thousands of photos scares me. I back up my computers every day on SkyDrive, OneDrive, Dropbox, ICloud and an external drive.
And here’s where my story starts. Five years ago, I went on a trip and took part in a conference about social entrepreneurship. I have always been interested about the other side of doing business and how it can make an impact on the world. During the afternoon break, I did leave a backpack in the meeting room for a couple of hours (under a table and hidden) at the resort the conference was held. I shouldn’t have done it, but I was in a hurry to catch the other participants for a photography shoot outside in the city. Also, the thought of carrying a laptop bag with me during a shoot made me “not think”. After returning to the meeting room two hours later, I found a clean meeting room along with a cleaned out backpack and laptop. Attempts to locate the laptop, while offering a reward have been useless. Luckily, at that time, I did not have my MacBook Pro 15”. J
But still, all my photos from my road trip which were meant to be showcased on my site were now gone. But this is not the only problem…As you can imagine, many documents also disappeared. Luckily, my old photos were backed up online and on the external drive. But what I wanted to stress with this story is that we, as photographers, need to be cautious. You never know when you can get stolen and lose “your life’. Backing – up is perhaps, the most important action that we need to do after taking photos. That’s why I recommend buying as many memory cards as possible, buying online storage from Amazon or Dropbox and keeping your files safe. It might be a life changer. Just like when making investments: “Don’t keep all your eggs in the same basket.”
Travel smart and passionately,
Piotr
P.S What do you use? What is your favorite item in your bag? Let me know in the comments below.


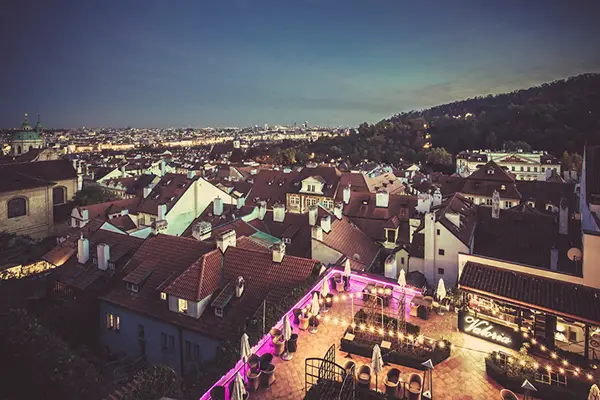
Hi Piotr, I am happy to see your trip photo. You are captured excellent image, mainly town photos. Thanks
Thanks for sharing.
Excellent tutorial!!! Thanks, I love it
Thanks. Your guidance and tips are important and we appreciate your efforts for sharing this great information.
I have shared your travel experience nicely in the article. As a traveler it will also help me to extent my experience also. Appreciate your good resource.