How would you like to turn your 6 megapixel D100 into a 17 megapixel super D100 for less than $20? You can if you use a Macintosh running OS X. Well, maybe it really won’t actually turn a D100 into a 17 megapixel camera, but you’ll be able to create images of 17 megapixels or even larger relatively painlessly.
Enter a progrom called DoubleTake for Mac OS X. It’s a handy little shareware gem that does a stellar job of stitching images together to form a huge photograph that’s ideal for printing at up to poster sizes with incredible detail.
I have used numerous photo stitching programs in the past; even ones that cost multiple hundreds of dollars, but I’m still impressed with DoubleTake. It doesn’t have all the features and output options of some stitching programs, but what it lacks in complexity, it more than makes up for in ease of use and accurate stitching.
DoubleTake can take a series of photos that match up horizontally, vertically or even in a matrix grid, match them up and output a single image that for all intents and purposes was taken with a camera with a much higher resolution.
The following image was produced by taking seven D100 photos and combining them, resulting in a 17 megapixel image. DoubleTake was able to automatically align all the photos very precisely. Although you can manually adjust misaligned overlaps within DoubleTake, it was not necessary for this image.

Panorama Created from Seven D100 Images
Since the panamoric image of the Hawaiian Airlines 767 above looks so small, I included an image of the nose section of the plane below to give a sense of scale. This photo is an uncropped 6 megapixel photo taken with a Nikon D100.
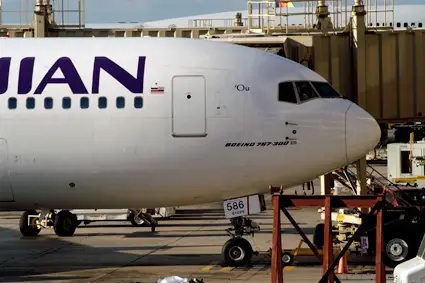
One D100 Image for Scale Comparison
I took seven hand-held photographs Honolulu International Airport. This is the actual airplane I flew in coming back to California. You need to overlap the images you take by about a quarter to a third of the frame so the program is able to align the photos. It’s best to use manual exposure set at the same exposure for all of the images so there isn’t a variation in brightness across the finished panoramic photo. If you forget to do this, DoubleTake can match the exposures for you. Employing a tripod and setting the pivot point on the optical axis of the lens will give the best results. Whether you use a tripod or not, it’s important to make sure the camera is level so vertical lines align proplerly on overlapping frames.
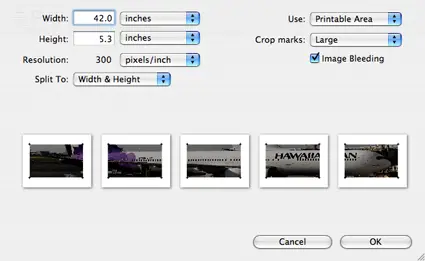
There’s a neat new feature in version 2.1 that allows you to print multiple pages which can be cut and pasted together to form a poster sized print.
Another cool use for DoubleTake is stitching together multiple screen snapshots to form a single image if you’re using a large monitor.
DoubleTake for Mac OS X is a great way to make panoramic images with a minimum of fuss and expense. I think that’s a great combination!


