After posting Getting the Exposure Right, I received a quite a few questions about how I achieved the HDR (High Dynamic Range) version of the mailbox photo (last photo in that article). This tutorial will walk you through the basics of creating the same look by hand. All you need is camera and photo editing software that supports layer masking (you can follow these steps in Photoshop, Paint Shop Pro, and The GIMP, among others).
A little background: HDR is a type of image manipulation. The goal is to blend multiple exposures of the same scene into a single image in order to get a result that has more dynamic range than your camera is capable of recording. Typically this applies when you have uneven lighting in your scene as in the example photo.
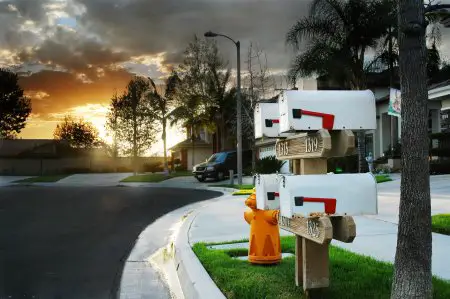
Final HDR result—this is what we’re going for.
The first step in creating an HDR image is to shoot your scene multiple times at different exposure settings. A tripod comes in handy here. The idea is to get at least one frame with the correct exposure for each region of your scene.