My role as a stay-at-home parent, along with my work as a blogger, means I’m stuck in the house more often than not. I love what I do, both as a writer and parent, but I do find myself lacking for photographic subjects. Everyone in my home, including the cats and dogs, seems to be camera shy. So I began to look for other photographic opportunities around the house.
Then I began to think. I like writing. I like taking photos. And I definitely like making extra money. I’ve been meaning to clean out some of the clutter in my office and around the house, and I figure I could sell a lot of the stuff that’s still good but is just collecting dust here in the house.
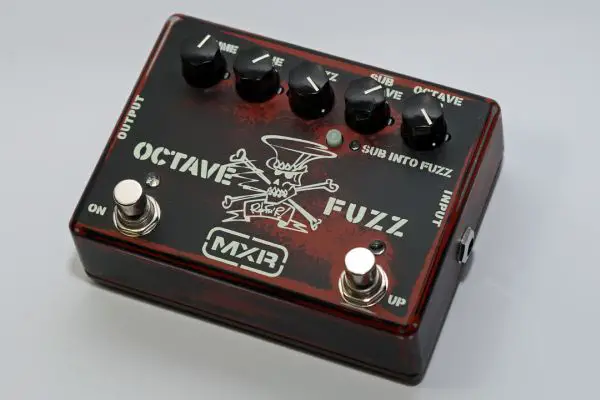
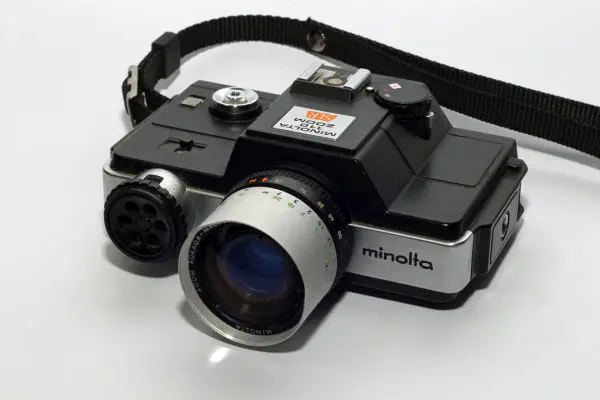
So I decided to have a go at some simple product photography as a way to keep myself and my camera active. Plus, when you’re photographing something that just sits there, and you have complete control of the lighting, it’s relatively easy to produce outstanding images.
For my project, I really didn’t want to spend much money on extra photography equipment. The idea is to make money and get rid of some clutter, not trade old stuff for new. So I took the cheapest route I could find and only spent a couple of bucks. If you want to sell some odds and ends, sell your own goods on websites like Etsy, or are considering starting your own product photography business, getting started isn’t complicated. Here’s how I did what I did along with the results.
My Equipment
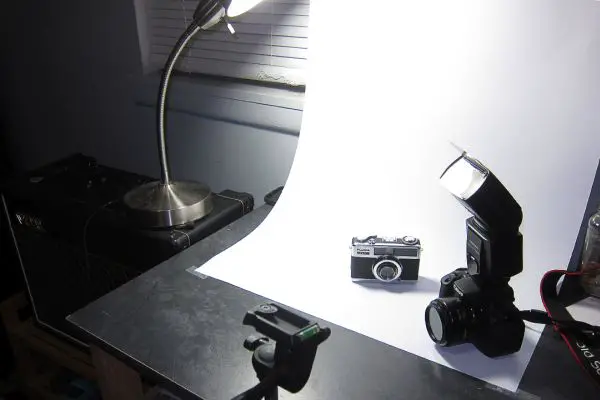
I’m not a professional photographer. I am a student and enthusiast, which means that I don’t own a lot of nice studio gear. I have a respectable consumer-level DSLR, a third party external flash and a 50mm prime lens. All of that adds up to a slightly-better-than-average photography set-up.
But really, a smaller camera with an in-body flash would suffice. Unless you’re planning on turning your images into giant prints, a point-and-shoot with a decent sensor will produce high-quality results.
Every other article I read on product photography seemed to insist that you have to have a solid, sturdy tripod. And while having a reliable tripod is definitely a good idea in general, I never used one. With the available light, I was able to shoot at a hand-holdable shutter speed while keeping my aperture closed enough to get the sharpness I was looking for.
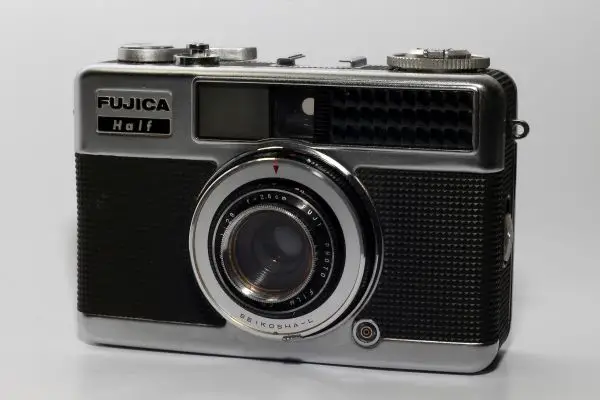
The one item I bought for this project was some white poster board, bringing my project investment up to a whopping $2.
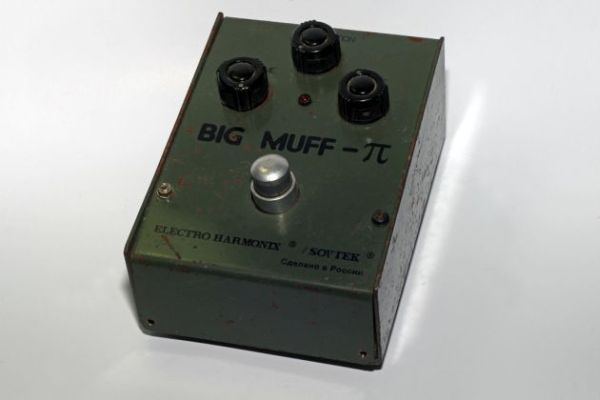
I cleared off some table space in my office and taped the poster board to the wall above the spot on the table. The bottom half of the poster board rested on the table. I taped the bottom corners to the table and had a fairly convincing infinite background.
I have a lamp with a 23 watt fluorescent, daylight-balanced bulb in it, which served well as a fill light.
Keep It Clean
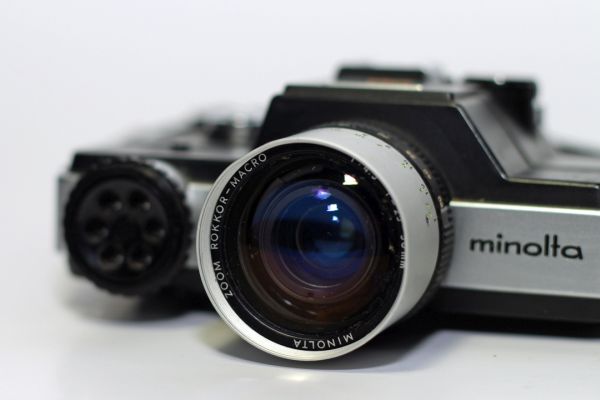
I found this particular tip difficult. The one drawback to taking sharp, detailed photos of objects on a white background is that those sharp details include bits of dirt, debris and all of those nooks and crannies covered in dust.
You’ll find cotton swabs and a small cap full of alcohol to be a big help. A small bit of dust might seem to be no big deal when you’re shooting. But that bit of dust will stand out amidst the otherwise sparkling clean subject and background.
If some dust and dirt slips through, all is not lost. The handy-dandy clone stamp tool in your favorite photo editing program can take care of any blemishes. Just try to avoid leaning too heavily on this trick. It can be time-consuming and diminish your photo’s quality.
Fix It In Post
Aside from the clone stamp, a few other simple adjustments can make your product photos stand out. A particularly effective trick is to use a high pass filter to make your image even sharper. In the past, I have warned against going too far with this tool. But used properly, the high pass filter can make your subject pop.
To accomplish this in Photoshop, start by creating a new duplicate layer of your image. Change the layer type from Normal to Overlay. This will make your image look strange, but it will end up looking OK by the time you’re done.
Next, open the Filters menu, click on Other, then select High Pass. You most likely only need to set the slider somewhere between 1 and 2. Much higher than that and you risk making your image look strange.
Step Up Your Game
If you want to go a little further and give yourself more lighting options, you can make a more advanced setup than what I created for just a little extra money.
Light boxes, which are boxes with translucent sides that allow light in from different angles, can be very expensive, especially if you’re just trying to sell your own stuff. But if you’ve got a little patience and wherewithal, you can construct your own light box without spending much money.
Here’s a video showing how to make your own light box for under $10. If the one in this video doesn’t seem like it would meet your needs, a quick search on YouTube will reward you with tons of other options.
In the End
Even if you’re not specifically interested in product photography, these tips can help expand your personal photographic toolbox. These tricks can also help if you’re interested in still life photography, as well. Understanding the basics for shooting still life and products can only help you in the long run.
Do you work within the field of product photography? What are some tricks and shortcuts you’ve found useful? Let us know what you think.


Excellent. I like product photography. Thanks.