Lightroom is a powerful editor with a huge set of tools, though we usually need a limited set for specific photo types.
So I’d like to go through editing of a landscape photo to see what cool things Lightroom offers us.
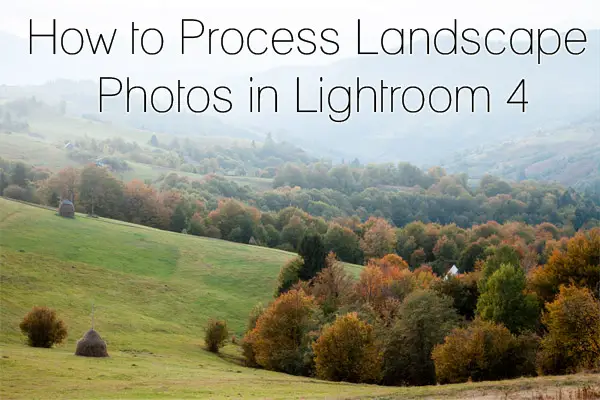
Let’s see what we can do on the example of one of my photos I took in the Carpathian Mountains this October.
The original picture is “not quite ideal”, but it is even better for us – the more problems we have, the more fixes we invent.
So, we have a RAW image, ISO 100, 1.6sec, f/11, Auto White Balance.
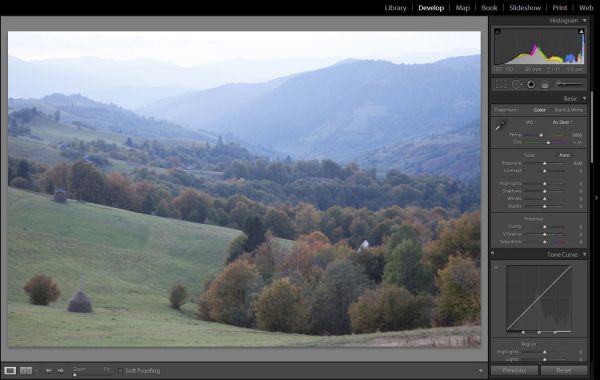
To me, looks pretty boring at this stage, though has potential.
What catches the eye most, is an overall underexposure, with almost blown out sky, improper white balance and insufficient contrast.
The problem with landscape photos is that sky is too often overexposed. Graduated ND filters would be a good thing to use here, but since I did not have one at the time of shoot, let’s see if we can fix this in post processing.
So let’s go to the Develop mode.
1.White Balance Adjustment.
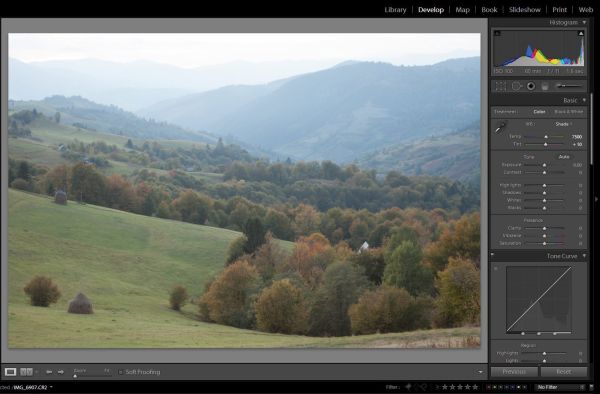
You can try different presets or adjust it manually. Unfortunately we do not have anything on the photo to select as a grey point (something in the photo which is in reality neutrally gray, without any color tints, so that a program could adjust the balance automatically form this “starting point”), so we just have to trust our eyes. You can try using Lightrooms’ Auto White Balance, which at times does a great job.
With this photo, Lightroom’s Auto showed results quite similar to the “Shade” preset, which I think is quite good here:
2. Fixing the Sky
Next thing is the sky – while a slight haze at the horizon gives a photo its mood, I would like to see some more detail in the highlights, without looking too “HDRish”.
Let’s take a graduated filter:
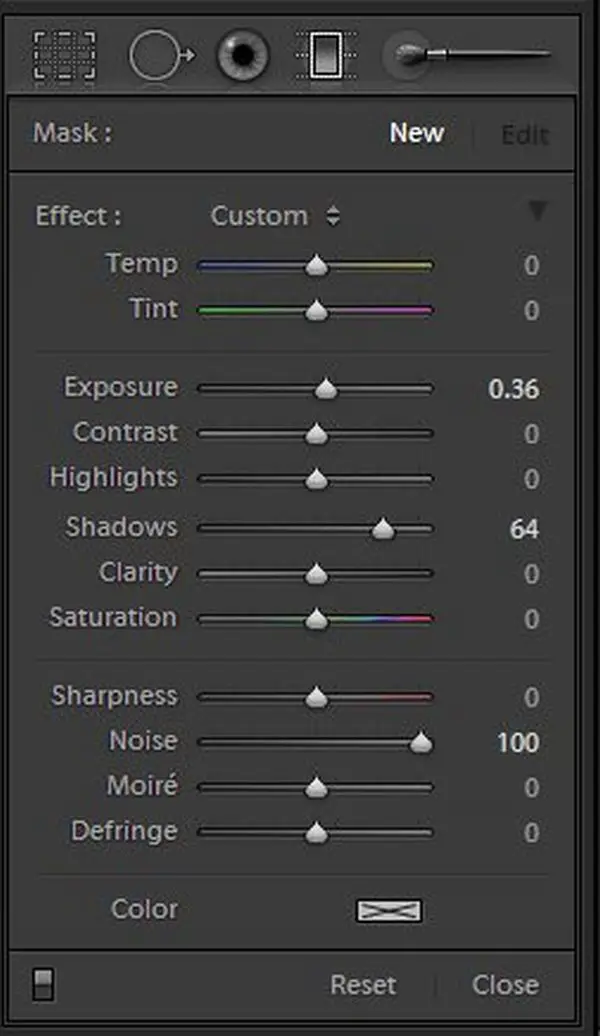
Then, let’s apply an exposure shift of -0.55 and highlights -11, or somewhere near.
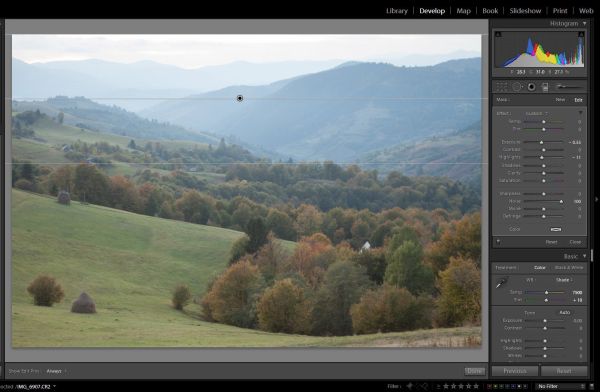
3. Contrast and Gamma.
This is where Lightroom offers true freedom. You can drag parts of the histogram (1), you can adjust the sliders (2) or adjust the tone curve (3).
I never limit myself to only one of these tools, and just adjust them all to my liking.
Here is what I have got by now:
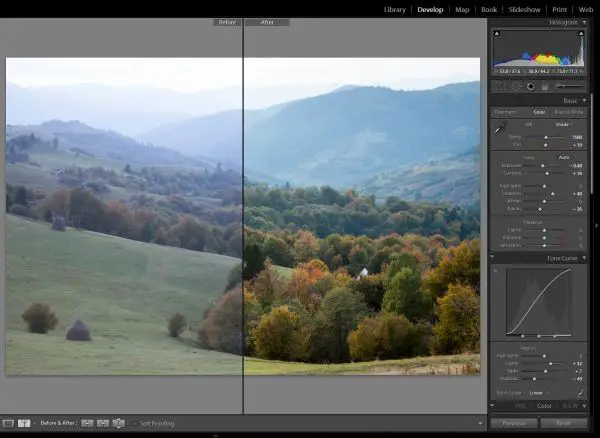
Now we have a little more contrast, but that made the skies too bright again, so we’ll just go back to the graduated filter and reduce exposure a little more there.
4. Color Adjustment
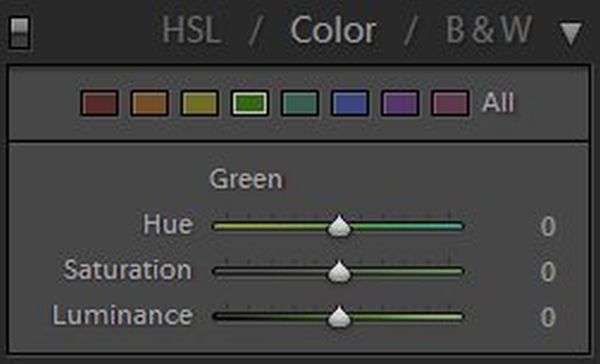
One more thing we can do here, is going back to the Graduated filter again and making a color temperature adjustment of -16. This would give the skies a cool blue tint which looks great to me in the current picture:
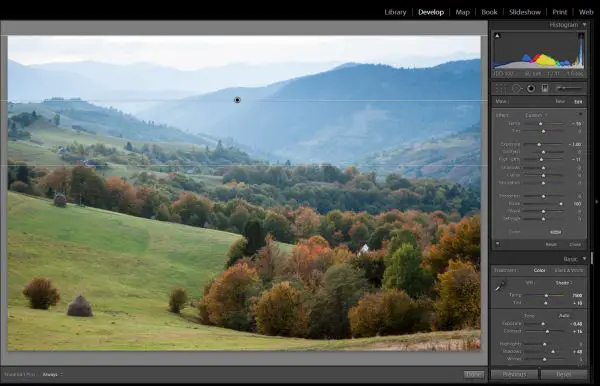
5. Sharpness and Noise Reduction
Final steps would make adjusting sharpness and noise reduction, which I usually all set to around 25. Noise reduction can be at 0 if the image is really noiseless.
But as we lighten the shadows, noise can come out even at ISO 100, so a mild noise reduction will be appropriate.
And now we can compare the results:
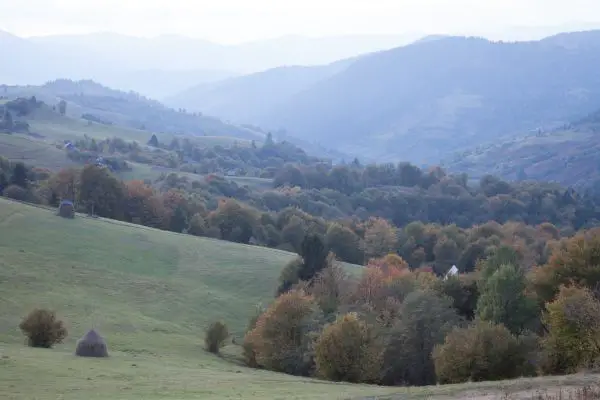
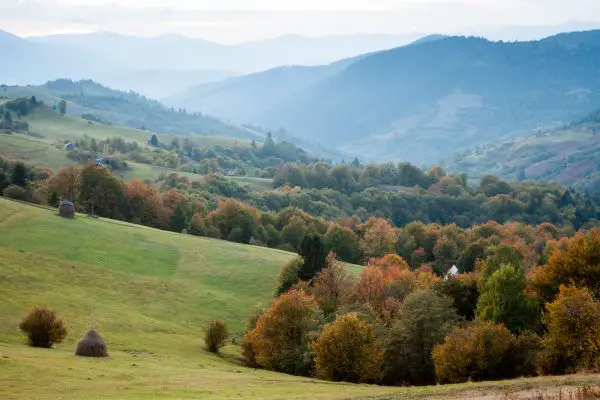
Perhaps someone would like to add more contrast and saturation, but too much can be too bad, so this is how it looks fine to me.
The problem with color correction is that you perceive a photo differently every time you look at it, so you might need to have a couple short breaks to have a fresh look at the colors. Maybe you will want to adjust something in a photo that you considered perfect 5 minutes before!
This is a normal thing to happen, and, to broaden your perspective on the image you can get a beautiful collection of Lightroom Presets from Photodoto to experiment with your photography and give your photos a fresh look.
So what do you think, are there any ways to make this photo even better? Your comments are welcome!


Nice tutorial, thank you.