When I first started in photography nineteen years ago, Photo Law dictated that you dare not show your face shooting outside after 8 a.m. or before 4:30 p.m. My Prime Appointment was 7 a.m. Well, I’m here to tell you , those days are over.
No one needs to get dressed up in their best clothes and drive an hour for a 7 a.m. appointment any more, because, you, the photographer, have all the power in your sweet little hand…and flash…and sometimes, even, your garage.
4:00 a.m. A Day in the Life of Your Best Light
Portrait photogs, what are ya, nuts? Go back to sleep. Or what the heck, get up and try some landscape photography. Landscape is good for your soul, albeit not necessarily your wallet. Landscape fanatics, grab the coffee, we’re going for a ride.
Ok, so, of course, you have your sunrise/sunset times app on your phone, right? If not, now is a great time to get one. My favorite free one is Sunrise, Sunset Lite. It uses your location to let you know exactly when that first light will come over the horizon. You want to be totally in place and ready to go a good half hour to an hour before any prettiness occurs. When the sky starts getting a tinge of dark blue in it, it’s time to spring into action.
Even though your eye can’t see it, your camera will start picking up a lot of killer colored light, but be prepared: You’ll need a tripod with a long exposure to catch this.
Don’t go cheap on your tripod. Get something lightweight, but tough, like a Gitzo. Try to shoot things that can easily silhouette, like a tree with the sun coming up in the sky behind. If it’s too dark, get the best rule of thirds composition you can, but more importantly, make sure that the whole object is in the shot, and crop later.
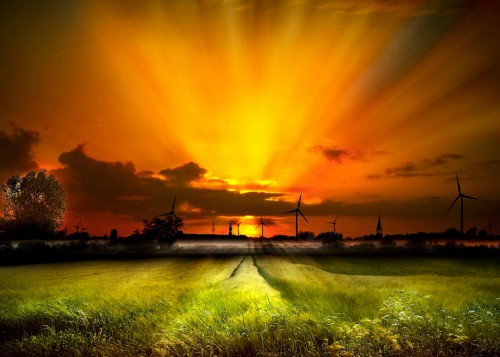
5:00-7 a.m. The First Golden Hour of the Day. Coming Right Up!
Landscapers, while those peach and pinks are coming up in front of you, don’t forget to turn around and look behind you. The sun will read really warm on anything that the sun is about to be on, even if it doesn’t show it to the naked eye.
It will, of course look great on that mountain or plant, but it will look equally cool on all things industrial; homes, office buildings, water tanks, factories. If there are buildings behind you, look for reflections off the windows. Or light coming through the buildings, and that same light reflecting off the building across the street from it. Also turn sideways to the sun and get some of that strong sidelight coming across.
Later on in the day, the difference between light and dark will get too harsh, but right now, the world is your oyster. The light will give a soft ploopy blend from brightness to darkness.
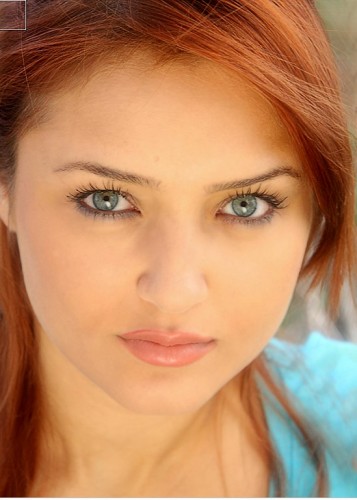
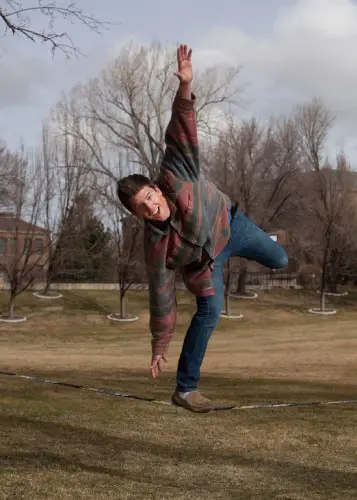
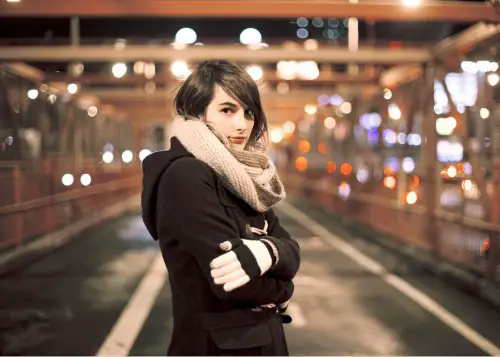
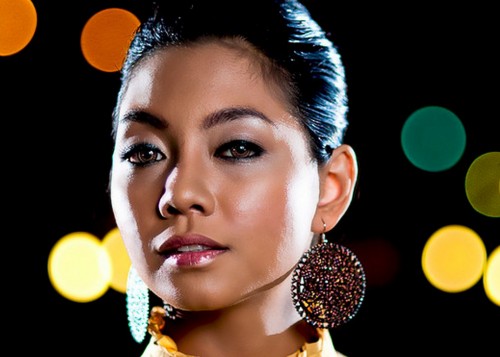
8:00-10 a.m. Portrait time, People!
The sun is low in the sky, so turn your subjects away from the sun, allowing the sun to provide some nice rim light on their hair. You can either use an on camera flash, or a reflector, or both to kick some light into their eyes.

Don’t have a flash? It’s ok. Open up your exposure a stop and a half. Your background will blow out a bit, but your subject will be a lot crisper and brighter.
Don’t have a reflector? Use a white sheet, or a piece of gold aluminum foil wrapped around a cheap, light $10 20×30 frame from Walmart. Have a helper stand opposite from the sun and pop the sunlight back into their eyes to make a nice catchlight in their eyes.
10a.m.-2p.m. Oh No, You Missed it… Now What? Overpower the Sun!
Ok, so everyone has those pictures of themselves squinting into the sun at high noon, giant black shadows in your eye sockets. What do you do? Well, you can overpower the sun, or you can work around it.
Elinchrom, Broncolor and Profoto all have some great options for big old honking lights that you can bring out into the field and just make the sun a non-issue.
One sort of economical, but still powerful enough to make the sun not a factor option is the Elinchrom Ranger RX 1100. It will run you about $1800, but if you really need to shoot in the middle of the full sunlight between 10 and 2, it might be worth it.

The “Poor Man’s Way” to get a similar look would be to dial up your flash on camera to +3, then underexpose your shot by 2 -2 1/2 stops.
…No Dough? Pull Up A Garage…
Don’t have an adjustable flash or two thousand dollars to drop on a light? You can put your subject in the shade. Any kind of shade will do. A tree, an awning. I once shot an entire family under a picnic table for an hour, and the result was magical. You can take that reflector that you were just using to bounce sunlight into your subject’s faces and put it between them and the sun, creating shade.
Believe it or not, one of my favorite places to shoot at high noon is in people’s garages. I stand outside of the garage, on the driveway, and position them just inside the garage door. If the sun is directly overhead, it’s shining on the driveway, which is one big huge white reflector bouncing the sun into their eyes.

They’ll be so much brighter than the rest of the garage that you won’t be able to see what’s going on with all of those brooms and dustpans back there, (but do move the cars and anything within about 10 feet of the front of the garage out, they’re too close to the front of the garage to fade into the background). As much as I like hammer drills, this is not where you would be showing them.
Then turn them around, go inside the garage and blow out the background. A doorway works the exact same way. It’s a little tighter, so have them snuggle up. You can also have your subject work with the sun. Put them into a dramatic pose, then have them turn profile, close their eyes, and bend their head back so that the sun creates a nice little butterfly or loop shadow under their nose, and make like you planned it that way.
The only thing you shouldn’t do is point their sweet little faces toward the sun. There will be all of those terrible harsh shadows in their eye sockets and they’ll squint so bad they’ll look like your great-uncle Melvin after he went on that bender in Miami…Not Pretty.

Of course you can go inside, put your subject facing or at a 45 degree angle to a window and go for it.
Clouds are Your Friends
Is it a cloudy day? Pay dirt! You can turn them any way you want, no worries. Throw some flash in there for pop… the reflector won’t work, since there is nothing to reflect.
By the way, if you’ve always wondered how they make the Caribbean waters look so amazing, it’s because they shoot it at high noon, when there are little or no clouds in the sky, and no breeze. The sun reflects off that nice white sand on the bottom, creating spectral light that shimmers and bounces all over the water.
Nice, huh? You knew that you liked shooting in the middle of the day for a reason.
3p.m. Half Hour After Sunset (Golden Hour Part 2) But Don’t Walk Away Too Quickly!
You’re right back in the saddle. You can’t do anything wrong in this light. You can even go back to the same location and explore the other side. As the sun goes lower, there are a few different things that you can do: first, you might notice lens flare.

That’s the milky look that comes across your lens when you’re shooting directly into the sun, and it produces out of focus bright rainbow spots on your picture. Traditionally, they’ve been taboo; they’re super fashionable right now, but ten years from now, I’m sure that they’ll go the way of the all black-and-white-except-for-the -red-rose look of the late ’90’s, so have fun experimenting with it, but then move on.
If you really need lens flare and need it now, you can also do filter/render/lens flare in Photoshop, but I think it looks fakey, plus, it’s kind of cheating if you can do it for real, right?
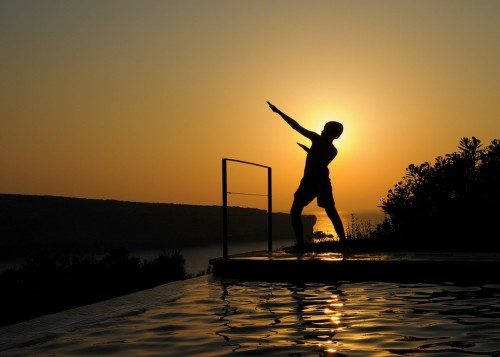
Right before sunset you can do silhouette shots by exposing for the sky at it’s brightest point, right by the sun, then underexposing 1 stop, without a flash, or you can do sunset shots by exposing for the sunset, then overcompensating by dialing up the flash by a couple of stops.
Most flashes only dial up 3 stops, so make sure that you check all of your settings first so that you won’t be disappointed.
Remember: Sidelight is Good. You don’t have to blast everything you shoot from the front. Always turn sideways to see what the light is doing in regards to the sun.
You know what makes me crazy? There’s this little sunset spot on Kauai that I’ve been going to for years in Poipu by the Beachhouse restaurant. Literally hundreds of people line up on this tiny strip of sand with their cameras to photograph the sun setting, and the second it disappears from the horizon, there’s this mass exodus, like there’s something really important to get back to their rental condos to, like the finale of Wheel of Fortune or something, and I’m suddenly sitting all alone on a deserted beach, shooting the most spectacular light known to mankind.
That’s why they call it the golden HOUR…a half hour before sunset and a half hour after. Don’t get me wrong; of course I love the fact that I’m the only one shooting all of this amazingness, but I just feel so bad…
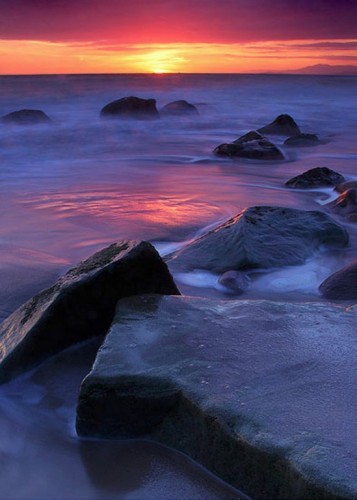
You know those shots where the water is aqua, but it’s kind of backlit and see through and tinged with pink, and the sky is all kinds of pink and yellow too with no sun showing? That’s when those shots are taken. Drag the shutter to 1/8 or 1/4 of an inch, and you got yourself something to be mighty proud of.
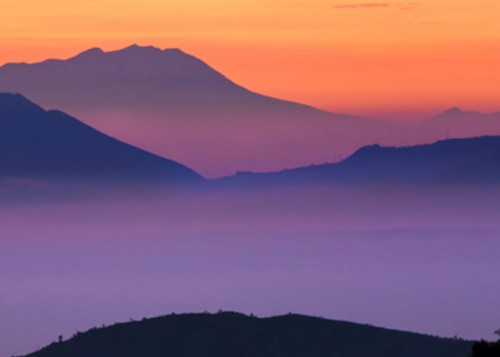
Photograph the sand. It will have this magical pinkish tint to it. Shooting in the mountains? The shadows will have a purple/ blue look to them. You might not be able to tell just by sitting there. It might just seem like it’s getting dark and the mosquitos are coming out and you’re getting hungry. That’s ok. Pack a granola bar, spray on some environmentally friendly bug spray and shoot it anyway. You’ll be so happy with your results, you’ll be sending me muffins by mail in no time.
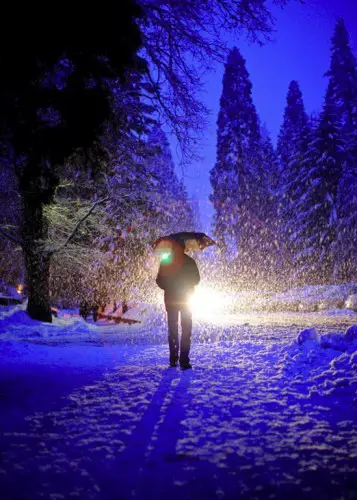
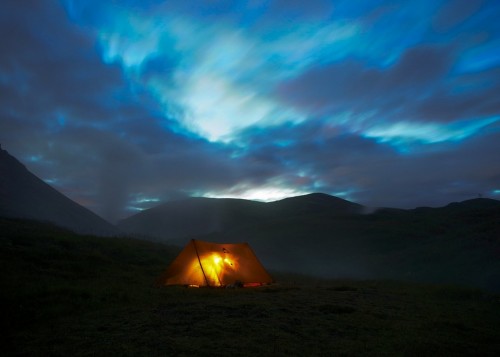
Dark time. Night Time is No Time to Set Your Camera Down
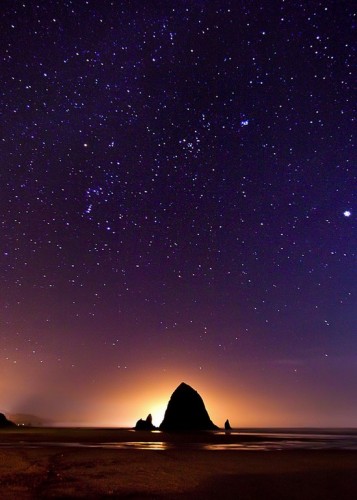
What do you shoot in the dark? Everything, of course. You just have to find the light. If you’re a nature guy, you can set up a tripod, put your camera on “B” for Bulb, and get some star trails. Buildings, cityscapes, car light trails all look awesome at night. Look for light in the darkness, like this tent that’s illuminated from the inside.
For these long exposure shots, try to keep your ISO low. There is a special value called natural ISO that transmits a minimal amount of amplification on the sensor, which will really reduce the noise on the sensor. One thing to keep in mind is that if you’re doing star trails, there is a limit to how long the exposure can be before the stars start stretching out into ovals instead of staying round.
The formula for 35 mm cameras is 600 divided by lens focal length (in millimeters) = maximum exposure. so if you have a 50 mm lens, the longest you should keep the shot going to keep the stars looking right is 12 minutes.
If you’re doing portraits, work with the light. Put your subject by a store window, about 6 inches to a foot away, and let the light from the window come onto the subject, then lean onto the window yourself with a long lens, at a low f stop, say 2.8 or below, with the lights from the oncoming cars all blobby and blurred out behind them. Ooh, cool!
Or put them under a street light, with the light shining down on them, which is particularly nice on happy engaged couples, or sit them down in front of or slightly to the side of your car’s headlights, mix the ambient light either inside or outside with an LED flashlight directly on your subject. Shoot to your heart’s content, and experiment…the light will look exactly like this for the next 10 hours or so. Then run home and look at all of the amazingness you created. Yeah, you’re awesome.
Your Move!
So now that you know how to take amazing, beautiful pictures any time, day or night, what are you still doing here when there’s all that light to be photographing?
Oh, right, You’re so into this article that you want to ask a question, or pin this article, or tweet it or Like it on Facebook, right?
Well, go for it!
You ask, I answer, you like me, I like you! You pin my article, I get a hand written note from my Aunt Myrtle in Stoneybrook…she’s so proud when I get pinned…me too. 🙂
And SHARE. Share this with your friends, share with the guy who’s trying to shoot a two second exposure handheld and seeing the blur in his viewfinder and getting all frustrated. Share with anyone that you think might find this interesting, because sharing only makes all of us as a whole better.
Then get out there, you’re wasting the light!
Click the following link to learn if photography classes are worth it.
About the author: Barbara Stitzer has been an award winning Master Photographer for the past 19 years, She lives in Arizona with her husband and two ridiculously talented girls and has been known to fall into a cactus or two in pursuit of the perfect shot. Feel free to find her on face book or check out her website at www.barbstitzer.com


Barb is an amazing photographer and teacher!! She took me from not knowing a thing about cameras or photography (honestly! I had never even owned a digital camera before I met her) to being able to take some awesome pictures during my safari in Tanzania. All in about 6- 7 months. With her immense patience with my kindergarten level of understanding anything about photography to her hilarious sense of humor I learned a heck of a lot in those few short months. And yes we did outside shots at dusk, during middle of day, and in front of her garage!
awesome blog Barb!
And we had so much fun, didn’t we?! Remember pan/blur day?! That was a crazy fun day, huh? And you came back with tons of AMAZING shots, for sure!!!
Great info!! Good read!!
Thanks Amy! I Appreciate it!
Great tips! Can’t wait to try them, Barb!
Thanks Molly!! I’d love to see them when you do!
Thanks for the loads of great information. And the header is right….the photographs are amazing and beautiful.
I appreciate it Carol!
Thanks again for sharing your amazing talent! YES your phototography is the BEST of the BEST but your ability to write is eqally as amazing! LOVE IT!
Jamie, Thanks so much for the kind words!I hope it helps!!
Love Barbara’s photos. By far the most talented photographer I know
I think I feel a love fest coming on! Thanks Rocio’
When I shoot around dusk I have a problem with redeye…..wicked evil red eye that won’t edit out. I know I’m just being obtuse, but help?!
Jojo, you’re absolutely right, redeye is wicked and evil and you should run as far away from it as fast as you can…or at least get your flash as far away from your camera as possible by using an external flash which elevates it above the camera enough that the flash is on a different plane from the camera or taking your flash off the camera if you can. What kind of camera are you shooting with? If it’s a. “Mom camera,” you’re probably taking the picture holding the camera horizontally, so try standing it up…sometimes I even turn my mom camera upside down to get rid of the redeye, but if there isn’t any light at all, it could make your subjects look kind like they’re in a horror film, slightly under lit…but no red eye! Try it and let me know if it works!
Really excellent article. Wonderful shots, your work is truly brilliant. Will enjoy reading this many times.
Hi, I was looking for some photography blog but there is not so many in Spanish (I´m from Mexico) and even in English this is the first one that I found highly satisfactory to read; good advises, great examples and a very good redaction.
Tank you for your effort.