When you discover that you can easily transform your digital photos into some unique creative art with just the magic touch of a digital pen, it opens up a whole world of imaginative possibilities.

In this article you can find some handy tips on how to use a blender pen for the best results.
How it works
If you remember using a pencil to create a copy of a coin by tracing over it as a kid, well that is basically the skillset you need but with an updated digital twist.
You will need to get yourself a blender marker pen, which you can find online very cheaply, and you might also want to stock up on some print cartridges, because once you get started with your blender pen you will probably be printing out lots of digital images to work with.
You start by printing a photo onto some photo paper or you can use a photo that you already have. You then simply position the chosen image on the transfer surface with the image face down.
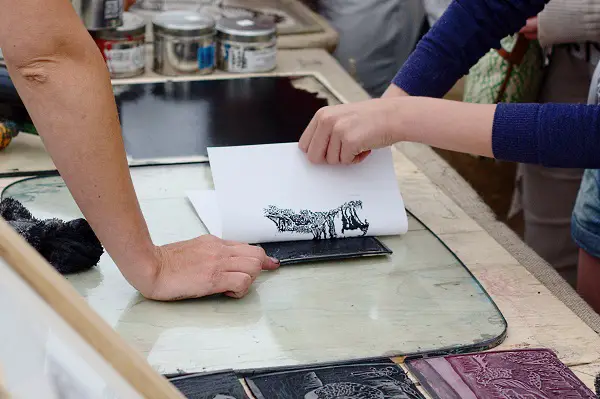
This is where you then use the blender pen to saturate the image while keeping the paper firmly in place, which has the effect of creating a mirrorimage but with a more faded or vintage look than the original, rather like a digital homage to the old technique of brassrubbing.
The magic of the blender pen
The unique effect of the blender pen is how it manages to produce a reaction between the toner and the Xylene in your pen. One of the minimal requirements you need to adhere to for a successful transfer, is you will need to use regular paper so that the liquid is allowed to seep through and create your new version of an old treasured image.
For best results
You will need to make photocopies of the images that you are looking to transfer using the blender pen and this is a crucial part of the process as just printing a photo from your computer won’t allow the pen to work and create a mirror image.
The reason that you need to use a photocopy is because of the toner ink that is used in these machines or you could use your laser printer if you have one.
Make sure that you are working in a wellventilated area when using your blender pen as they can sometimes exude a strong smell when the transfer process is ongoing.
You can choose to transfer your image using the pen to a variety of different surfaces like ceramic, wood and tin, although you may want to start with paper transfer so that you get the hang of the technique before moving on to other surfaces.
If you go wrong
One of the great things about using a blender pen is that you can correct a mistake and there are normally options to rescue an art project if you make an error or decide that something doesn’t look right.
First step would be to slip a clean paper towel or some sort of absorbent paper underneath your image, so that it can soak up any excess fluid through the paper.
If you have gone outside of your image line by mistake for instance, start to rectify the mistake by very gently starting to push your excess color back into your original chosen image area for the color, but stopping right on the line.
You might need to repeat the process a couple of times to completely correct the error but your patience should often be rewarded and your image can be returned to how you wanted it to look in the first place.
Light colors are always going to be easier to correct than darker ones and if you are trying to clean up a darker color, you should be patient and be prepared to need several goes.
If this does not work, you can always consider the other project rescue option of cutting around the image that you want to retain and adding another layer to your remaining work.

Transferring the image
Start by turning your chosen image face down and secure it in place in the spot on the paper where you want to transfer the image.
You might want to consider taping it down so that it holds steady in the right place while you are concentrating on using the pen.
Using the blender pen, cover the back, concentrating on one area and then methodically moving around until all parts of the original image have been saturated and you have covered the entire surface and outline of the back of the original image.
You should be able to start seeing the image appear through the back of your photocopy as you work your way through the process and when you are satisfied that the pen has covered all of the areas completely, you can lift up the copy to reveal a stunning mirrorimage that has been transferred to your chosen surface.

Endless possibilities
The images that you can create using a blender pen have a real endearing quality about them and offer a uniquely new perspective of what might be a muchloved family photo.
If you search sites like Pinterest, you can get some inspiration and ideas on how to make the most of your blender pen.
Some ideas to consider include transferring an image onto a regular item like a chopping board.This would make a great personalized gift or could be for your own pleasure. If you do use a surface that is going to come into contact with food, just remember that you should arrange to use a coat of food grade sealant over your image transfer.
You could also create some great looking invites or birthday cards using your blender pen to transfer your chosen images.
Whatever you decide to do with your blender pen, it is enjoyable using digital imagery to spark your imagination.


4 comments