Everyone loves to take pictures. With the easy availability of cheap DSLR cameras on the market and the advent of affordable photography gadgets, who wouldn’t right?

If you are one of those who loves photography, then you probably are already aware of one or two techniques to make your pictures look awesome! But if you’re looking to further improve your photography skills, then I have six photography lighting techniques to help take your pictures to the next level.
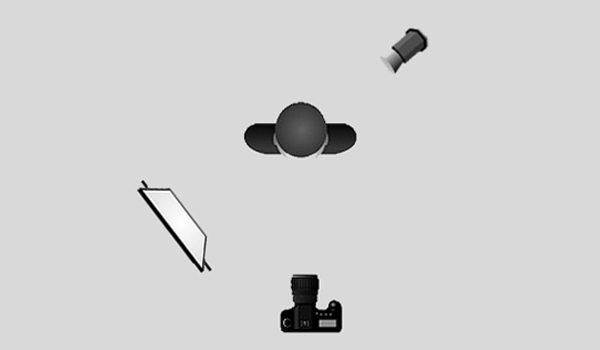
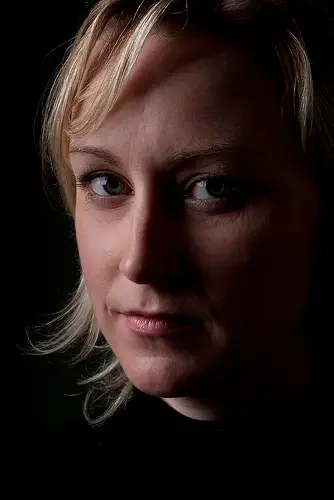
1. Split Lighting
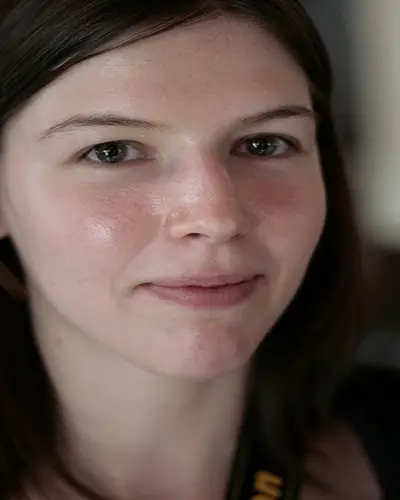
Split lighting is a technique where the subject’s face is somewhat divided into equal halves (one appearing on the light and the other in the shadow).
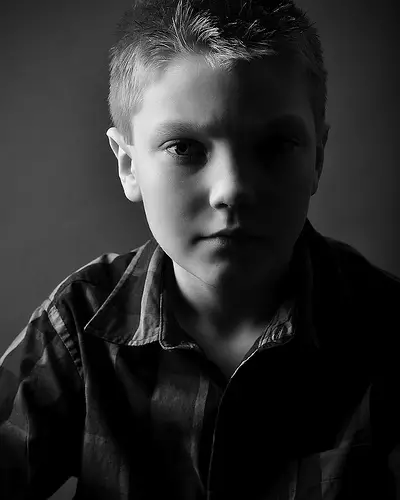
This simple lighting technique is normally used in art works and dramatic images that includes portraits. To achieve this effect simply illuminate one half of your subject’s portrait and take the picture straight on.
One of the things that you can do to emphasize your photo’s split lighting effect is to look for a line down the center of the subject’s face. Since the light source is positioned 90 degrees from the subject’s face, you should see the line. If not, then your subject may have moved.
As an added tip, you might want to convert the photo to black and white. I personally think that it looks way better and dramatic that way.
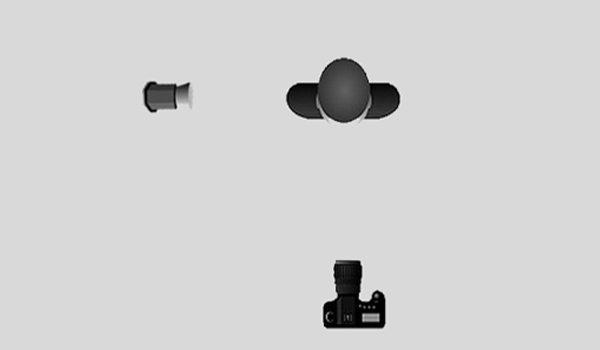
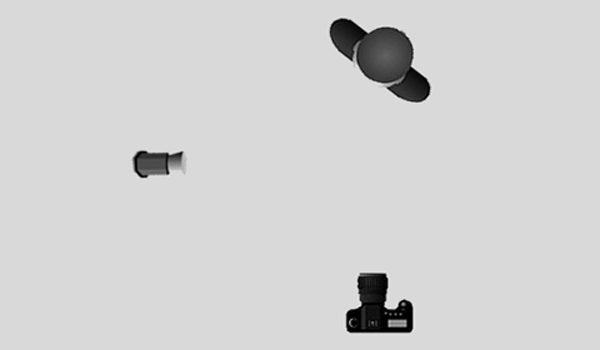
Positioning:
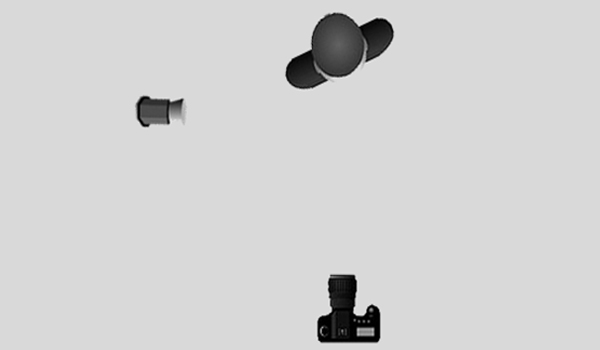
2. Butterfly lighting
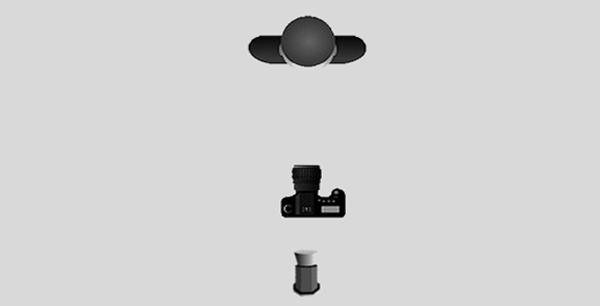
Butterfly lighting created a butterfly–like shadow just beneath the subject’s nose. The light source should be behind and above the camera when using this technique.

As a general rule, when your subject has a rather round face, it’s better to use the split or the loop lighting technique (which I’ll cover later) over the butterfly lighting since both of them helps create the illusion of a slimmer face.
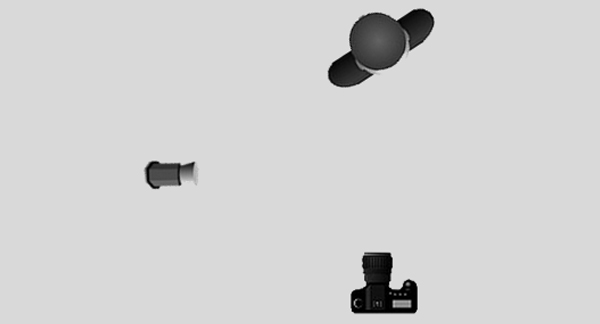
Positioning:
3. Loop lighting
Loop lighting is one of the most popular and is supposedly easy to achieve. This technique creates a loop-shaped shadow under the subject’s nose.
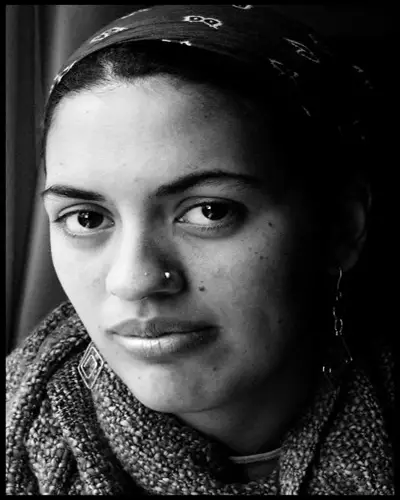
When using this technique, the shadow of the subject’s nose is reflected on their cheek but the nose’s shadow should never touch the cheek’s shadow.
Positioning:
4. Rembrandt lighting
This technique was named after Rembrandt the painter who often used this lighting pattern. What makes Rembrandt lighting is a triangle of light on the object’s cheek.
Unlike the loop lighting where the nose’s shadow and the cheek’s shadow doesn’t meet, the Rembrandt lighting is the exact opposite. This technique makes the photo more dramatic. Technically, the triangle should be no longer than the nose and no wider than the eyes.
It’s ideal to use this technique on subjects with round or full faces simply because its slims their face and adds definition.
Positioning:
5. Short lighting
Short lighting is a perfect technique if you want to flatter and make your subject’s face look slimmer. In this technique, the side of the subject’s face is directed towards the camera.
The side directed is then in shadows allowing for more sculpting and 3D qualities.
Positioning:
6. Broad lighting
This is the exact opposite of the short lighting technique. When using this, most of the subject’s face is lighted while a smaller part of it is in the shadows.
It’s a good idea to use this technique when taking pictures of someone with a slim or small face. Broad lighting creates the illusion of making your face seem broader (thus the name of the technique). That said, if your subject feels that they are too thin, then using this technique will help solve that problem.
Another great idea of using this tip is when your subject has scars on their face or any kind of defect. If they feel insecure about it and doesn’t want it to show on the photo, you can hide it in the shadows.
Positioning:
Conclusion
Some of us are already using these techniques even without knowing what they are. Others have made it up to this point simply by pure artistry or combining common sense with intuition. Whichever your case is, I hope you’ve learned a lot from this article. If you have photography lighting techniques you’d like to share (and I’m sure you do), please share it in the comments section below.
About the author: Aileen Galsim is a blogger for Showcase Creative a UK based printing company that provides Custom Presentation Folders, calendars, and other printed presentation products. They can be found at http://www.showcasecreative.com


I could be wrong but I think that the positioning pictures from broad and short lighting should be switched.
nope, they are good, it’s just the example for Broad lighting is not the best