Do You Need A Flash For Travel Photography?

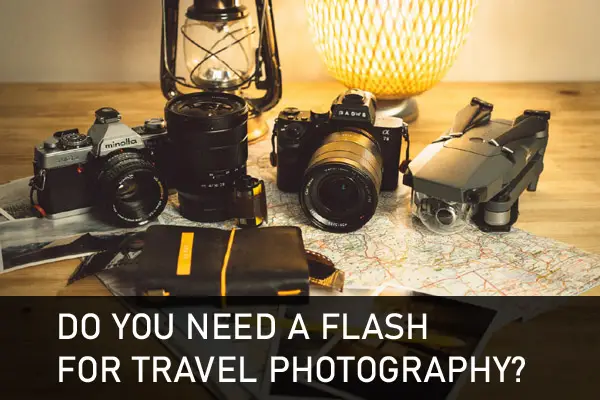
Packing for a trip is arguably the worst part about travel. As photographers, not only do we have to choose which of our vast wardrobe of clothes to take with us, but we also have to decide which pieces of our ever-expanding portfolio of camera equipment to take with us. From picking which lenses and camera bag to remembering your spare memory cards, packing your photography gear for travel can be a nightmare. There is one decision, however, that can often make or break the standard of photographs you come back with. Do I need a flash for my travel photography?
flash-for-travel-photography-1

The answer to whether or not to take a flash with you on your travels will be different for everyone based on a few things.

Continue reading Do You Need A Flash For Travel Photography?

Anatomy of a photo: Balvenie Scotch

Several unconnected events converged to make this photo (below). First, I received a review copy of The Nikon Creative Lighting System by Mike Hagen (from rockynook and NikoniansPress publishing). A review is on the way. Second, and more importantly, I received as a gift a bottle of Balvenie Doublewood 12 year old single malt scotch.

Read on to get details of the lighting setup and what I think works and could be improved in this photo.

Balvenie Doublewood 12 Year Old

The setup

This scene was lit with two off-camera flashes. The first reflected from an umbrella directly to camera left set at -1.3 EV. The second directly behind the bottle, aimed at about a 45 degree up angle and towards the camera at 0 EV (TTL mode, normal sync). This flash was zoomed to 50mm. Both flashes were triggered wirelessly from the D90 built-in commander which did not contribute to the exposure. 98mm, 1/60s, f/5.6.

Flash setup

The good

Let’s talk about what I like in this photo and what I don’t like.

Continue reading Anatomy of a photo: Balvenie Scotch

Anatomy of a photo: The silly faces project

The silly faces projectI recently published this photo on Flickr (click here to view larger) and it received a lot of interest so I thought I’d share how I made it. Taking 64 photos like this may look like a lot of work but it can actually be done quite easily. Here’s how I did it.

First of all, I used two flashes for lighting. An on camera SB-800 with diffusion dome pointed up and back and an off-camera SB-600 bounced into an umbrella to the right of the camera. You can do this without fancy lighting equipment. The important thing to remember is simply that the lighting must be consistent from shot to shot.

Continue reading Anatomy of a photo: The silly faces project

Take better flash photos in one easy step

Photo by *Micky
Photo by *Micky

Many people shy away from flash photography because it makes people look bad. Photographs taken with a flash can leave harsh shadows that highlight every wrinkle, turn skin blue, shine a flood light at thinning hair, create hot spots on the forehead, nose and cheeks, and generally make subjects look unattractive. But when there isn’t enough light, sometimes your only choice is to use a flash or not take photos at all.

Well, I’m here to tell you that your flash photos indoors can look amazing. And here’s how…

Continue reading Take better flash photos in one easy step

Photography and magic and Nikon CLS

A friend of mine calls me up every week or so with a photography question. Usually, he’s looking for the magic incantation or editing technique that will make his photos turn out in a particular way. Sometimes there is such a thing (e.g. wait for the the flash to charge, use manual focus, etc.). But usually there isn’t. Usually, getting a particular effect in a photograph, either at the camera or in post-production, requires experience, artistry, experimentation, and work. And a lot of the stuff you learn on one photo can’t just be applied blindly to the next one. School portraits aside (ha!), every photo is different.

Continue reading Photography and magic and Nikon CLS

Workshop at the Ranch

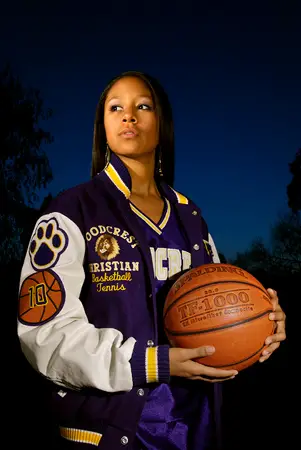
Dave Black has a wonderful website. One of his monthly features is called Workshop at the Ranch. There he gives insightful tips on how to use off-camera flash in creative ways. Although anyone using wireless flash units can benefit from Dave’s experience, his series is of particular interest to Nikon shooters using SB-800s and the Nikon Creative Lighting System.

I make it a point to check back each month to learn more from this master of Nikon flash. I particularly like his method of using warm gels with SB-800 Speedlights to create warm subject lighting and a cool blue background. I think it works particularly well for sports portraits, but I’ve used it for a variety of subjects.

Alicia with Basketball

This is an example using Dave’s technique for a Senior Portrait.

Continue reading Workshop at the Ranch

Quick tip: did you know you have a photo studio in your house?

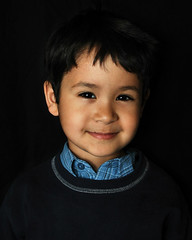
The BoyOne of my favorite photo locations right now is our upstairs bathroom. The tub and toilet are separated from the rest of the bathroom by a door which can be opened or closed to let in varying amounts of sunlight from the window in the outer room. Combine that with a small flash and you get perfect portraits every time:

  • Just drape a cloth over the shower bar (or buy a nice looking shower curtain)
  • Turn off the lights
  • Point your flash at the wall behind you and to the left
  • Fire away!

If you’ve got a window, a little investigating may reveal that you get perfect light in your bathroom (or some other small room in your home) at certain times of the day just from that. Sure, it’s a little cramped but you can’t beat the price and you can’t argue with the results.

Continue reading Quick tip: did you know you have a photo studio in your house?

Getting the exposure right

One of the most common problems people have when taking photos is that part of the photo (usually the part that they want to see) is too dark or too bright. For example, when taking a photograph of a friend in front of the sunset, the sunset will show perfectly but the friend is a dark, unrecognizable blob. The problem is that the range of brightness in the scene is too much for your camera to record. So it has to “decide” which parts of the photo it wants to keep (the sunset, in this case) and which parts aren’t as important. And it often gets it wrong.

Continue reading Getting the exposure right

Create your own light box

A light box is basically a miniature photography studio. Lit from the sides, front, top or any combination, a light box provides even illumination of any subject which can fit inside of it. Boxes like this are perfect for product photos (think eBay) and general macro and closeup photography. There are a lot of tutorials out there for making light boxes. There’s a good one for making one out of a cardboard box over on Strobist. I’ve had an idea for making one of my own kicking around for a few weeks and decided to build it this week. Here’s what I came up with. And it’ll only cost you about $5 (assuming you’ve got some scissors and glue) and 30 minutes of your time.

Continue reading Create your own light box

Weekend assignment: Night portraits

If you’ve ever taken a flash photograph at night, you probably know first hand how cold and unnatural these kinds of photographs can look. What you often end up with is an overexposed photograph of a person floating in a sea of black space. But there is a better way to make a portrait at night, the subject of this week’s Weekend Assignment.

Continue reading Weekend assignment: Night portraits