Capturing an underexposed photo has had a very negative connotation in the world of modern photography. Underexposed photos were invariably treated as terrible photographic failures brought about by insufficient lighting. However, with the coming of digital photography and initial feedback, even capturing an underexposed photo has turned into a form of art.
In this article I will show examples of underexposed photos and describe the pros and cons of underexposure.
Generally, an underexposed photo where the camera lets in too little light is dark, with the subject not seen clearly, little detail in the shadows, light sources appearing dimmer, and the image as a whole looking off. Let’s discuss.
Photographers have conducted various experiments on exposure for a long time. They noticed that not only does the exposure decide how light and dull the tones are in your photographs, but also the decisions you take on exposure will decide the general expression and the vibe of your photos.
However, taking an impeccably underexposed photograph isn’t as simple as it sounds. It demands certain standards and a limitless measure of abilities with creativity.
Let’s do a quick review of exposure basics and then jump in to examples.
What is exposure?
Exposure is in its simplest terms how much light reaches the sensor. What you are attempting to do when you set exposure is to have the brightness and darkness values match closely the actual scene you are viewing with a naked eye.
At the point when you snap a photo, you press the shutter button to unfold a camera’s aperture, and light appears, setting off a reaction from a sensor. Exposure is the measure of light that arrives at your camera’s sensor, making optical information throughout some undefined time frame. That time frame could be a small amount of a second or an entire moment. Through setting the aperture and shutter speed, either you manually or your camera automatically controls how much light reaches the sensor.
At the point when you shoot an impeccably exposed photograph, you are catching every one of the subtleties in the features and the shadows.
Types of Exposure
Overexposure:
When the sensor of your camera gets too exposed to a source of light, overexposure occurs. Therefore, the photo lacks details in the highlights and the brighter part of the photo gets washed out.
Underexposure:
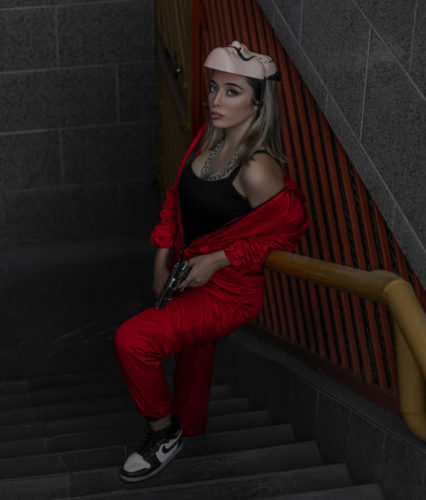
When the sensor of your camera doesn’t get the required amount of light, under exposure occurs. The darker parts become more obscured and there is a lack of details in the darker tones.
Long exposure:
It is a very common term used in night photography. It is likewise called slow shutter photography and essentially means snapping a subject throughout a lengthy time frame.
Double exposure:
Also known as multiple exposures. It is a unique procedure of exposing the camera sensor to different images by opening the camera shutter twice. The multiple exposures transform into one picture.
What is underexposure?
Underexposure is the point at which due to setting shutter speed, aperture and iso a certain way, a picture seems more obscure than it should be, with little detail in the shadows and overall dark appearance. It is the aftereffect of insufficient light striking the sheet of film or the sensor of the camera.
How to check your photographs exposure
Histograms are a good way to evaluate exposure because the photo you see in the field on a camera LCD screen or on your phone can be affected by ambient light. It may look washed out and too light when in fact it is not. You should be able to find a histogram both on your regular camera and on your phone, just look around for this feature or consult the manual. You may also be able to view the histogram in photo editing or viewing apps if your camera app does not have this feature. It may be under the photo information button.
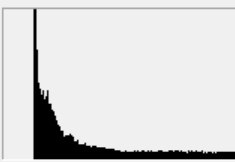
Because the histogram shows the brightness or tonal values of the current photo, it is not same for every photograph and needs to be interpreted. A histogram of a correctly exposed photo shows the graph reaching from all the way on the left of the box (dark tones) to all the way on the right of the box (bright whites). An underexposed photo will have the values of the graph concentrated on the left side of the histogram.
Why do people shoot underexposed?
Underexposure is not always a bad thing. Many people shoot underexposed photos on purpose. For the photographers who want their highlights to be protected, under exposure is like insurance to them as it gives the largest amount of security for the shadows to stay put. It also helps with the adjustment of the white balance and displaying the minutest details.
Especially when you need to protect more splendid background subtleties and add contrast to your photograph, there could be no more attractive options for you than under exposure. Underexposing preserves detail of bright backgrounds. One of the major things it does is it protects your from blowing any highlights in the image.
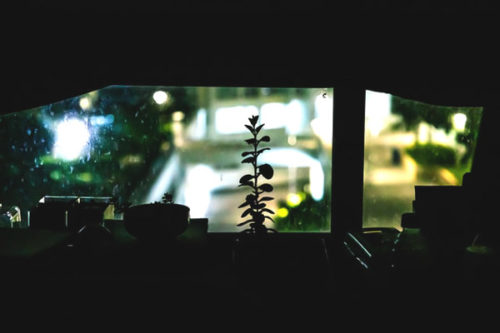
Still, you are not going to get the same measure of shadow recovery from every camera available in the market. Yet, it’s likewise simpler to recover shadows than highlights in post production.
Capturing an underexposed photo
Underexposed photography has the potential to add a completely different dimension to your photographic collection. Taking underexposed photos has become a trend.
Underexposure preserves brighter background detail and adds contrast
If the main object of a photo is a special kind of flower, the background is often the entire garden. Undoubtedly, they complement each other in the appearance of true beauty and both are important. A modern camera of today can record a mind-blowing measure of subtleties, especially when you are shooting at a lower ISO and the photo is recorded in a RAW format.
While underexposing an excessive amount can add noise, dialing the exposure down around one stop won’t destroy your photo. All things considered, it will help you protect a portion of the more splendid foundation detail and hold you back from wasting your features.
Under exposure gives you richer skin tones and texture
Maintaining skin tones is about those who rank originality over perfection. A large part of photographers could do without spooky white skin that comes up short on any surface or detail. No one needs to resemble a perfectly created animation character. What people need is natural. Being natural is likely the most important thing to expect.
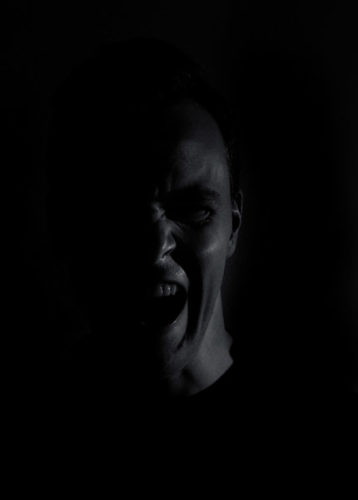
Somewhat underexposing your object conserves that clear quality and surface detail. Appropriate skin tones are apparently one of the more significant parts of a random picture. So it’s mandatory that you take care of this. I’d prefer to underexpose a bit than unintentionally leave my features and lose those excellent little subtleties until the end of time.
Under exposure helps with really cool sun flares
A decent photographer consistently attempts to fuse the sun flare into their photos at whatever point conceivable. However, there’s a contrast amidst a very much-done sun flare and a major white mass of lighting.
In a perfect world, there will be a particular contour to the sun and amazing color maintenance. To get that going, you’ll need to underexpose your subject and go for the most dazzling part of the picture, all things considered. However, this will obscure each other item introduced in the photo and you should go through certain techniques to fix this.
Once more, a straightforward brush with a strong knock in the shadows ought to get the job done. You can cut the blacks down a bit, as well, on the off-chance you want to add a little contrast to your photo.
What mistakes do photographers perpetrate while shooting an underexposed photo?
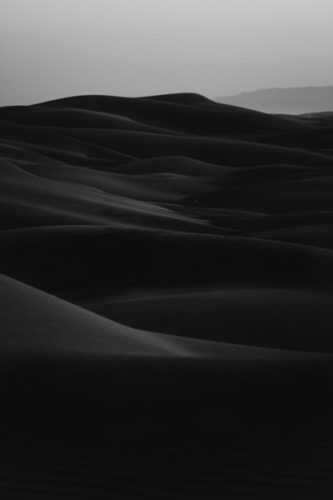
Not seeking Out High Dynamic Range
Where the main purpose of underexposed photography is to highlight finer objects in particular, there might be a question, why do we need high dynamic ranges? The main reason is clarity. The more perfect and clear your object and background, the more perfection will come through in the picture.
Not composing around a particular story
Photography is a form of art that demands an incredible level of visualization. It’s the composition that decides how things are going to come out. Especially when you are planning something unique like underexposure, you must compose in your head what will be captured by your camera lens.
Not focusing on post-processing
Post-processing is like getting a second chance after committing a mistake once. You have to use this chance to repair your loss.
You can simply deepen your exposure during post-production with definitely no damage in quality. Simply attach a curve adaptation layer and change the blend mode to multiply very easily.
Not adjusting the ISO setting properly
Creating accurate exposure is definitely not an easy job to carry out. Be that as it may, you can adjust as much light as your camera requires to perceive the necessary amount of light. Adjusting the ISO number to a greater amount shows your camera has greater sensitivity to light.
Here is a good video on underexposing your images:
How to avoid underexposure?
Understand the exposure triangle for capturing a perfect underexposed photo
Understanding the exposure triangle is vital to assure a perfect exposure adjustment.
Each one- shutter speed, aperture, and ISO determine how to take a picture with proper exposure. Every one of the three components influences each other; if you change the aperture, it influences both the shutter speed and the ISO. Seeing how they help will result in more appropriately taken images.
Add proper amount of light
Since the properly exposed photo is about the presence of the right amount of light, the best way to avoid underexposed photos is to provide adequate lighting, whether it is natural or artificial.
This will solve the problem almost 90% of the time.
Use exposure compensation
At the hour of the shooting, if a piece of the frame is extremely dim or exceptionally light, your camera might get confused. Maybe then changing into manual mode, you can use the exposure compensation dial to supersede the settings of the camera. Shifting the dial tells the camera whether you need to over expose or under expose the shots.
Adjust a standard shutter speed
The shutter speed alludes to what amount of time goes by when capturing an image. The longer or shorter your shutter is open, the higher the chances of over exposing/under exposing the picture. 1/60 is a decent and standard shutter speed to begin with, and you can experiment from that point on.
In Conclusion
Unprecedented variety is making its way into photography.
Taking an underexposed photo is one such variation. However, accurate exposure is unquestionably predominant in what “standard photography” means. Yet no solid alternative to under exposure has been found.
Hopefully, from the above discussion, you got a clear idea of how to capture an underexposed photo and what it actually looks like.
If you are confident enough to share your skills in underexposed photography, feel free to share your thoughts here.
Click on the following link to find out more about what overexposure is, why photographers take overexposed photos, and what mistakes photographers usually make while taking an overexposed photo.


