After posting Getting the Exposure Right, I received a quite a few questions about how I achieved the HDR (High Dynamic Range) version of the mailbox photo (last photo in that article). This tutorial will walk you through the basics of creating the same look by hand. All you need is camera and photo editing software that supports layer masking (you can follow these steps in Photoshop, Paint Shop Pro, and The GIMP, among others).
A little background: HDR is a type of image manipulation. The goal is to blend multiple exposures of the same scene into a single image in order to get a result that has more dynamic range than your camera is capable of recording. Typically this applies when you have uneven lighting in your scene as in the example photo.
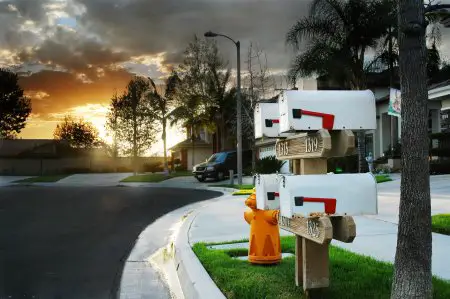
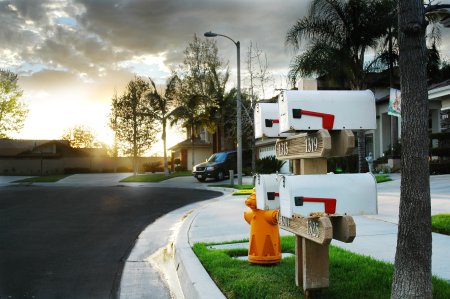
Final HDR result—this is what we’re going for.
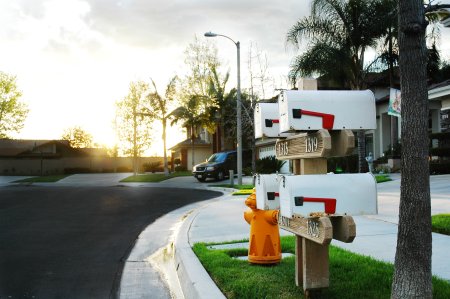
The first step in creating an HDR image is to shoot your scene multiple times at different exposure settings. A tripod comes in handy here. The idea is to get at least one frame with the correct exposure for each region of your scene. In this case, there are four regions I want to capture full detail in: the sunset, the clouds surrounding the sunset, the middle ground trees, and the mailboxes in the foreground. I started shooting with the exposure set for the mailboxes and then gradually decreased the exposure in steps of about 2/3 of a stop, taking a shot at each step, until I got a good exposure for the sunset. I ended up with about 10 frames but decided just to use the following four in the final image:
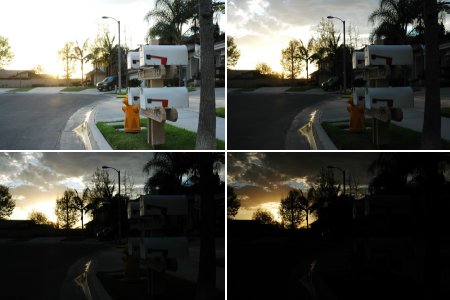
Exposures chosen for HDR blending.
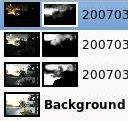
The next step is to load these images up in your image editor of choice. Create a new image and stack each of these exposures in separate layers. You can go from darkest to brightest or brightest to darkest—whichever way you choose, keep them in order. I chose to put the darkest layer on top and the brightest foreground layer at the bottom of the stack.
 Then I add masks to my top three layers so that they are hidden (the contents of the masks are black). This effectively removes the top three exposures from the image and lets the fourth, bottommost image show through. Now grab a largish brush with a soft edge and paint white onto the black areas of the masks where you want the associated image to show through.
Imagine you are looking down on a set of transparencies stacked one on top of the other. Where the mask is black, the layer beneath shows through. Where the mask is white, the image in that layer is what you will see. Gray portions of the mask blend the layers smoothly.
This step can be quite time consuming and you’ll find yourself going back and forth painting different portions of the masks on different layers to bring out more or less detail in your final photo. Start with a large, soft brush to quickly get to a rough draft. Later, switch to smaller brushes to make refinements.
The masks for this project ended up being quite complex. Here are the individually masked layers:
Layer 2 mask (one from bottom)
Layer 3 mask

Layer 4 mask (top)
The following images demonstrate how these masks combine together to achieve the final result:

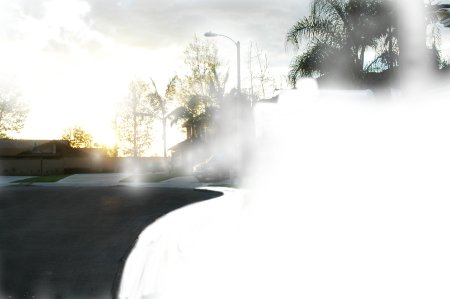
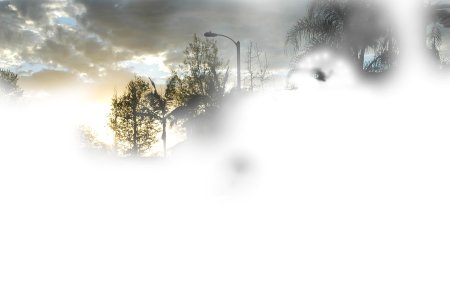
Layer 1 (bottom) by itself
Layer 2 is added on top of that. Notice this layer was used to bring in detail in the clouds and to darken the street for additional contrast.
Layer 3 added. More cloud and tree detail.
Layer 4 added. Sunset detail. Final result.
This technique is time-consuming and difficult to master. A good way to ease yourself into this kind of manipulation is to try blending just two layers together with a single mask. That is much simpler than trying to juggle multiple masks. Two exposure masks are actually very useful in a number of situations. In fact, you don’t even need two separate exposures. This same technique is often used to simply blend an adjustment made to one layer with the layers beneath such that the adjustment doesn’t affect the entire layer. This technique can be used to adjust the contrast only in a portrait subject’s eyes, for example, or to apply localized sharpening or blurring.


Terrific tutorial and great use of examples.
Wow, you picked a difficult scene to do that on. I generally confine myself to nice landscapes with an even level horizon and a large sky. Well done!
This is really good stuff, thanks for showing the masks — they really help explain the process better.
Awesome, just what I was looking for. Thanks.
i very very like your tutorial 😉 nice effect
Excellent tutorial, I don’t think it’s that hard to master, just takes time to make the picture look perfect =)
A couple of months ago I did something similar to take a nocturne shot of a flower with the moon in the background (link). In my case, I combined a multiple exposures setting with light painting.
It’s a nice technique to approach HDR!
You achieved a proffesional result here! 🙂
Nice job and well presented. The date on this tut is April 2007, and it is now September 2012. Over five years and still appreciated. Thank you!
Thank you for this tutorial! My photos are starting to look much better using this technique rather than HDR all the time!
You have done
such an amazing job on this series. I envy your sewing skills and your
patience and your diligence. If anyone ever asks me how to sew, I’m sending
them to your blog and this series. Congratulations on such an extensive, well
thought out and clearly presented set of tutorials
This looks so
great! It is so good to see you posting again! Ok so I’m guessing you mean
the next recipe is the pie that Florida is known for????? I’m sooooo excited
for that one!!!
It’s really nicely you have done. Good job.
very nice article it is very helpful. great collection and a lot of good inspiration for getting better final results 🙂 Helped me getting even more beautiful shots. Thanks for sharing!