Ahh, film photography. The cool kid on the block. The “old” thing that’s suddenly the “new” thing. In recent years, it’s been popular opinion that it was an identifying trademark of hipsters, and only then for an artistic flair that digital photography has failed to capture for them. The reason Instagram has been such an enormous success recently is our love for trendy, analog effects the app has on our photos, and the ability to then share our new creations to the masses.
In reality, film (or analog) photography has been recognized by the professional photography community for its benefits since its heyday, and although it experienced a huge decline in popularity with the advent of digital, it has shown a righteous resurgence in recent years.
Why? Because as convenient as our trusty DSLR is, you’ll never get the out-of-the-box warmth and feel of an analog camera shooting film, and you’ll never get that certain tinge of creativity and nostalgia that you do when you hear that old mechanical shutter snap in and out of place.

As photographers, it’s important to understand the history of our craft, and that means having an understanding of shooting film.
Musicians know that the best way to truly understand an artist is not to listen to only their music, but to listen to what that artist is influenced by. The same holds true for photography. We can more completely understand what we do now by having a basic grasp on how photographers did things years ago.
So let’s take a short trip down memory lane and explore the basics of analog photography. When we’re finished, my hope is that you have a better understanding of what the purpose of shooting film is for you personally, the equipment, the process, and in the end, I hope that you have fun. That’s what it’s all about; a hobby (or profession, for a lucky few of us) that brings us satisfaction and a sense of creative accomplishment.
Let’s get going!
1. Recognize the benefits and drawbacks of shooting film
Before you decide how you want to use film photography, you need to understand what it’s good at, and what it isn’t. If you’ve shot only digital, it may be a bit of a shock the first time you pick up a film camera. The controls and functions are different, but the basic premise is the same, and in many cases, you’ll end up enjoying the simplicity that these older cameras provide.
Let’s look at some of the advantages of using film:
Equipment Cost
As far as the equipment itself goes, get ready to have a field day; the onset of digital has produced an extremely low-cost market for analog equipment, parts and accessories. You’ll find that you can get into a very good film system for a mere fraction of the cost of a comparable digital camera. As an example, I scored my preferred analog camera, a Canon AE-1 Program, at a garage sale two blocks from my house for $20, including the original 50mm lens and a UV filter.
Ease of Use
Shooting with a film camera is just an easier experience than with digital. There are no electronic focus points to determine, and no endless menu of options for white balance and resolution; you set your exposure triangle variables (shutter speed, aperture, and ISO), rotate the focus ring, and click the button. That’s it. Simplicity. Some of the later models offered program functionality (which set aperture or shutter speed automatically based on available light, like modern DSLR’s), but even this process seems more efficient with analog equipment.
You Get a Lot for a Little
For that $20 bucks I spent on my AE-1, I got features that would cost me thousands in the digital world. The film camera gave me true, full-frame experience (as opposed to the APS-C sensors used on most low to mid-priced DSLR’s), and is built like a tank, with a full metal body. No cheap plastic here.
In a Word, Warmth
Probably the most compelling reason to work analog photography into your rotation is the results you get; film shots have a warmth and dynamic range that is absolutely untouched by more modern equipment. Yes, you can run your digital shots through Photoshop filters, and yes, you can add faux film grain, but that’s a lot of work to recreate something that happens naturally (and more effectively) with a film camera.
But of course, with the good, comes the bad, and there are a few disadvantages in using film:
Film Cost
Although personally I enjoy the fact that shooting my AE-1 makes me think about my shot before I take it, it also highlights an issue; cost of the film itself. Since film isn’t the primary medium that it was 20 years ago, it has increased in price considerably, and at the same time, become less abundant. Unless you’re content on shooting standard Kodak Gold 400, you’re probably not going to be able to get it at your local Walgreen’s. Most of the film you’ll need will have to be ordered through a catalog or online, so you’ll have to take shipping costs and time into account as well.
Development
With digital equipment, thousands of shots can be taken, and then instantly dumped to a computer for processing; all of the development work is done, and you’re ready to move directly to the editing phase. Of course, this isn’t the case with film; you’ll have a few decisions to make when you’re done shooting. The film you’ve shot has to be chemically processed into negatives, and then the negatives will have to either be enlarged to prints or scanned to a digital format, depending on what you want to end up with.
Unfortunately, the costs involved in all of this are, to be blunt, staggering. We’ll go into a bit more detail about this later.
Lack of Convenience
Being able to produce a high-quality print image comes at a price, of course. You’re going to be limited on how many shots you can produce (as we discussed, film costs mean you’re going to spend much more per shot than you would for digital), and film is a physical format, meaning that until you have that negative scanned into your computer, it’s the only copy available. If something happens to it, it’s gone.
We also have to understand the strengths of analog photography; there are some situations that are perfect for film, such as landscape or portrait shots. Due to manual focusing, shooting high-speed action shots at a kids’ soccer game would be an absolute nightmare on a film camera. Both analog and digital formats have their respective places.
2. Decide how film will fit into your photographic repertoire
Since we know the benefits of film and what it excels at, how do we then figure out how to use it? As we discussed earlier, film is best used in static situations such as landscapes or portraits. This is not to say that you can’t use film for dynamic situations of course, it just means that you’ll need to spend more time planning in these situations to get the results you’re after.
In the bigger picture, as an amateur, you’d be best served by using film photography as a teaching tool; a way to get back to the roots, and understand the groundwork of shooting a photo – exposure, speed, and sensitivity. Shooting a film camera allows you to peel away all of the distracting variables that are inherent in modern equipment, and focus on the basics.
For professionals, film is simply an extra weapon in the arsenal. They might use a Canon 5D for action shots in a basketball game, but for an evening engagement shoot, they could decide on their Nikon FM10 film camera for its smooth dynamic range and added warmth.
3. Get to know your analog camera equipment
In this section, we’re going to work on the assumption you’re using an older film camera (mid 1980’s and before) that doesn’t have most of the more modern features such as autofocus. We’re also going to limit our discussion to standard 35mm film and equipment, as 110 or other formats are beyond the scope of this article.
So you’ve snagged a great deal on a film camera, now what? As with your DSLR, familiarizing yourself with your equipment is the first step you should take before shooting. Forget everything you know about automated photography when doing this, including menus, custom functions, and RAW/JPG formats; your experience will be stripped down to the photography’s bare essentials.
The first thing to remember is that your film and digital cameras are completely separate entities; film cameras usually use different mounts than digital, so you’ll need to purchase lenses, filters, and other accessories that are meant specifically for your camera’s mount. For example, the Canon FD mount was the standard-issue mount for Canon SLR film cameras. It is different than the EF and EF-S mounts that are common for Canon digital cameras today, and without adapters, accessories for one will not fit the other.
Secondly, depending on the age of your film camera, electronics will normally not be integrated into the system. Again, in the case of my old Canon AE-1 Program, there is no autofocus, since there is no electronic connection between the camera and my lens; the camera is powered by a 6-volt battery and this powers the flash, exposure system, and film advance lever. Many older cameras did not even use a battery, however.

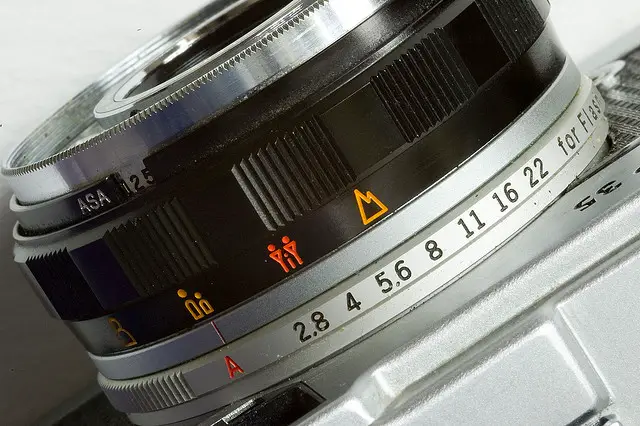
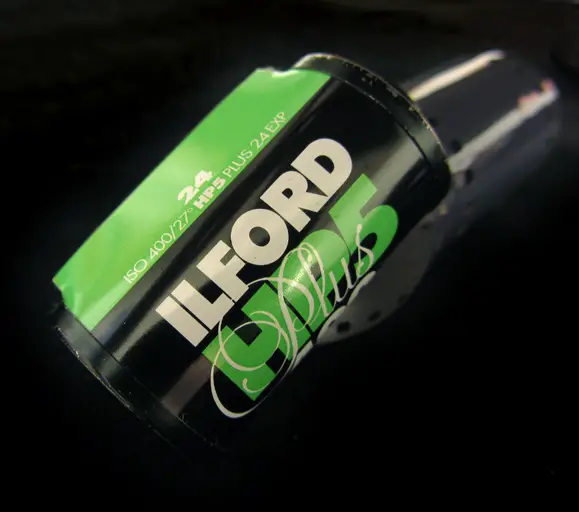
Although we’ll go into film characteristics a bit later, it’s important to remember that with film cameras, you no longer have onboard control over the ISO or sensitivity of the film; this is determined by what film you use. When choosing a film type, you’ll notice the numbering system on the package; 100, 200, 400, and so on. This is telling you what “sensitivity” or ISO the film is rated for. Although most SLR’s will allow you to adjust the sensitivity setting on the camera, the film is rated for one ISO rating only, and was designed to be used at that setting. Setting a different rating on your camera will, of course, produce different exposure results.
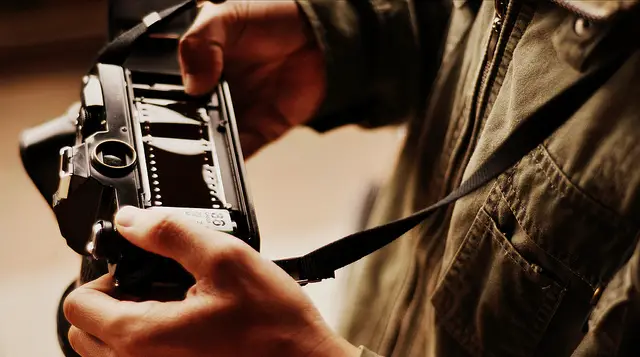
Film, of course, will need to be manually loaded. You can look through the user manual specific to your camera to get the complete instructions, but the essentials are the same with all models. The film edge is threaded into the rollers of the camera, and the film canister is fitted into the camera body. After closing the film loading door, the camera’s lever is advanced to pull the film into position for the first shot.
Some film cameras will have an “automatic” mode, some will not. If the automatic mode is available, you can enable it usually by setting the lens ring to automatic (or the equivalent) and “program” or something similar on the body. This is similar to using Program mode in modern DSLR’s. The camera’s exposure system will determine the optimal settings for shutter speed and lens aperture, and shoot the photo accordingly.
If your camera doesn’t have an automatic mode, then you’ll need to set your shutter speed and aperture individually, as you would when shooting completely manual in your digital camera.
Focusing an older SLR is almost a surreal experience. No motors, no autofocus to help you. You’ll usually see a “split screen” system, where the image through the viewfinder is split into two areas. When the shot is in focus, the images will align and appear in unison.
Of course, we haven’t covered all of the options and techniques you’ll need to know before mastering your film camera, but fortunately the internet is a treasure trove of information, and you’ll find all you need to know here.
4. Learn about your options for film
Film itself is both an advantage and disadvantage in the sense that although cost and availability is always an issue, the medium itself is fantastic and can provide images that just aren’t possible with a digital camera sensor.
Film provides better resolution in almost every situation. To simulate the resolution you get on a standard 35mm analog camera, you’d need 25 megapixels of digital resolution. And if the film is being scanned to digital, the better quality of scanner you use, the better print you’ll end up with. And with scanners getting better and better, you’ll always be able to get a great result.
Film also records a much higher dynamic range than digital. Dynamic range is described as the ratio between minimum and maximum light intensities, and how much of that range can be captured by your camera. Film cameras are closer to the dynamic ranges of our own eyes. This gives us a much broader range of intensities to capture, and therefore a more accurate image of what our eyes see.
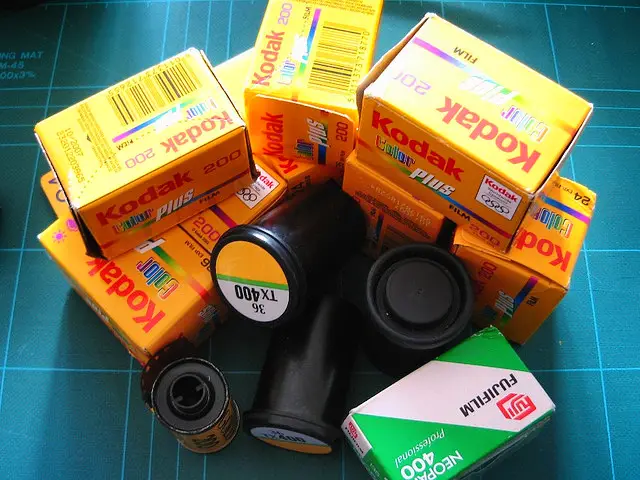
Film can be divided into 3 main categories; slide, black and white, and color negative.
Slide film is extremely high resolution film that is primary used for reproduction in magazines and other media, and is normally not chosen for general use, due to the extra care and steps needed to properly produce a print.
Black and white film is sensitive to the most visible parts of the light spectrum and, as the name suggests, produces black and white images.
Color negative film is what we normally think of when we see a color film shot printed on a 4″x6″ or other size photograph. Color film records values for both dark and light, as well as hue. This is the more commonly-available type of film.
The speed of the film (ASA number, which is meant to be equivalent to the modern digital ISO) is also an important factor when determining which film to use. As with ISO numbers, a film’s speed influences the sensitivity of the film, as well as the grain produced in the final result.
A lower-speed film (100, 200) produces much less grain than a higher-speed film (800). In most situations, an ASA of 400 is a safe choice and will have moderate grain. The main point to remember is that the higher the speed (and therefore lower ASA number), the better quality of the print, at a cost of speed and exposure time, of course.
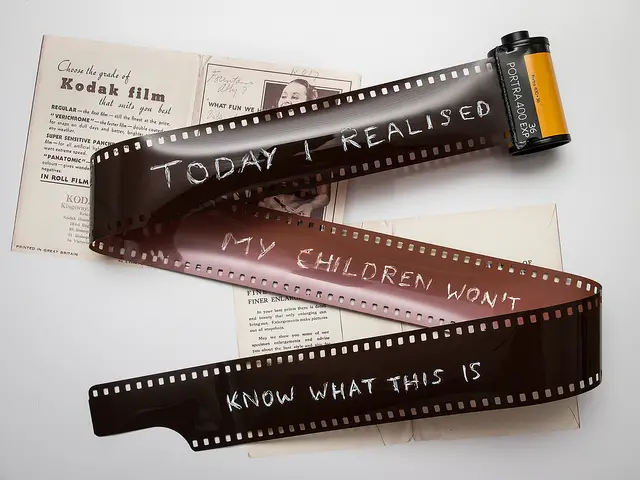
There are many popular brands of film, and many carried over from analog’s heyday including Kodak and Fujifilm. The various types have differences in color saturation and tone, and personal preference is usually the deciding factor here. There are many examples on the internet that show the variations between these brands.
Lastly, there are other “specialized” film types and brands including the immensely popular Lomography brand. These types excel in producing “artistic” images full of light leaks and other imperfections that give images uniqueness and character.
5. Decide on a medium
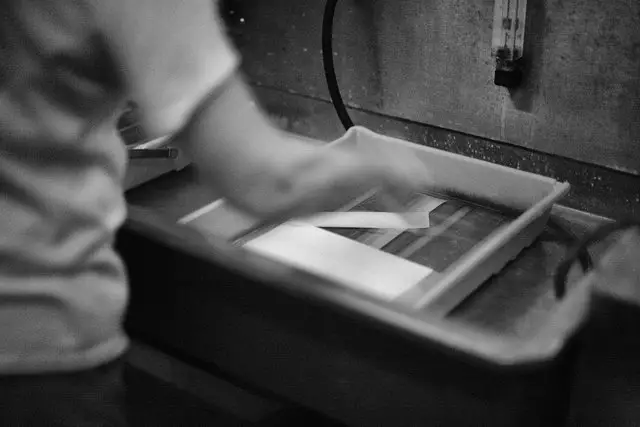
Another costly byproduct of shooting film is development. Whereas digital cameras record electronic images via a sensor, allowing us to download the image onto our computers for processing, film cameras record the light onto chemically-sensitive photographic paper. At this point, the image only exists as a capture, and must be taken through several processes to produce a physical print. At that point, the print can be scanned, if desired, to a digital format.
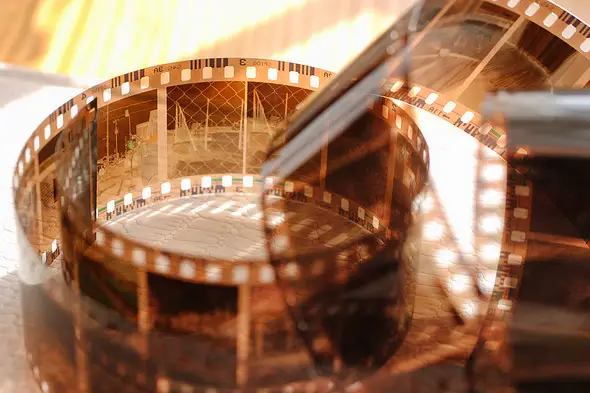
The first step in processing film is producing a negative (we’re assuming the use of black and white or color negative film). A negative is produced by introducing the raw film into chemicals that stimulate the light-sensitive paper and “extract” the image captured. Once this has been done, the negative is then either enlarged and printed on photo paper, or scanned directly to a digital file.
Knowing this basic process can help you determine what route to go with for your own photo development. 20 years ago, you had many local choices for development, from the professional camera shop, down to your local Walgreen’s. It was cheap, fast (remember the one-hour photo shops?) and nothing beat the feeling of opening that packets to see how your shots turned out.
With the rise of digital and subsequent slow demise of film photography, services became harder to come by, as they were simply not in demand anymore. This also caused the cost of the services to skyrocket. Right now, it is very difficult to find a local shop that will still develop your film professionally, and your best option is to contact one of the online vendors that are popping up. These shops allow you to send your film to them via mail and choose your development options online. The shop will then develop your film and mail the prints back to you. Most services will also scan the negatives to digital format for an additional fee. The downside to this is cost; you can expect to pay between $10 to $20 for a single roll of 24 or 36 exposures.
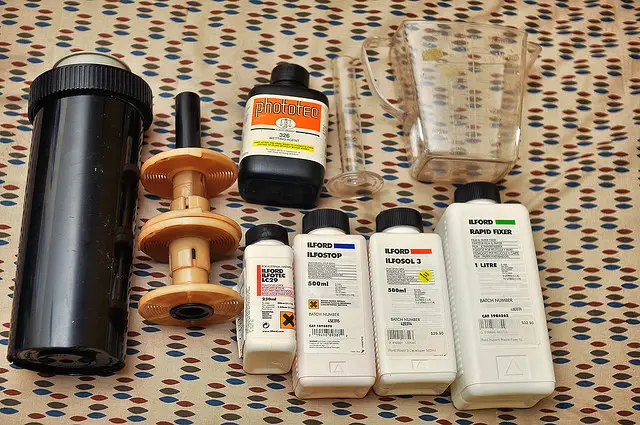
The alternative is to develop the film yourself. If you’re the Do-It-Yourself type, I highly recommend looking into the equipment and chemicals needed to do this at home. The cost of producing prints is lower and the process isn’t as difficult as you’d think (especially for producing black and white negatives). Many sites offer great tutorials that walk you through the process. A great overview is provided at Chromogenic.net.
6. Learn to shoot again
As we discussed earlier, shooting on a film camera is a wholly different experience; there are usually no electronics to lean on when shooting, and more thought goes into each shot. We already know where film’s strengths lie, and the thought process of taking pictures with analog go right along with that.
Knowing that the cost to produce images is higher for film means that we don’t just blindly fire off shots; we need to think about the exposure factors, ensure our shot is in focus, decide on the final composition, then execute the shot. It’s almost guaranteed that becoming adept at the shooting process on a film camera will make you a better digital photographer.
7. Keep learning everything you can!
Part of the fun of film photography is the learning process. In the end, learning everything you can about the origins of our hobby or profession can only help us in our endeavors moving forward. As always, the internet is an incredibly vast source of knowledge for us, and I’ve provided a few more areas that you might find helpful.
- Film Photography Project
- Photo.net
- Digitaltruth Photo
- Flickr Film Photography Pool
- IStillShootFilm.org
I hope I’ve provided a good start for your learning process, and pointed you in the right direction to improve your skills. Part of being a photographer is knowing the history and techniques used in the beginning, and learning about analog photography can only benefit you in your hobby or business.
Have a great film story, technique, or resource you’d like to share with us? Be sure to sound off in the comments section below!


A higher-speed film (100, 200) produces much less grain than a slower film (800). In most situations, an ASA of 400 is a safe choice and will have moderate grain.
I think that you have your numbers mixed up 🙂
oops, that was an accidental transposition on my part with the numbers, thanks for the catch!
I’m sorry but I got rid of my analog equipment years ago and do not miss it. To me analog photography is like taking a hammer and chisel and doing cave art. My studio/office is entirely digital. However, I did enjoy the article. It reminded me of the days I had a camera for every occasion .
thanks for the comment Gunter! There’s definitely a big difference between the two, and of course, I think both have their respective places 🙂
you are right film photography has its place, just not my place.
Hey, I know it’s old piece, but…
I came back to analog 2-3 years ago. I started with camera, after couple of rolls I came back to developing as I did back in elementary choll in the ’80. now I am figuring out enlargements – the equipment I have is waaay ahead what was available back the in communist Poland.
anyway – my point is that for me it is more DIY fun rather than hipster art thing. I do understand Gunter’s point but in the same time I have more fun with a photo taken on film, developed and printend in my dark(bath)room than with DSL+Lightroom. even despite technical flaws. it’s like with stuff you made with hammer and chisel instead of ordering it from Amazon 😉
Hi Sholay! Thanks for reading and participating! 🙂
I agree, I feel film has been on the way to becoming a lost art for years now, and I’d like to hold on to it for as long as possible 🙂
thanks for the article it was very informative and nostalgic
I hate film. I hate that I need to take film photography classes for a photography major…. I wish I was able to take Digital Photography classes (I love digital) but my school doesn’t have Digital and it is making me really mad…. Film is old. Time to change my major.