Cell phone cameras and apps like Instagram have made it possible for anyone to practice and enjoy the art of Photography. The filters that come with Instagram do a great job of altering the mood or tone of photographs. They also add a flare of drama to otherwise boring images.
However, because Instagram filters lack the ability to customize exactly how the images will be altered, using these filters can actually lower the quality of your photographs.
If you want to create photographs with high-quality post-editing, it is much better to use photo-editing software that has more customization features.
This guide will show you how to add really cool Instagram-inspired effects to your photos using Adobe Photoshop so that you can Instagram the professional way. You will also level up your Photoshop skills and pick up some tips and tricks along the way!
Prepare your workspace in Adobe Photoshop
Note: For this tutorial, I used Adobe Photoshop CS5 on Windows.
Step 1: Open the image you want to edit in Adobe Photoshop. Unless you have an amazing computer, you might want to close all other programs except for this window. Photoshop tends to be unkind to older computers that don’t have gobs of RAM.
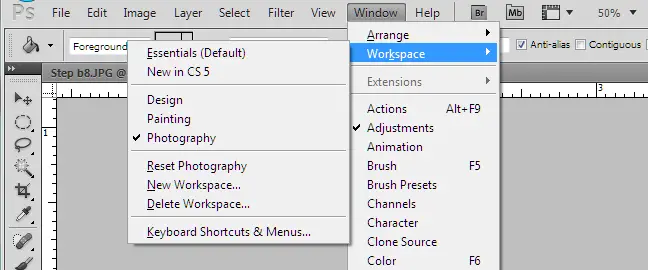
Step 2: Set up a Photography workspace by selecting Window > Workspace > Photography . This will open up all the windows you need for this tutorial.
Step 3: Select the Rectangular Marquee Tool (or press M) and frame the area of the photo that you wish to be in the final image. Go to Image > Crop. Hint: Do not crop out the subject’s feet like I did when I took the picture.
Step 4: (Optional) The cropping tool on Instagram forces all photos to have a 1:1 dimensional ratio, or more simply put, to be square-shaped. Unless you want your photo to look exactly like an Instagram photo, feel free to skip this step. Go to Image > Canvas Size or press Alt+Ctrl+C. Change the number in the Height box so that it is identical to the number in the Width box (i.e., give it a 1:1 ratio). Click OK. Your image should now be square-shaped.
Step 5: Go to File > Save As and save the file under a new name so that the original photo will not be affected.
The Earlybird Filter
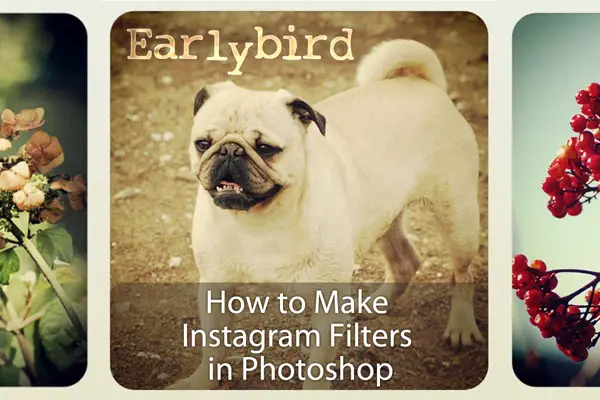
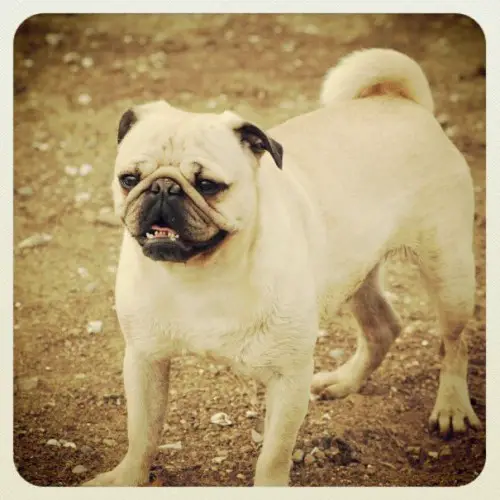
According to Webstagram, Earlybird is the most popular Instagram filter after Normal. The Earlybird filter adds sepia and yellow photo effects, as well as a soft blur and dramatic vignetting (darker edges and corners).

Achieve the Earlybird Filter Effect
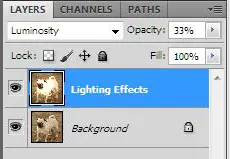
Step 1: Right-click the background layer and select “duplicate.” Name the new layer “Lighting Effects.” Now you can alter the duplicate layer while keeping the original intact.
Step 2: With the “Lighting Effects” layer selected, go to Filter > Render > Lighting Effects. Change the Light Type to Omni. This will render an artificial lighting effect that looks like a light bulb is located directly above the image. Drag the circle so that the sides touch the edge of the photo. The light will be brightest in the middle and grow dimmer toward the edges. Change the Intensity to about 32 so that the center is a little overexposed and the edges are a little darker. Click OK.
Step 3: Change the blending mode of the “Lighting Effects” layer to Luminosity using the drop-down menu. The Luminosity mode prevents the layer from affecting the colors of the original image so that only the lightness values will change. Using the slider, change the opacity so that the center of the photo is just slightly over-exposed, and the corners of the photo are a bit dark. For my image, the magic number was 33%.
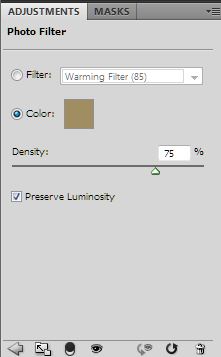
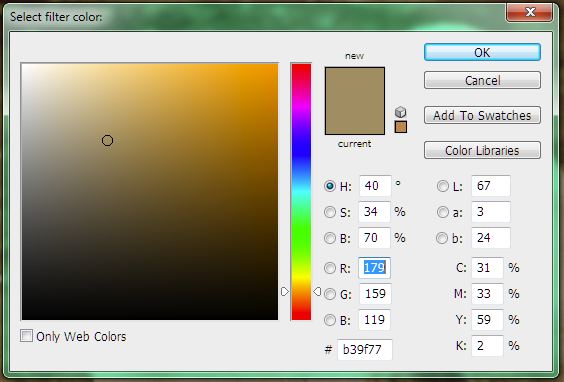
Step 4: Click Photo Filter in the Adjustments menu. Click the circle next to Color, and then click on the color box. In the box that has a # symbol next to it, type in the following code: b39f77 . Change the Density to 75. This setting will add some strong Sepia-like tones to the image.
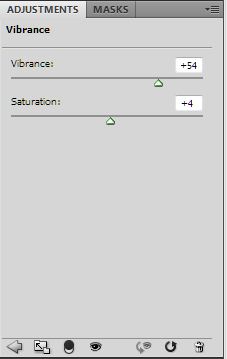
Step 5: Select Vibrance in the Adjustments menu. Change the Vibrance to +54 and the Saturation to +4. Generously increasing the Vibrance will make muted colors look more vivid, while leaving already vivid colors and skin-tones unchanged. Slightly increasing the saturation will make all colors in the image appear slightly more vivid.
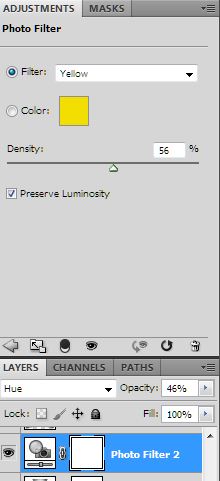
Step 6: Create another Photo Filter by selecting Photo Filter in the Adjustments Menu. Choose Yellow in the drop-down menu next to filter. Set the Density to 56%. Click on the Photo Filter 2 layer in the Layers box. Change the Blending Mode to Hue and the Opacity to around 50% so that the filter only affects the colors and hue of the original image. The colors in the image should now have a subtle yellow tint. If the colors look extremely yellow, lower the opacity and density settings until you get the desired effect.
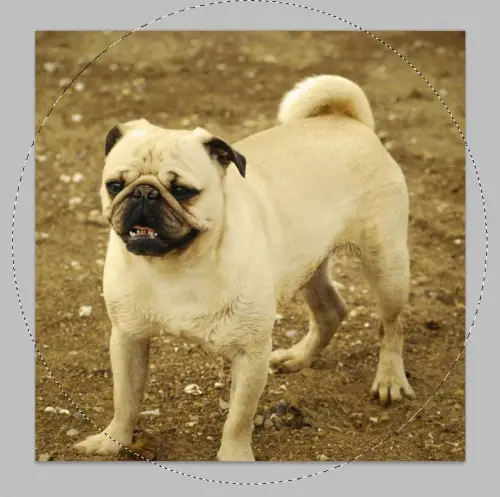
Step 7: Press Ctrl+Shift+N to create a new layer. Name the Layer “Vignetting.” Right-click the Rectangular Marquee Tool in the menu on the left and select Elliptical Marquee Tool. Press M to use this tool. Align your cursor just outside the upper-left corner of the photo. Click and drag toward the bottom-right corner until the edges of the circle are just outside the edges of the image.
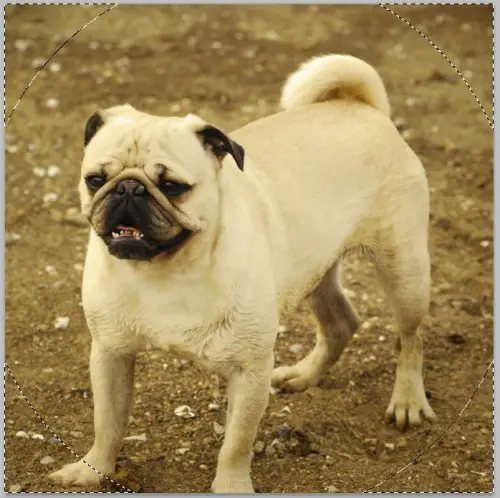
Step 8: Press Ctrl+Shift+I or go to Select > Inverse to select the opposite of what you selected before. Only the corners of the image should now be selected.
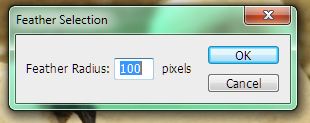
Step 9: Press Shift+F6 or go to Select > Modify > Feather. Type 100 in the box and click OK. This will greatly soften the selection. You may need to adjust this value according to the size of your photo (i.e. use a larger number for a larger photo).
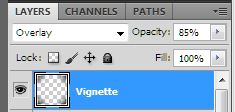
Step 10: With black set as the Foreground color, press G to open the Paint Bucket Tool and click inside one of the corners of the selection to fill it with black. Change the opacity of the “Vignetting” layer to around 85% and change the blending mode to Overlay. The Overlay blending mode will lighten the lighter parts of the image and darken the darker parts. Press Ctrl+D to deselect the image. The edges of the image, especially the corners, should look much darker and more dramatic.
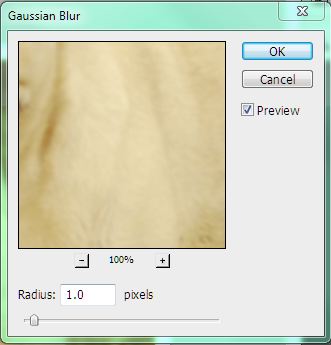
Step 11 (Optional): This step will show you how to achieve the Earlybird blur effect; however, it is optional since it does lower the quality of the photo a little (I prefer images without blur, so I did not include the blur effect in my final image). Save the image as a jpeg and include “blurred” in the file name. Open the jpeg in photoshop. Go to Filter > Blur > Gaussian Blur. A Guassian Blur will reduce noise as well as detail. Move the slider so that the blur is barely noticeable and the Radius value reads 1.0.
Create Earlybird Border (Optional)
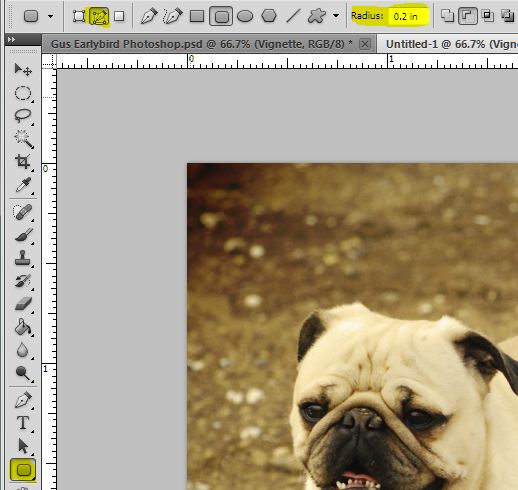
Step 1: Right-click the Rectangle Tool on the menu on the left. Select the Rounded Rectangle Tool. At the top, change the Radius to .2 in, and select the third icon from that left that says “Paths” when you hover over it. We will use the paths tool to turn the rounded rectangle into a selection rather than a filled shape.
Step 2: Starting just inside the upper-left corner of the photo, click and drag toward the bottom-right corner so that the edges of the rounded rectangle shape touch the edges of the photo.
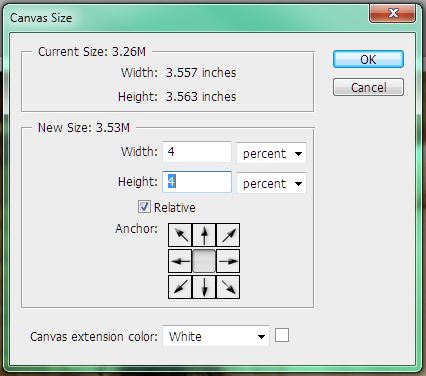
Step 3: Press Alt+Ctrl+C or go to Image > Canvas Size. Check the box next to Relative and change Width and Height to 4 percent. This will expand the size of the image by 4% so that the frame will cut off as little of the actual photograph as possible. There should now a white border around the image.
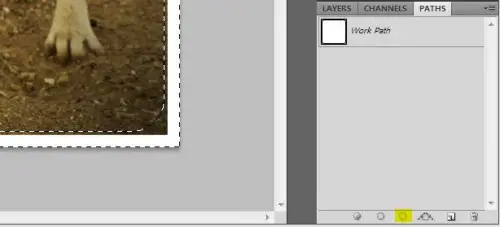
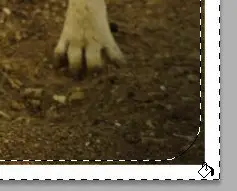
Step 4: Press Ctrl+Shift+N to create a new layer. Name the new layer “Border.” Click on the Paths Tab in the Layers box. Click the icon that looks like a circle made of dashes and says “Load path as selection” when you hover over it. This will turn the rounded rectangle path into a selection instead. Press Control+Shift+I to select everything opposite, or outside, the rounded rectangle selection.
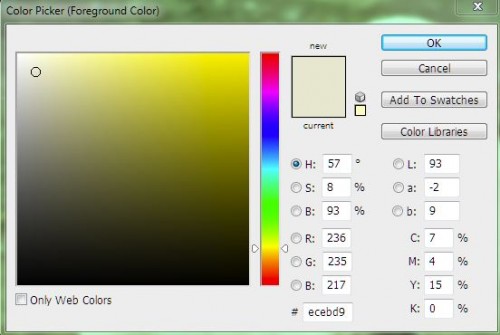
Step 5: Click inside the Foreground color box to bring up the Color Picker menu. In the box next to the # symbol, enter the following code: ecebd9 . This yellow-gray color matches the color of the Instagram Earlybird border. Press OK. Using the Paint Bucket Tool, click inside the selection to fill the frame with this color.
Congratulations! You’ve just finished creating a high quality version of Instagram’s most popular photo filter, Earlybird. Feel like a pro yet? Check back soon for more Instagram filter tutorials!
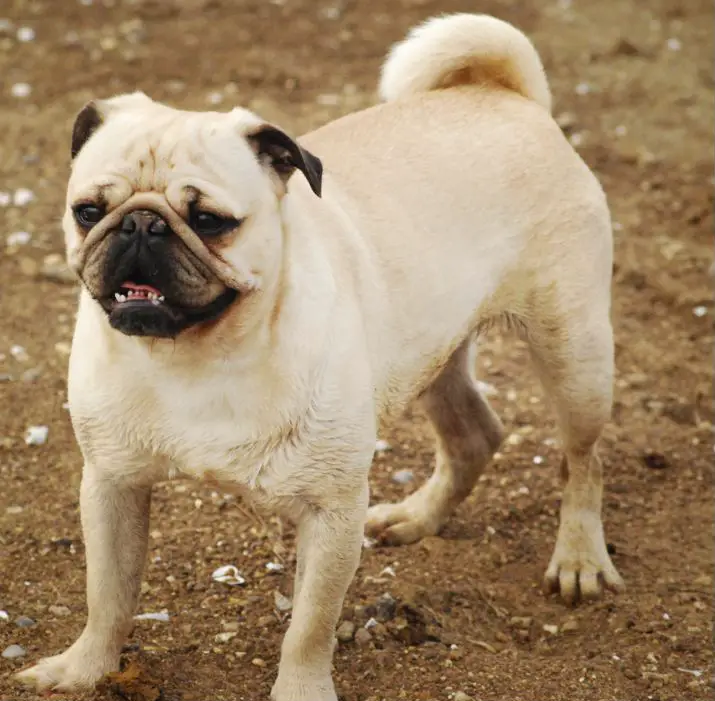
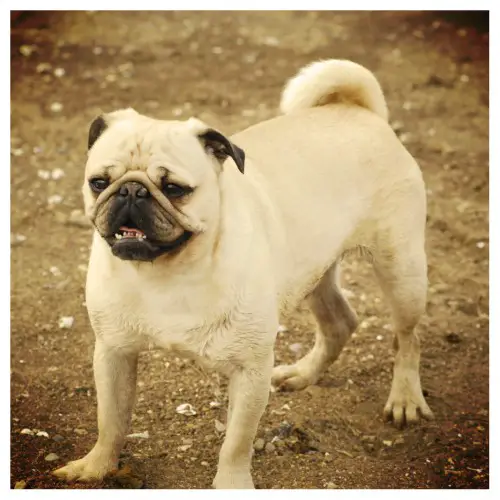
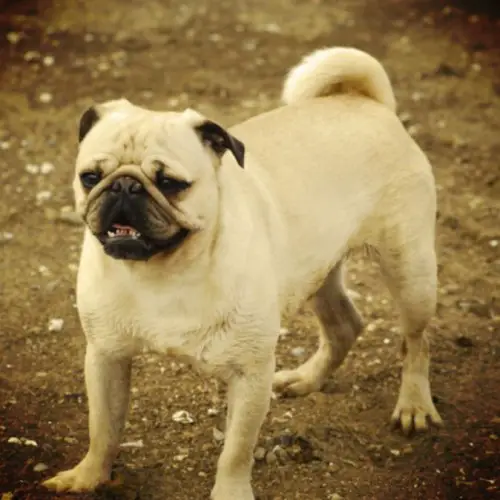
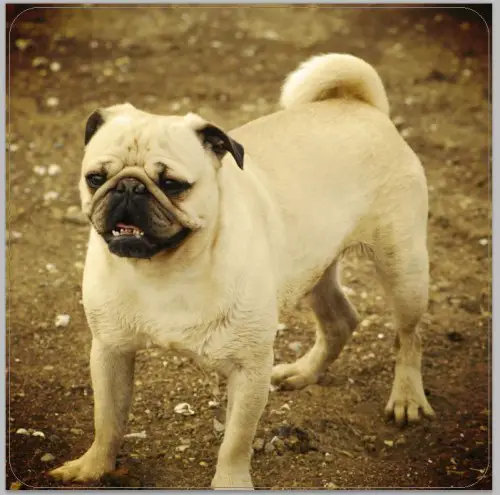
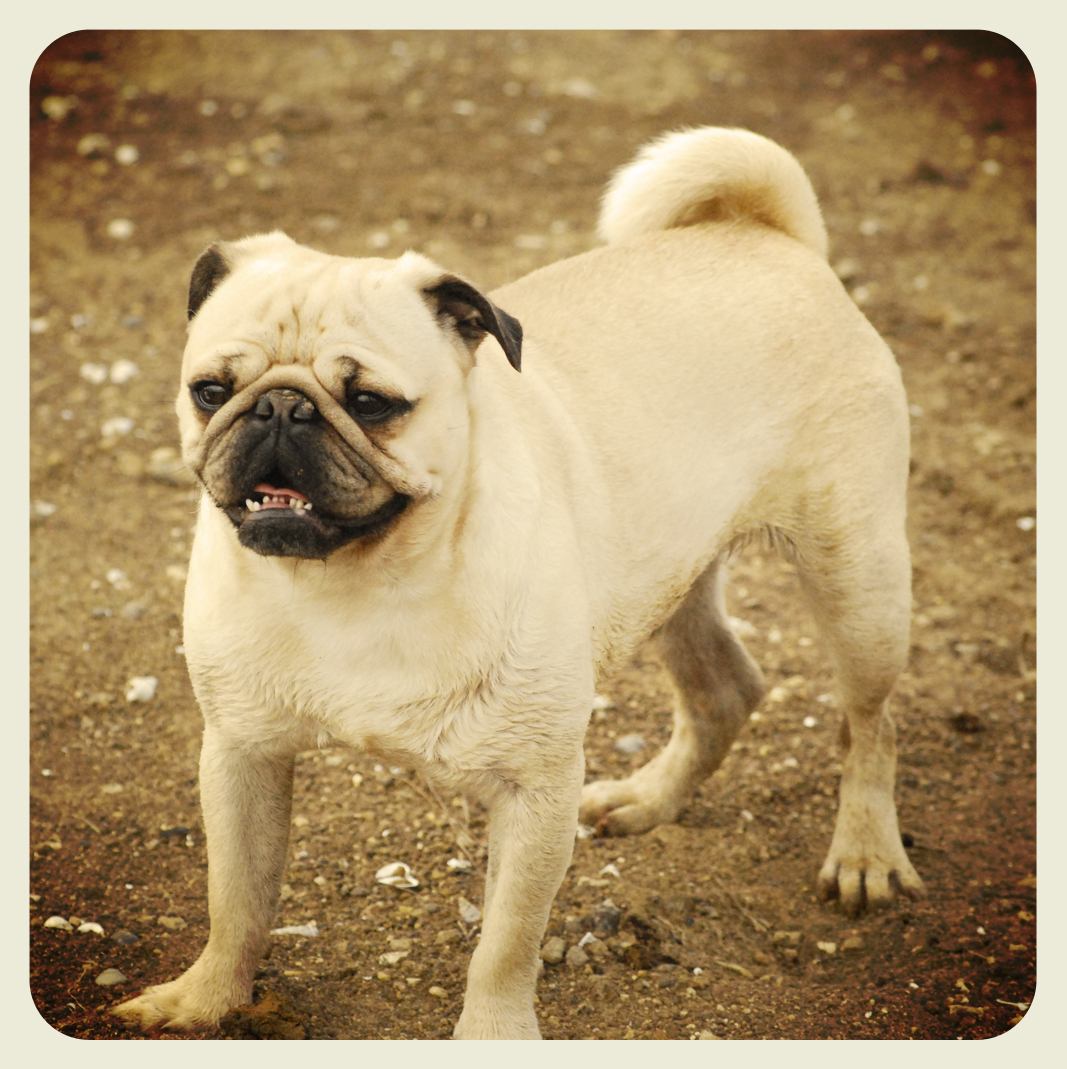
Here’s my finished, super-adorable product:





Good effort but not accurate.Check the following blog where the author makes 1:1 copies of all Instagram’s filters.
Nashville: http://gexxx.livejournal.com/784033.html
1977: http://gexxx.livejournal.com/784458.html
…more to come.
Use the “difference” layer blending mode in Photoshop to compare results. Good luck.
It makes no sense to me to try to get an EXACT copy of an Instagram effect using other means…if you want the exact effect, just use Instagram. Why would you WANT to spend all of this extra effort for the exact same thing?
Image size perhaps?
? It makes no sense to simulate Instagram to begin with. However, if you do, at least do it RIGHT.
Because you cannot use an Instagram image in a printed piece because the resolution is too low. Images manipulated in Instagram are 72 dpi. Images for printing need to be 300 dpi.
This effect is blowing out the highlights, see the tail and face, poor filter quality
So? It -barely- does this at all. That doesn’t mean this filter/effect is “poor quality”. If having those few, small sections be pure white means more dramatic contrast overall…it is worth it. Plus, it is a tutorial, with very thorough, well-written instructions. If you care so much, just adjust that part of it to your personal taste. That’s the point, and the author says to do this as well.
Which made it look better than the original. Salty photographers bashing anything Instagram related. /smh
Let’s just say that JonHoffman is Melanie Mayne’s alter ego who chops down any criticism to this article. Let’s just say…
I see a fan of conspiracy theories here 🙂 Stefan, what’s your opinion on this article anyways? 🙂
If I had an alter ego, she would be female and named Tali Vas Brilliant. She would also go on epic adventures to save the universe and definitely would not have time to comment on articles.
Nice one Melanie – I was looking for this. Good job.
“Cell phone cameras and apps like Instagram have made it possible for anyone to practice and enjoy the art of Photography.” Um, no. The ‘Art’ (capital A) of photography takes years to learn. Just because any idiot with a cell phone can take a craptastic snapshot and screw it up even worse with a obnoxious filter does not make it ‘art’. Besides, if you have a decent image taken with a real camera, why on Earth would you screw it up with some crappy Instagram effects?
Agreed! You should definitely check this post – https://www.photodoto.com/15-reasons-why-your-instagram-followers-hate-you/
No one said Instagram was “art” (which is NOT capitalized by the way.) Instagram is a fun tool for people to share photos and has a bunch of gilters to make them more interesting.
And it doesn’t take years to learn photography. Someone can pick up a DSLR and in one day have a pretty good knowledge of it. As in any art form, you are constantly learning anyhow. Get the fuck over yourself, you pretentious fuck. Photography isn’t an exclusive club anymore, anyone can be one.
We apply Instagram filter because the films that those filter are based on no longer exist. So how about you put away your temporal hipster soap box and just enjoy life a little. Maybe take a well composed picture and share it with a few friends. It will be fun, I swear.
Wow, this was exactly what I was looking for. Thanks! I’m floored by the obnoxious comments, though. What are your problems? If you don’t have anything nice to say, than don’t say anything at all. What is the point of coming on here to bash something helpful. Some are offended, some are critical. If the idea of Instagram angers you, or you have no desire to create what this blog is trying to achieve, than why the heck are you even here reading it?!
Thank you Stacy. I have been looking for some blogs to follow in which people have constructive things to say, but once again, I find myself disappointed.
I happen to feel Instagram filters give photos a nice level of view-ability and enhance them past the “normal” colors that are life.
Thank you for showing me some new tools. EXACTLY what I was after. Thanks again.
Amazing! Thanks a lot!
Very nice, thanks. Especially how to make the curved frame. Have you done one for Brannan or Kelvin?
Very Nice (Y)
Wonderful.. Many thanks!
Nice tutorial, thank you 🙂
this is very nice. we like so much and its so simple
thank’s .this tutorial very help me to know the graphics designs