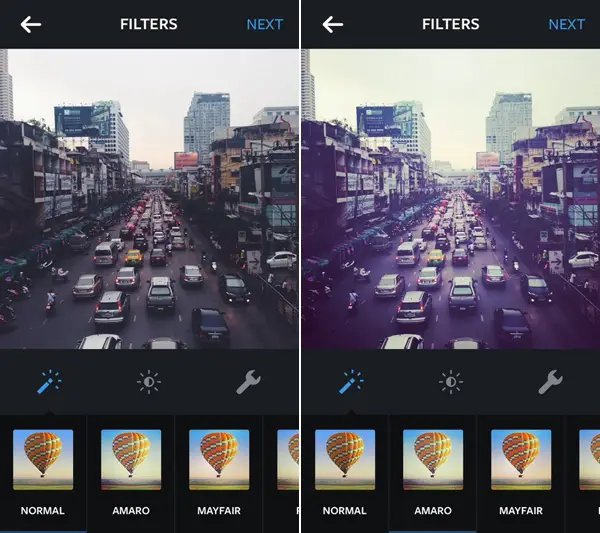
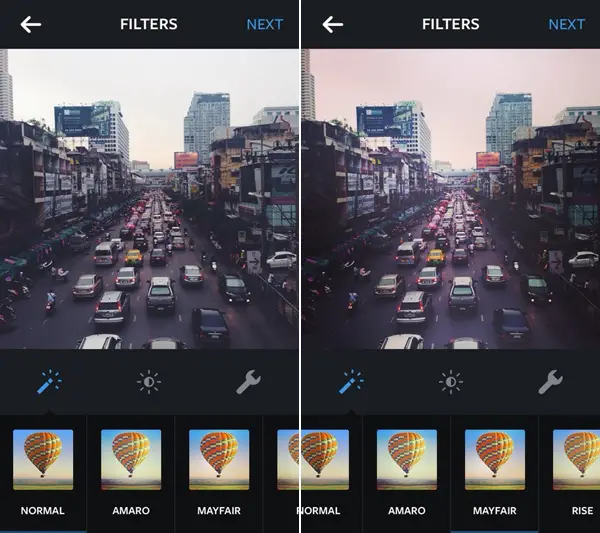
With over 100 million users worldwide on both iOS and Android devices, Instagram’s success as a mobile platform and social network is clear to see. These days, it has an expanded web presence, so there are more opportunities than ever to show off your photography skills. Instagram’s 20 filters that fit a handy app are a great playground for photographers to have fun with their images.

If you want to create high-quality, post-edited images, you should use some editing software for it, not a mobile app. For instance, you can use Photoshop to recreate some Instagram filters. If you have ever wanted to give your DSLR pictures some retro feeling, take the following steps to mimic Amaro and Mayfair Instagram filters. The advantage of this method is room for creativity as you can customize each filter to add your own personal touch. So start with Amaro and Mayfair Instagram photo effect tutorials. They’re pretty short and easy-to-follow; even if you’re new to Photoshop, it won’t take a long time to create each photo filter.
Amaro
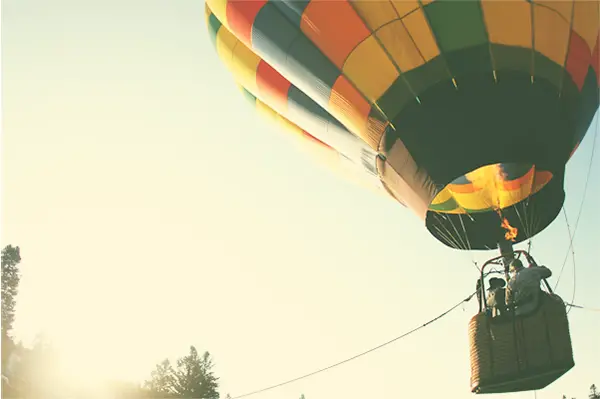
Amaro filter was created by Instagram’s creator, Cole Rise, for Instagram v2.0. Amaro filter gives your photos a film-inspired and gorgeous look. The Amaro filter adds light to the images, with a center focus; it darkens around the edges. It increases exposure of the image.
As a result, exposure adds some extra light to the photo. Sometimes, it makes the result a little tough. This filter is cool for dark photos. You may reach the same result by leaving the dark photo out in the sun for a long time.
Note: For this tutorial, I used Adobe Photoshop CS5 on Windows.
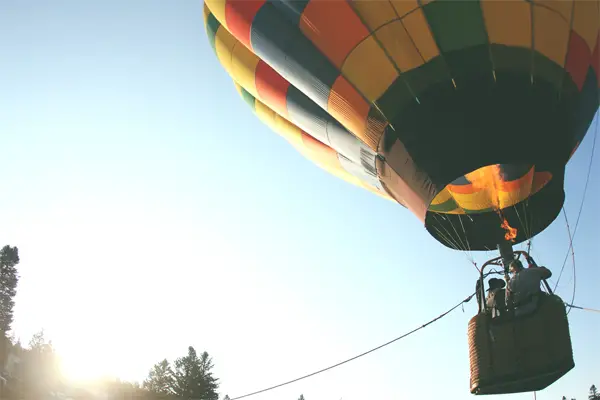
- Open the photo you’re going to edit in Photoshop. Press F7 to ensure that the layer palette is open.
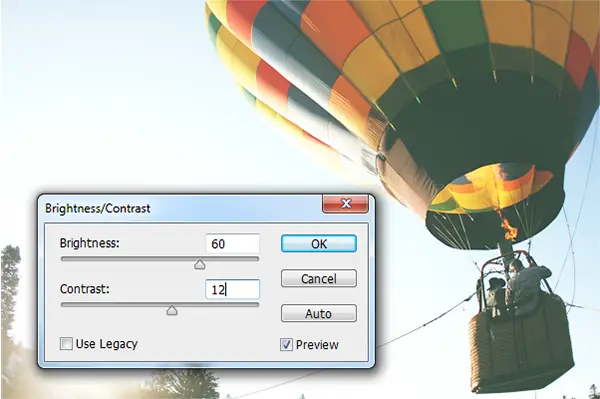
- Increase the brightness and contrast of your image by going to Image > Adjustments > Brightness/Contrast. And change the setting as shown below.
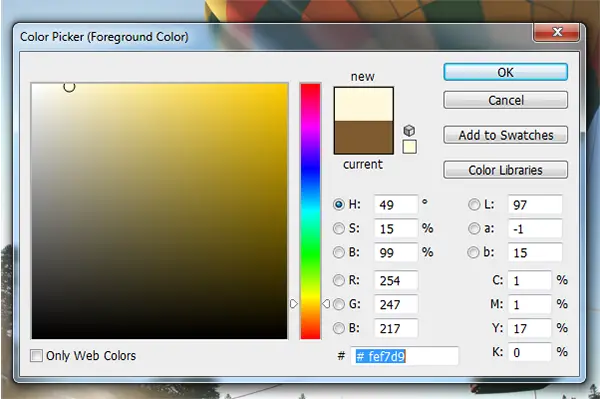
- To add a soft yellow light, create a new layer over the photo (Shift+Ctrl+N). Or just go to Layer > New Fill Layer > Solid Color. Play around until you find a proper shade, or you could just enter the shade I used. It’s #fef7d9. Click Ok.
- Change the “Normal” mode to “Multiply” in the bottom layer panel. This will add a soft, yellow light over your image.
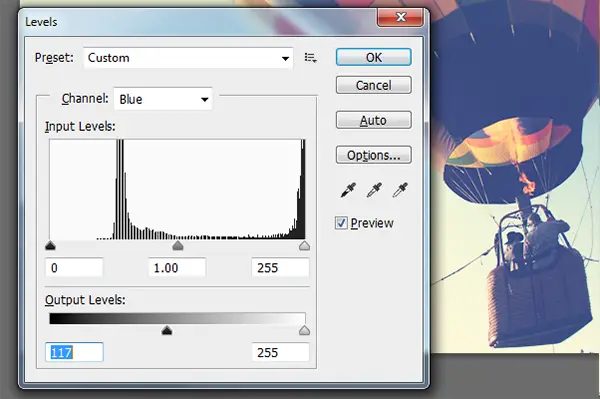
- Now go to the Level Menu (Ctrl+L) by going to Image > Adjustments > Levels. Change the channel to Blue in the drop-down menu, and increase the Output levels from 0 to 117 by dragging the arrow. This action should add the blue tint to the image.
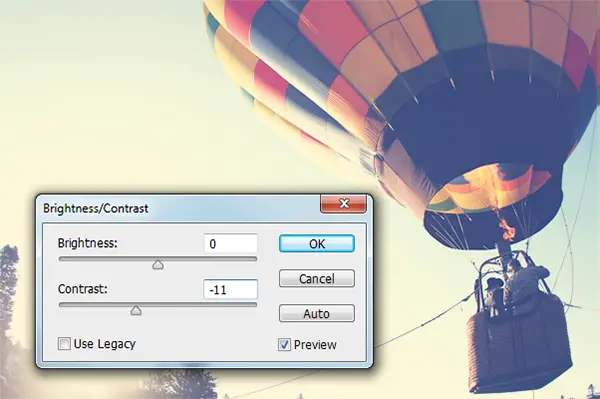
- To give your photo a more faded look, change the Contrast a bit. Go to Brightness/Contrast and decrease the Contrast to -11.
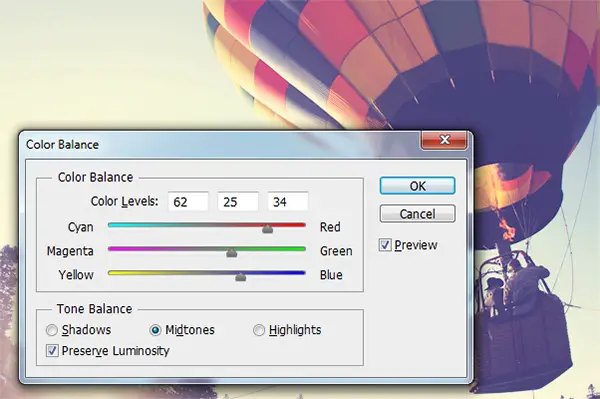
- Then, open up Color Balance with Ctrl + B, or Image > Adjustments > Color Balance. Make sure the radio dial below is set to “Midtones.” Play around until you have a good blend of colors. As you see, I chose to increase my Red, Green and Yellow levels.
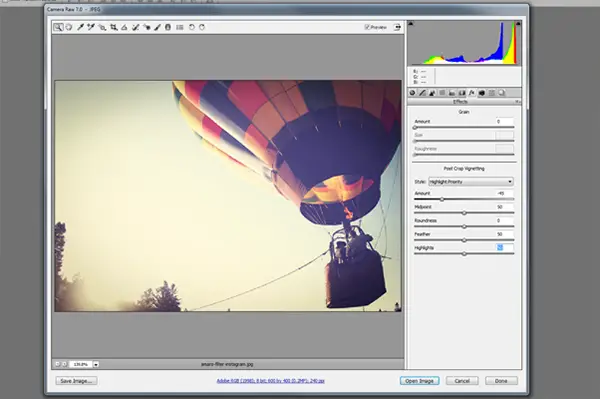
- The final step would be saving an image in Camera Raw. To do this, exit out of the current window, and go to the File > Save As > Camera Raw (and choose Camera Raw format in the drop-down window). Then, exit out of the current window, and go to the File > Open As > Camera Raw. Select your image, and then select “Camera Raw” in the “Format” drop-down menu.
- Once you have the file open in Camera Raw, select the Effects menu on the right-hand side of the editor. Select the “Highlight Priority” to the “Style” in the drop-down menu. Move the “Amount” slider left to make a black vignette around the edges of the photo. I made it -45. Once you’re satisfied with the vignette, move the “Highlights” (I made it 50) slider to the right, so that the vignette will not affect the highlights too much. Click “Save Image” when you’re done.
And that’s it! The Amaro Instagram photo effect is done! My final result:
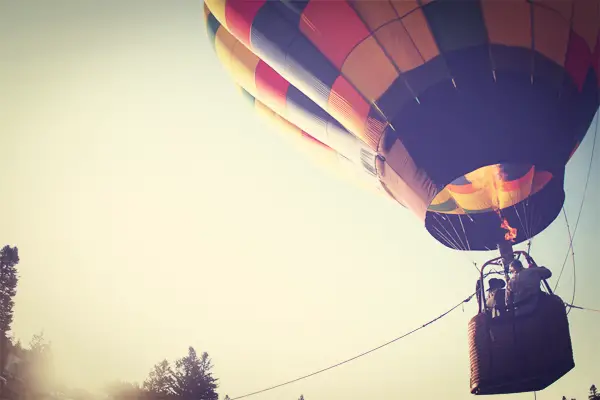
You can сompare the “before” and “after” images below:

Mayfair
Mayfair filter was also created by Cole Rise for Instagram 3.4.0. It has a warm, pink tone, subtle vignetting that brightens the center of the photograph, and a thin black border. Mayfair works great with evenly and well-lit scenes.
As you know, different filters work for different types of images. Marketing analytics firm TrackHaven found that Mayfair and Inkwell work best, along with no filters at all.
- Open the image you’d like to edit in Photoshop.
- Duplicate the original layer twice by clicking on the left mouse button and pressing the Duplicate Layer.
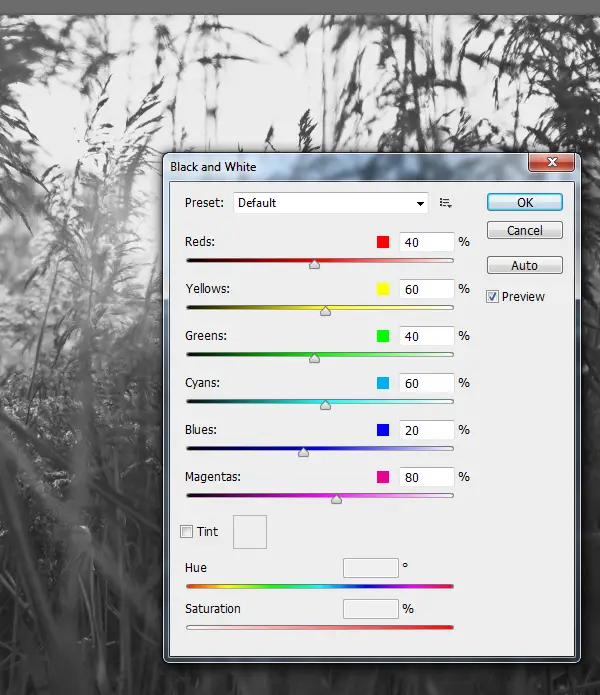
- Go to Image > Adjustments > Black & White and press Ok. Now your image should be black and white.
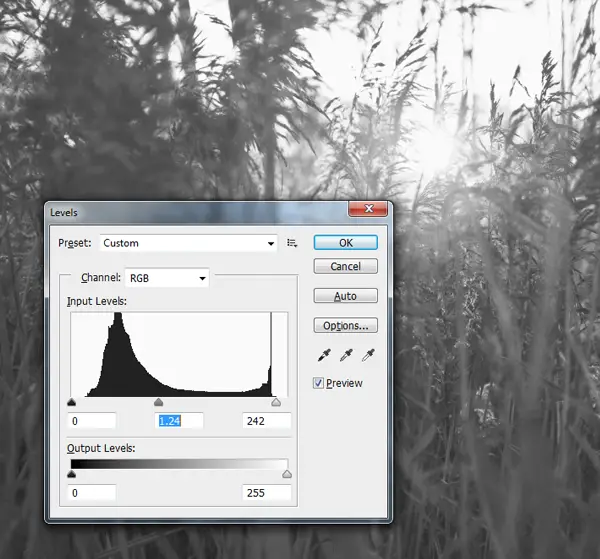
- Next, click Ctrl+L to open Levels. And play around with black-and-white colors to make your image look as nice as you like.
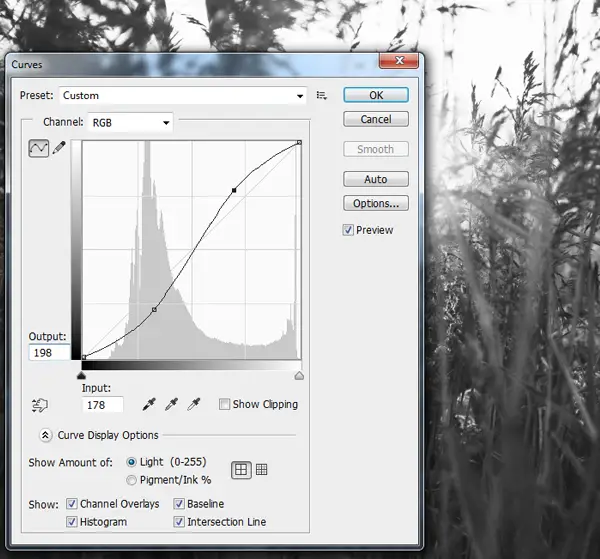
- Then go to the Curves (Ctrl+M), and make the S curve like on the picture below:
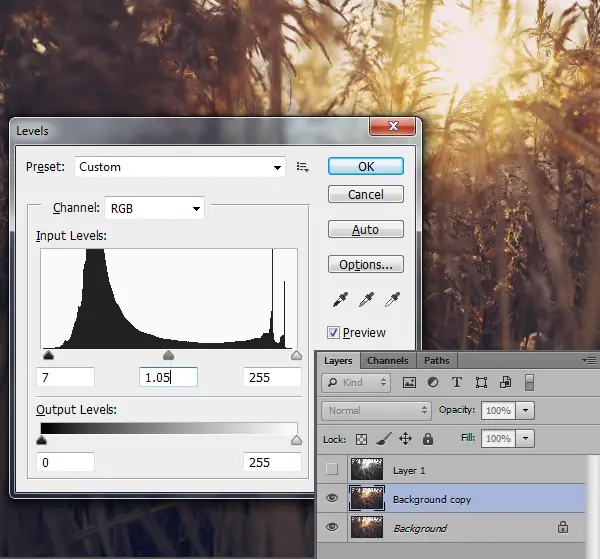
- It’s time to make the first background copy visible and make the second invisible instead. Click on the eye icon near the layer.
- Open Levels again to play around with contrast and brightness again, but only on the first copied layer. After that, do the same S thing with Curves again.
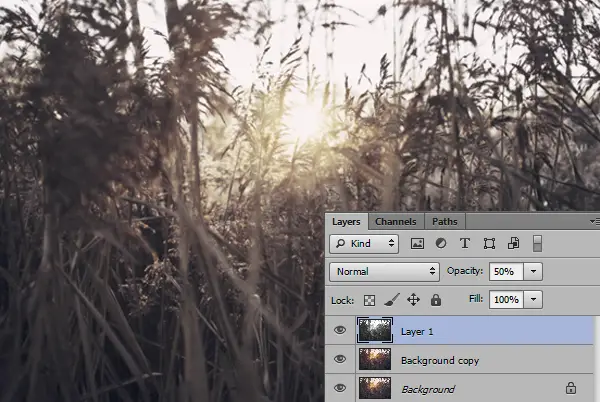
- Next, go to the black-and-white layer, and change Opacity into 50%. It should look like this:
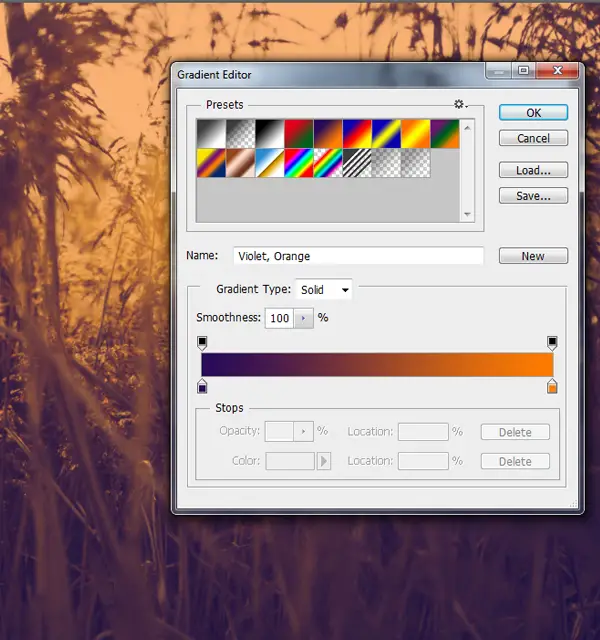
- Go to the Gradient map in the right-hand Adjustments menu, and choose Violet/Orange from the default presets.
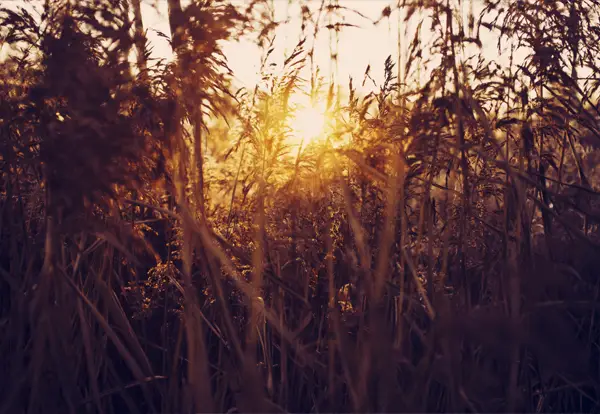
- Change the blending mode of this layer to the Soft light and also bring the Opacity down to 75% (it depends on the image, so change it as you like). The photo will look like this:
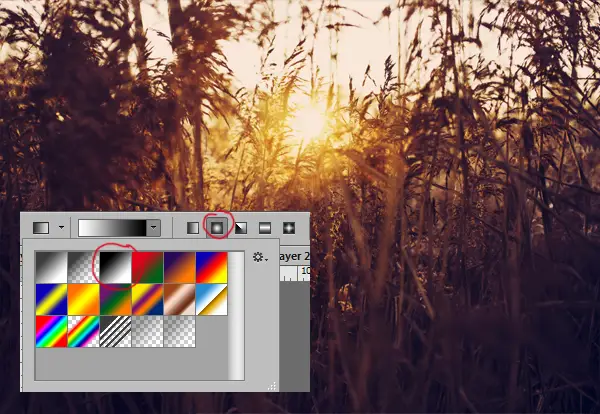
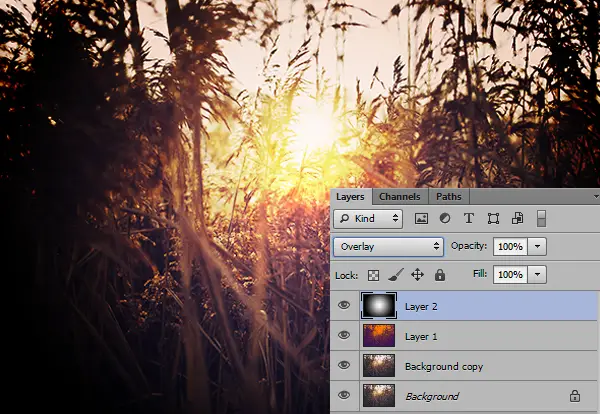
- Finally, we need to add a vignette look to the image. Create a new Layer (Ctrl+Shift+N). Take the Gradient Tool (Shift+G), choose Radial Black and White Gradient, just like shown below:
- Press Shift and draw a line from the center of the image to the other side with your mouse. It should make a gradient over the whole picture. Change the blending mode to the Overlay. Here is how my image looks like:
- Now take the Erase Tool (Shift+E), and erase the core of the image (on the Gradient layer), passing the edges. So, as a result, you should get something like you see below!

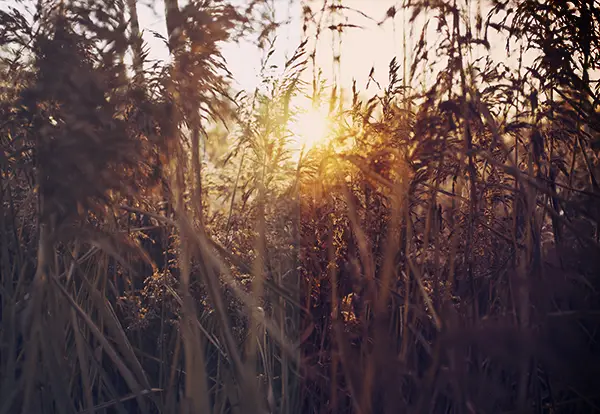
And that’s it! The Mayfair Instagram filter is done. You can compare “before” and “after” images below:
Conclusion
I hope these Instagram filters tutorials were helpful for you, and my efforts were worth it. Also, be sure to check out our previous tutorial on how to create Earlybird Instagram filter in Photoshop.
Don’t get involved in sharing photos on Instagram too much, as your Instagram followers may already hate you! I’m kidding 🙂 It’s all about having fun with your photos and sharing your emotions with friends.
Have something to add to these tutorials? Please, share with us in the comment field below. Also, feel free to show off your edited photos!


awesome 🙂
Thanks, Caitlyn 😉
Great tutorial. Thanks!
this is very cool! will you do tutorials for all the filters? I also like the Afterlight filters 🙂
Hey Julia,
Yep! I’m going to cover all Instagram filters in my future tutorials, and I think the next filters would be Valencia and Lo-Fi 🙂
I need aden filter. Where can I find the tutorial?
It’s amazing,so easy to do but the result is even better then when you do it thru instagram, not to mention you can edit some more details while you are there and make the photo more powerful! I did the same thing in PaintShop
Thanks! Great tutorial. I used it in Gimp instead of PS and it works anyway 🙂
When someone will get Photoshop actions pack then It would be more easier!
I do these thing using Adobe Photoshop cause of its amazing filters and effects. Thanks for letting us know about some more software.
Amazing! I love your pictures, and what a wonderful tips !!
Love your filters as well!!
Wow this is a wonderful tutorial!
Wonderful techniques and idea about filters. Most of the time i use filter in Adobe Photoshop software. It would be better if y add all Instagram filters in the article. Hope to see all Instagram filters in a single article.