Perhaps this is one of the biggest reasons why people enjoy photography: to capture the beauty that they see. It’s no wonder that people of all ages are attracted to the camera, especially young and curious children. Wouldn’t you feel the same way when you look at the smiling faces of adults after getting that one perfect shot?
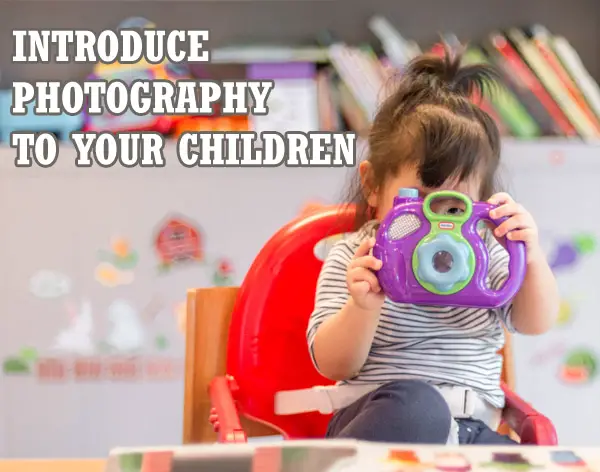
So why not try to introduce photography to your children which will open up a whole new world for them.
But before you hand out a camera to a child, you might be asking yourself a very specific question. Can children learn photography? Yes, they absolutely can! There are even cameras designed specifically for them. Introducing photography to your children will encourage them to see the world in a new way with a camera. But why should children learn photography? In fact, there are also numerous advantages that children can gain from the process of learning photography.
- Photography can help children develop their creativity and self-expression: By taking photos, children can learn to look at the world in a different way and find unique ways to capture and share their perspectives.
- Photography can improve children’s observation skills: As children learn to frame and compose their shots, they’ll also learn to pay attention to detail and notice things that they might have otherwise overlooked.
- Photography can teach children about technology: Photography involves using a camera and often editing the photos on a computer or phone. Learning about these tools can help children develop valuable technical skills.
- Photography can be a fun and engaging hobby: Children can find joy and a sense of accomplishment in taking and sharing their photos, which can boost their self-esteem and confidence.
- Photography can be a way for children to document and share their experiences: By taking photos, children can document and remember special moments and share them with others.
The most basic way for children to delve into photography is to give them a simple camera. Your kids can just point, press the button and see the result on screen. When their skills improve, they can begin to explore their creativity with a more advanced camera.
Photography Activities to Try Out
Introducing photography to children can be rewarding and challenging at the same time. These are some photography activities that you and your kids can try out.
Take pictures of what they love
Encouraging children to take pictures of things they love is a great way to spark their creativity and interest in photography. It can also be a fun and rewarding activity that helps children develop their artistic skills and sense of self-expression.
To get started, have your child think about what they are passionate about and what they love most in the world. This could be a favorite toy, a beloved pet, a cherished family member, or even a special place that holds meaning to them. Once they have identified their subject, encourage them to take a series of photographs that capture its essence and reflect their feelings towards it.
Encourage your child to experiment with different angles, lighting, and compositions to create unique and interesting images. Encourage them to use their creativity and try out different techniques to make their pictures stand out.
As they work on their project, help your child to think about what makes a good photograph and discuss their ideas and observations with them. This will help them develop their critical thinking skills and gain a deeper understanding of the art of photography. Taking pictures of what children love can be a fun and enriching activity that helps them develop their artistic skills and discover their own unique perspective and vision.
Take your child out for a walk
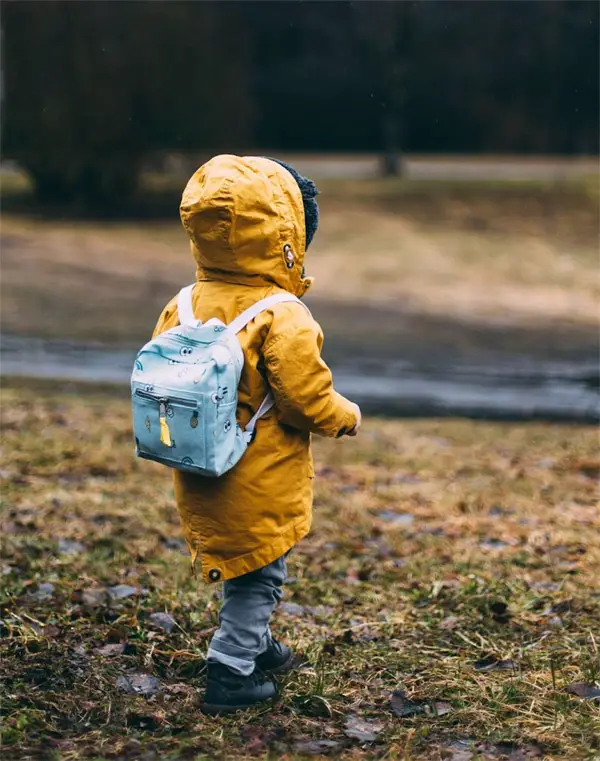
Take a walk and take pictures of interesting objects or scenes you come across. This is a simple and fun activity that allows children to practice their observation skills and look for interesting subjects to photograph. Encourage your child to look for patterns, textures, and colors in the environment. This can help them develop an eye for detail and composition.
In addition to the educational benefits, taking your child out for a walk to learn photography can also be a great opportunity for bonding and spending quality time together. Going for a walk allows you to explore your local neighborhood or a nearby park and discover new and interesting things along the way. It can also be a good way for your child to get some exercise and fresh air, which is important for their overall physical and mental health. So why not grab your camera and take your child out for a walk to learn photography today? Not only will it be a fun and educational activity, but it can also be a great way to promote healthy habits and spend quality time together.
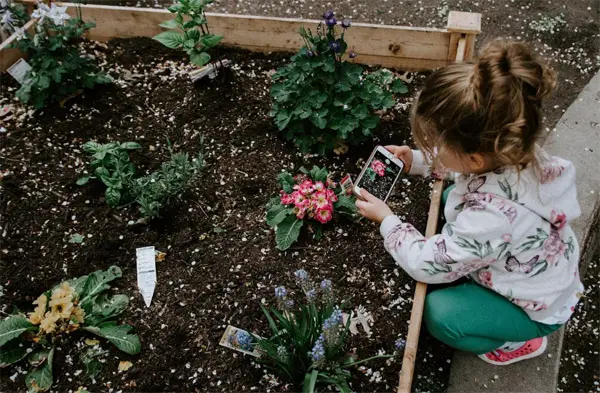
Shoot things with specific colors

“Shoot things with specific colors” is a fun and educational photography activity that can help children practice their composition and color skills. To begin, have children choose a specific color or color palette (such as shades of blue or rainbow colors) that they want to focus on in their photos. Then, have them search for subjects in their environment that match the chosen color or colors. This could include objects, people, or landscapes. Encourage children to experiment with different compositions and angles to create visually interesting photos.
Examples:
- Take a close-up photograph of a colorful flower, using the chosen color as the main focus of the image.
- Use colored lighting or filters to create a moody or surreal effect in a portrait of a friend or family member.
- Create a still-life scene with objects in the chosen color and photograph it from different angles and with different lighting setups.
- Take a photograph of a colorful street art mural or graffiti and use the chosen color as a backdrop for a portrait of a friend or family member.
As they take their photos, have children think about how the chosen color or colors contribute to the overall mood and meaning of the image. This will train their eyes to carefully observe their surroundings and spot an object they want to photograph. This activity can help children learn about how color can be used to create emotion and impact in a photograph. Other than that, your children will also be learning their colors.
Use polaroid cameras
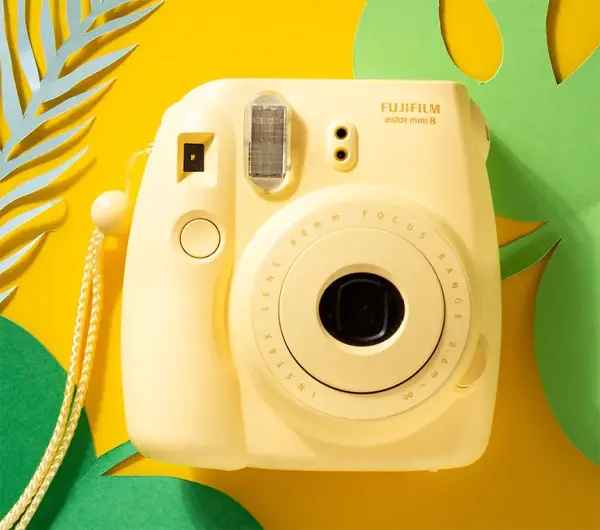
These days, there are so many instant Polaroid cameras available to use. Your children will love to use those cameras because of their simple use and variety of colors. What makes them even more appealing is the process, from capturing to waiting for the film to develop.
It’s always fun to see how the white film slowly turns to colors and forms a complete picture. This can serve as an exercise for your children to be patient. Not all films will come out perfect so your children can also learn to embrace imperfections that they have captured.
If you have never used a polaroid camera before, here is how it works:
- Make sure the battery is charged or the camera has enough film. You will need a new film pack for every 10-15 photos you take.
- Open the camera’s viewfinder by pulling it out or flipping it up.
- Look through the viewfinder and compose your shot by aligning the subject within the frame.
- Press the shutter button halfway down to focus the camera. The camera will make a clicking sound when it has focused.
- Press the shutter button the rest of the way down to take the photo.
- Wait for the photo to develop. The photo will begin to appear within a few seconds and will fully develop within a minute or two.
- Carefully remove the photo from the camera. Be sure not to bend or crease the photo as it develops.
- Enjoy your instant polaroid photo!
Make a pinhole camera
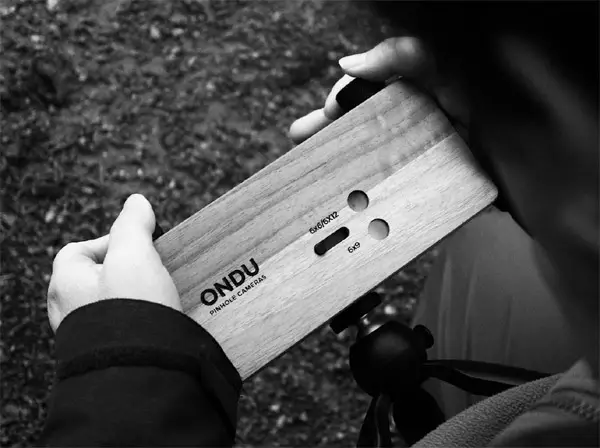
One fun photography activity for kids is creating a pinhole camera. Pinhole cameras are simple cameras that use a small hole in place of a lens to focus light onto film or a digital sensor. They’re easy to make and provide an opportunity for kids to learn about the basic principles of photography, such as how light and aperture work.
Follow these steps to make your own pinhole camera:
- Gather materials: You’ll need a cardboard box, some aluminum foil, a needle, and some tape.
- Cut a small hole in one side of the box: Use a pair of scissors or a craft knife to cut a small hole in one side of the cardboard box. The size of the hole will determine the size of the image that’s formed, so you can experiment with different sizes to see what works best.
- Cover the hole with aluminum foil: Cut a small piece of aluminum foil that’s big enough to cover the hole. Tape the foil in place over the hole, shiny side facing out.
- Punch a tiny hole in the center of the foil: Use the needle to punch a tiny hole in the center of the foil. This hole is what will allow light to enter the camera and form an image.
- Tape a piece of paper or film inside the box: On the opposite side of the hole from the aluminum foil, tape a piece of paper or film in place. This is where the image will be formed.
- Cover the hole with your finger to take a photo: When you’re ready to take a photo, cover the hole with your finger. Then, uncover the hole for the desired amount of time to expose the film or sensor to light. The longer you leave the hole uncovered, the more light will enter the camera and the brighter the image will be.
Kids will have a blast experimenting with different exposures and learning about the science behind photography. Plus, they’ll have a unique and personal camera to show off to their friends and family.
Photo scavenger hunt
A photo scavenger hunt is a fun and educational photography activity for children. To play, create a list of objects or scenes that children need to photograph, and send them on a scavenger hunt to find and photograph each item. The list can include a variety of subjects, such as animals, plants, landmarks, or everyday objects, and can be tailored to the children’s interests and abilities.
To play the scavenger hunt, children can use a digital camera, a smartphone, or a film camera to take photos. They can work individually or in teams, and can use any camera settings, techniques, or props they like to capture each item on the list. As they search for and photograph each item, children will practice their observation skills, as they need to look carefully at their surroundings to find and photograph each item on the list. They will also practice their composition, as they need to arrange the objects or scenes in a visually pleasing way in the frame. And they will practice their creativity, as they can use different angles, perspectives, and techniques to capture each item in a unique and interesting way.
Once the scavenger hunt is complete, children can review their photos and share them with others. They can discuss the different techniques and approaches they used to capture each item, and reflect on what they learned and enjoyed about the scavenger hunt. A photo scavenger hunt is a great way for children to learn about photography and have fun at the same time.
Set up a mini studio and have fun with it
For more dramatic and fun backdrops, try some of these ideas:
- Use colorful sheets or paper as backdrops: You can use sheets or paper in a variety of shades and patterns to create different moods and effects. For example, you can use a bright and vibrant red sheet to create a bold and energetic look, or a soft and pastel blue sheet to create a calm and serene feel. You can also use patterns, such as polka dots, stripes, or flowers, to add interest and texture to your photos.
- Use props and accessories to create a scene or theme: You can use a variety of props and accessories to bring a scene or theme to life. For example, you can use toy soldiers to create a battlefield, or dress up dolls or stuffed animals in costumes to create characters. You can also use household items, such as pots and pans, to create a kitchen scene, or use blankets and pillows to create a cozy fort.
- Create a fantasy world with mythical creatures, enchanted forests, and magical lands: Use your imagination to create a fantasy world filled with mythical creatures, enchanted forests, and magical lands. You can use toy animals, dolls, and other props to bring these worlds to life, and use creative lighting and backgrounds to enhance the magic.
- Use household items to create a backdrop: You can use everyday household items to create a backdrop for your photos. For example, you can use a kitchen counter to create a cooking scene, a living room couch to create a cozy atmosphere, or a bedroom wall to create a private retreat.
- Use outdoor locations as backdrops: You can use outdoor locations as backdrops for your photos, such as a park, a beach, or a mountain vista. These locations provide a natural and scenic backdrop for your photos, and can add a sense of adventure and exploration to your photos.
Photojournalism for kids
Photojournalism is a type of journalism that uses photographs to tell a story or convey a message. In this activity, children will have the opportunity to practice their photography skills while learning about storytelling and research.
- First, have children choose a subject they are interested in, such as their favorite hobby, a local landmark, or a current event. Encourage them to research the subject to learn more about it and gather ideas for their photo essay.
- Next, have children plan out their photo essay by deciding on the main message or theme they want to convey and the types of photos they will need to illustrate it. For example, they might need photos of people engaging in their favorite hobby, close-ups of interesting details, and wide shots of the overall scene.
- Then, have children take a series of photographs that tell the story of their chosen subject. Encourage them to experiment with different compositions, angles, and lighting setups to add interest and depth to their photos.
- Finally, have children select their best photos and arrange them in a logical order to create a cohesive narrative. They can add captions or titles to their photos to help explain what is happening in each one.
Find fun ways to use the images they’ve taken
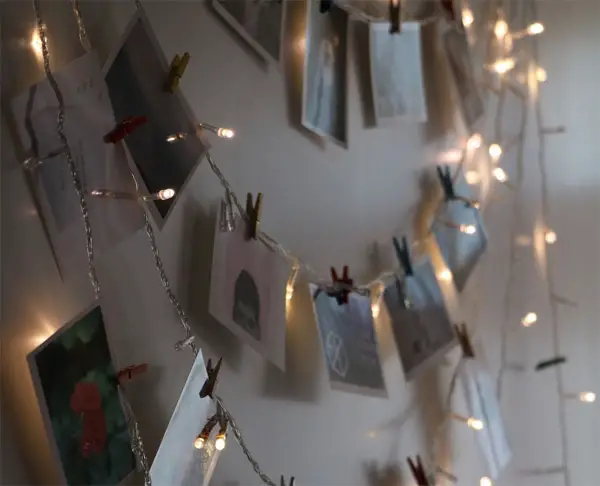
There are many creative and fun ways to display children’s photographs, depending on their interests and preferences. Some ideas for displaying children’s photographs include:
- Creating a photo wall: Hang a selection of children’s photographs on a wall or section of a wall to create a visual display of their work. You can use frames, clips, or magnets to hang the photos, and mix and match different sizes and styles to create a cohesive and visually interesting display.
- Making a photo album or scrapbook: Use a photo album or scrapbook to create a physical record of children’s photographs. You can add captions, notes, and other embellishments to add context and meaning to the photos. A photo album or scrapbook is a great way to preserve children’s memories and allow them to look back on their work over time.
- Printing and framing children’s photographs: Print children’s photographs and frame them to create a more formal and professional display. You can use different sizes and styles of frames to suit the photos and the decor of the room. Framing photographs is a great way to showcase children’s work and give it pride of place in your home.
- Using digital displays: Use digital displays, such as a digital photo frame or a tablet, to showcase children’s photographs. You can create a slideshow or a gallery of children’s photographs and display them on a digital device for others to enjoy. Digital displays are a convenient and flexible way to display children’s photographs, and they allow you to easily update and change the display as new photos are added.
There are many other fun and creative ways to display children’s photographs, so encourage your kids to get creative and find a display method that works best for them.
Try photography workshops for kids
Attending photography workshops or retreats is a great way to introduce children to photography. A photography workshop designed for kids provides a fun and exciting way to learn about photography with children of their age.
Websites like AllPhotographyCourses.com can help you find suitable workshops for your child. You can find the best tutor, location, group size and price according to your needs.
By attending workshops, you can have the children share their best photos with the group and give feedback on each other’s work. This activity can help children learn about different photography techniques and subjects, as well as develop their creativity and problem-solving skills.
More Tips from a Photographer
Below are some tips from Ray Davis for getting kids to pick up a camera:
“One of my day jobs involves working with special needs children and children in hospital. I do a lot of work with children on the autistic spectrum and children with learning difficulties, as well as with at-risk youth and kids with chronic illnesses. One of my absolute favourite things to do is introduce these children to photography. Not only do I enjoy sharing my passion but for a lot of the children I work with it is a unique way for them to express some creativity.
Introducing your children to photography, whether they have extra needs or not, is a great way to encourage creativity and decision-making and can give you a new activity to share with your whole family. Here are a few ideas to get you started (these tips are aimed for children from about 3 to 8 years old):
1. Don’t rush out and buy a new camera for your child’s first attempt. You’ve probably got an old camera somewhere, it doesn’t matter if it’s a film camera or an early digital camera with 8 MP, as long as it works it’ll do. If your child shows interest for more than a week or so then the chances are a new camera just for him will be used and appreciated (check out John’s post for ideas on which camera to buy). If the old camera is lying underneath that never-opened board game and once-used pair of roller blades from last Christmas, then it’s probably best to wait a few months and try again. Even if you just use an old camera and end up abandoning the project don’t forget to teach your child how to care for the camera (keep it switched off in it’s case when not in use, don’t touch the lens, use the wrist/neck strap) but don’t freak him out by telling him it’s really expensive and he better be careful. A better idea is not to equip him with a camera you’ll be angry about if it does get damaged.
2. Get back to basics. You might know about f-stop numbers, aperture, and depth of field but your child probably doesn’t even know how to hold a camera correctly. Start simple. Show her how to hold the camera so a blurry finger won’t appear in every shot. Explain how to open/close the shutter (or use the lens cap if the camera has one) and use the view finder and LCD screen. If your child is under 6 this is probably enough information, any more and they’ll tune out and be bored before they start. For older kids a quick explanation of the flash and zoom features can be included.
3. For their first foray into photography just let them go ahead and shoot. This will allow them to get familiar with the camera and also to take photos of the things they think are important (often toys, pets, and their bedroom will feature prominently) rather than things you tell them would look nice in a photo. A digital camera has the advantage of allowing a child to see the photos right away and removes the cost of processing film. But many children enjoy taking the film to a photo lab and then holding real photos in their hands (it often feels more like they’ve created something if they can hold it), so don’t be afraid to try a film camera. If you go with a digital camera put a small memory card in so that they’re limited to 20 or 30 shots (equivalent to one roll of film).
4. When you have plenty of time to sit down with your child, get the photos and look through them with him. Before you say anything remember that photography (like all art) is subjective. Just because it’s not what you would have done doesn’t mean it’s wrong. Try and find something positive to say, even if he’s taken 25 photos of a matchbox car. If he has taken lots of photos of the same thing, as him if he wished he’d had more film/memory so he could photograph some other things too. If the answer is yes it’s a good time to discuss decision-making and using limited resources (don’t just hand him a larger memory card, try and encourage him to be selective about what he photographs. Then later if he’s taking 25 photos of different things or using different perspectives and still feels he needs more shots you can give him the larger card to work with). And if he says no, at least you know those matchbox cars are really important to him!
5. Get some books or find some child-friendly web sites that showcase photography. Or better yet find a local photography exhibit or gallery and take a trip to see finished, framed photos. Try and look at a variety of different styles with you child and discuss which ones you and she like and dislike. Then discuss some of the different techniques used (tailor the language and detail to your child’s age level and attention span) and point out things like the angle, focus, distance, and framing.
6. Plan a photography outing either as a family, with friends, or just you and your child. You don’t have to go far, the beach, a playground, a hiking trail, or the zoo are all good places to try (although if you choose the beach be wary of cameras and water!). Encourage your child to photograph different things, landscapes, people, animals, and from different perspectives. Set and example yourself by photographing a variety of scenes and getting down on your knees or standing on a bench to try different angles. Most importantly, have fun and don’t forget to let you child share her finished photos with other people (her friends, grandparents, etc).
7. Remember to not rush this. If you really want your child to enjoy photography and be able to express himself though it then it needs to be an ongoing process. Trying to cram the whole learning experience into one day isn’t going to work. This is something you can re-visit and build on as he grows older and can learn new skills and techniques. And don’t forget all kids go through phases so if the camera sits unused for a few weeks or months don’t try to force him to use it, instead plan another photography outing for a time when you think he might be ready to try again (try going somewhere you haven’t been for a while so he has new things to photograph). Or encourage him to use his previous photos in an art project, or make an album with them, seeing his work might remind him how much fun he had and prompt him to pick up the camera again.”
I hope this article was helpful in helping you figure out how to get your kids interested in photography. Click the following link for a guide to kids portraits.


I introduced my son to photography a few months ago (he’s almost 3ys). He uses our point and shoot (canon ixus55) and loves it, especially as he gets instant gratification seeing his photos instantly on the viewer.
I definitely don’t agree about letting the kids use a traditional film camera. My daughter has produced a number of throw-aways. I would push for an old digital camera. To see the instant results is pretty motivating.
I’ve got my entire family hooked on photography and this post was very helpful. My wife still uses a 2MP HP digital but she gets good shots with it. I tell her to just shoot everything you see in any way (light, angle, depth) you can and we’ll throw them up on the computer. It works and she’s getting better and better. I’ll turn over my Nikon D100 to her when I get upgrade.
we play a game with cameras where my 5 year old zooms off round the house and takes some photos. she comes back and the rest of the family have to guess what the room she was photoing.
After a while she starts taking photos of more obscure parts of her chosen room to keep us guessing longer.
and best of all, you can sit in a chair and wait for them to come back with their photos !
great site by the way, keep up the excellent work