Photoshop. For photographers, web developers and graphic designers alike, its the go-to program for creating and editing professional grade graphics. And like every beloved piece of software, it has to have a strong foundation to build upon; a base system that supports all other operations. For Photoshop, it’s layers.
Operations we describe here are applicable to all Creative Suite versions of the software.
A Layer’s purpose in life
Layers are Photoshop’s way of organizing the content being produced within the software. They allow us to keep related content separate, and to make it easier for us to edit that content later. It’s almost impossible to imagine using the software in the days before layers were implemented.
Without layers, all content in an image would exist on the same plane; that is, any change applied to the image would affect the entire image, and there would be no way to easily modify a particular object, especially if that object overlapped other objects.
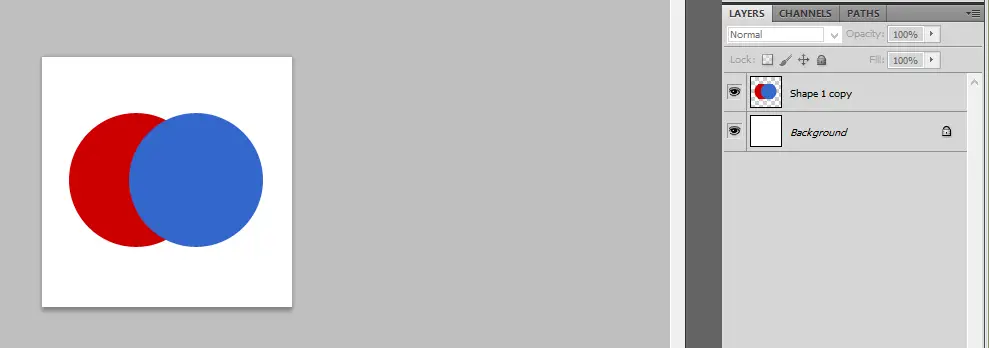
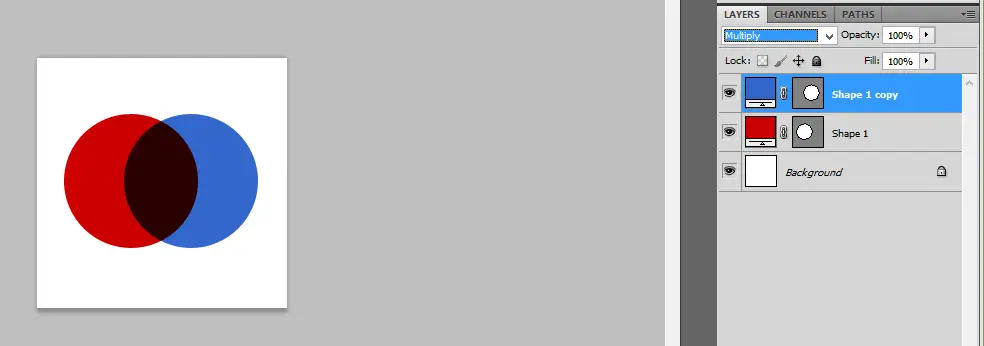
Imagine an image of two circles, one red, and one blue. If you needed the circles to partially overlap, you’d need to draw the circles precisely in their proper positions. Once the circles were in place, it would be difficult or impossible to edit them separately.
Enter layers. Since Photoshop 3, we have had the ability to place content or groups of content on separate layers, and those layers can be moved and edited separately. Even more helpful, these layers can now be organized further into folders, and can be modified with nondestructive adjustment layers.
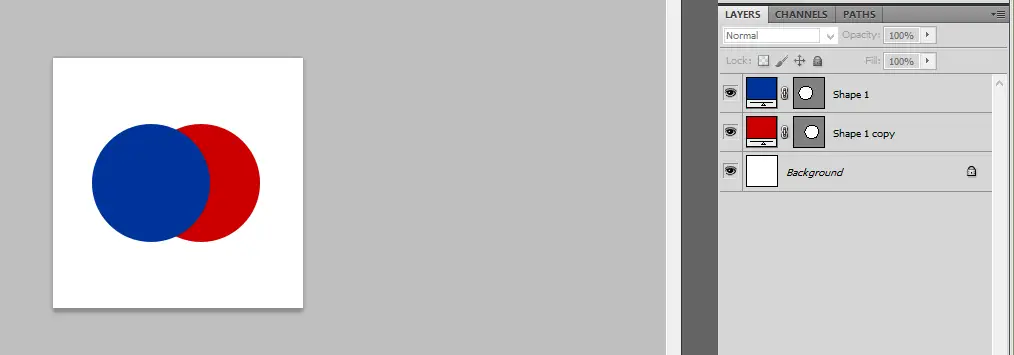
In our example above, we place each circle on its own layer. We can then perform independent actions on them, as well as move them around however we wish.
Creating and manipulating layers
The layers panel (Window > Layers) shows us all layers in the current image. This panel will also display the order of the layers, and any grouping, linking, or Smart Objects, which are special layers that contain multiple layers of content that can be modified non-destructively. A layer can be created by clicking the New Layer icon on the layers panel, or by clicking Layer > New > Layer.
Organizing your layers
One of the advantages of the layer system in Photoshop is the ability to keep them organized. This comes in handy when a project gets large and you’ve got layers coming out of your ears. We have a few options to satisfy our obsessive/compulsive tendencies, fortunately.
- Linking Layers
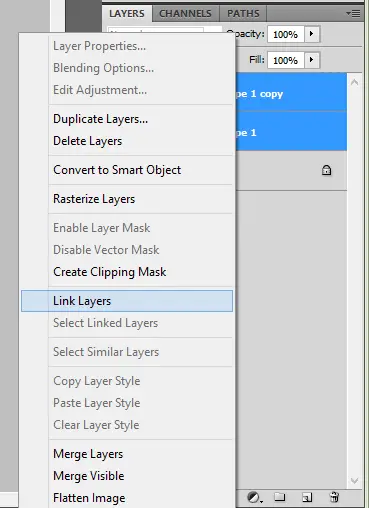
Sometimes several layers of content need to be grouped together, without actually merging them. This is where linking comes in handy. Layers can be linked together by selecting two or more layers (Click layers while holding down Control/Command) and then right clicking the layers and selecting “Link Layers”. Any layers can be unlinked the same way. Linked layers can be moved around together.
- Layer Groups
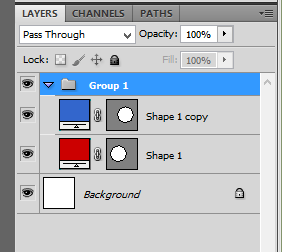
Layer groups give us even more control over the way our objects are organized. A new group can be created by clicking the New Layer Group icon at the bottom of the layer panel or by clicking Layer > New > Group. Selecting two or more layers and clicking the New Layer Group icon will place those layers together in a new layer group automatically.
- Smart Objects
Grouping layers into a Smart Object allows us to apply non-destructive adjustments to them simultaneously. This means that actual pixels in the image will not be effected, and the results can be reversed easily. We can convert layers over to a Smart Object by selecting two or more layers and then right-clicking them to bring up a contextual menu, then selecting Convert to Smart Object.Similarly, we can use the menus and click-through to Layer > Smart Objects > Convert to Smart Objects.Smart objects can then have adjustments and filters applied to them, and can then be reversed if necessary. We also have the ability to convert the contents of a Smart Object to a standard layer (which is required to perform any pixel-altering functions) by clicking Layer > Rasterize > Smart Object.

Editing layers and adjustments
One of the most useful things about layers is the ability to edit them individually. We might have an image consisting of several layers, all of which could have different needs such as opacity changes, masking, or other adjustments.
Masks can be applied to individual layers by clicking the Layer Mask button at the bottom of the panel or by clicking Layer > Layer Mask > Hide All/Reveal All. This creates a new mask that is attached to that layer, and allows us to modify the mask independently. You can click the thumbnails within the layer to select either the mask or the layer itself.
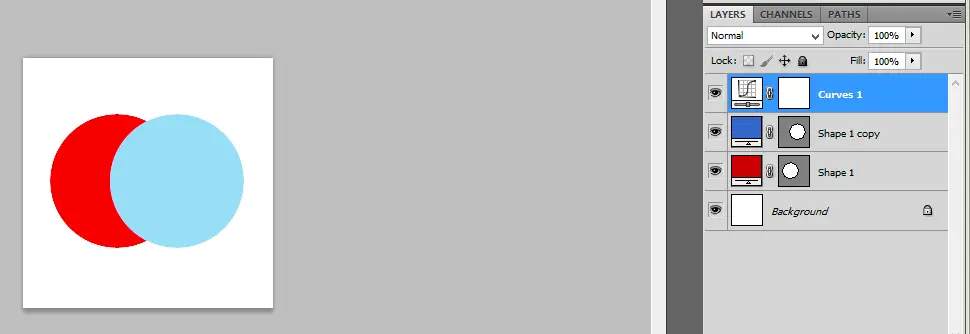
Adjustment layers allow nondestructive adjustments such as levels and curves to the their affected layers, and can be turned off or deleted at any time. These can be added by clicking Layer > New Adjustment Layer and then selecting what adjustment you’d like to apply. Fill layers work in the same way. These layers affect all layers below them.
Any and all layers can also be locked by clicking the small lock icon near the top of the layer panel. Locked panels can not be moved or edited.
Lastly, any layer can be hidden from view temporarily by clicking the small corresponding eye icon on the left hand edge of the panel.
Blending, opacity, and layer styles
Photoshop has grown exponentially over the years and continually add features that make it easier for us as designers to create the images we’ve envisioned. Layer styles are a good example of these additions. Now, we don’t have to experiment and go through the rigors of trial and error (wait, where’s the fun in that?) to apply effects to our images. We now have a dedicated panel (Window > Styles) that gives us a set of predefined styles to apply to our layers, simplifying the process of creating buttons, interfaces, and other graphics.
Using a layer style is as simple as clicking on a layer, and then clicking a style thumbnail in the Layer Styles panel. The image will instantly update, showing its new look. The layer in the Layers panel will also provide an indented list of what specific effects were applied to make that look possible. Each individual effect can be adjusted, or turned off altogether.
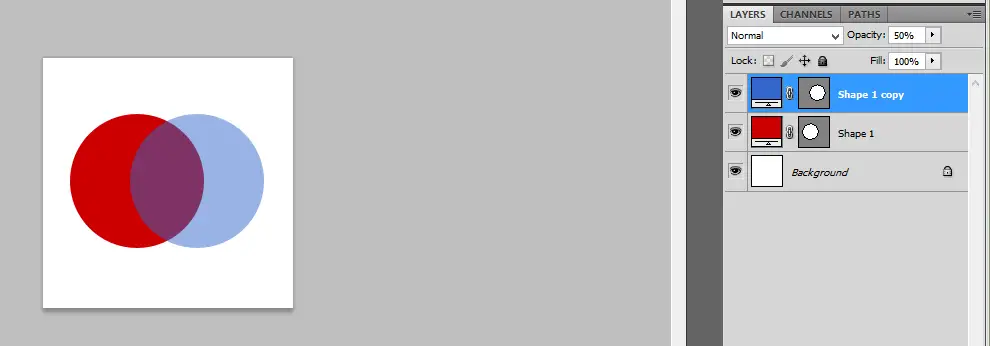
Finally, we have the ability to control the opacity and blending of each layer. Opacity refers to the level of transparency for a layer. When a layer is selected, its opacity and fill percentages are displayed near the top of the panel, and can be adjusted independently. Layer blending settings are available as well at the top of the panel, and let us blend individual layers into the rest of the image with several presets.
Go Play Around!
We’ve only scratched the surface of how powerful and important layers are to our workflow in Photoshop; luckily for us, the best way to learn how to use the software is by applying what you have learned, so crack it open and give it a shot!
You can delve deeper into the world of Photoshop by checking out some of our other related articles here on Photodoto such as making the popular Earlybird Instagram filter and Ann Davlin’s excellent series on retouching in Photoshop. Photoshop.com is also a great online tool created by Adobe that helps you along in learning about the software as well as improving and sharing your images.
For those who are still having trouble understanding layers, below is another approach to learning them:
Understanding Photoshop Layers Part 2
If you are new to Photoshop, you might find working with layers a bit confusing at first, but when you learn to use layers, you will soon begin to love them. But why use layers, and what is the benefit for working with layers? This is best explained with an example.
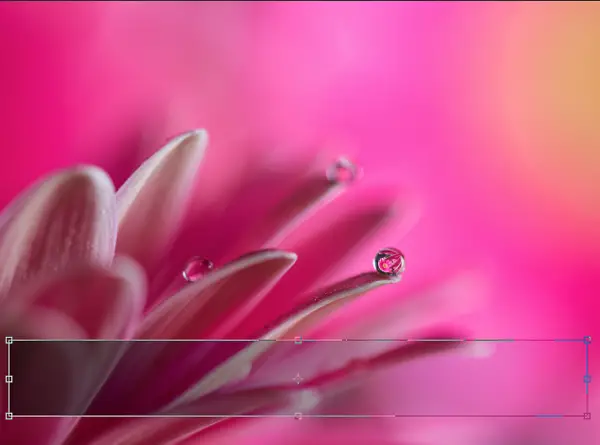
If you, for instance, draw a rectangle directly on your image you “destroy” the original image. It becomes very hard to undo changes at a later stage of post-processing. However, if you first create a new layer and make a rectangle on it, you will separate the rectangle and the original image. The power of layers becomes very clear when you want to modify the rectangle because you can move it around, scale or change it separately from the background image.
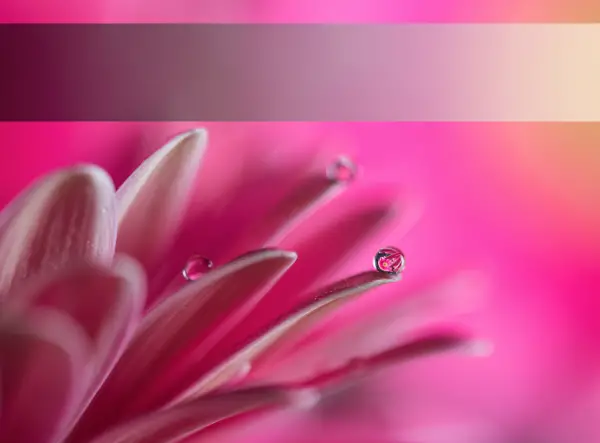
Because the rectangular shape was created on its own separate layer, you can transform it, and change its opacity. If you created a rectangular element directly at the original image layer, you wouldn’t be able to move it or change it later.
What is a Layer?
A layer is like a transparent piece of cellophane placed on top of your image. If you were to paint with a green color on the cellophane, it would not ‘damage’ the original image, and you could just remove the cellophane at any time to remove the green paint. However, when looking at the image even with many cellophane layers on top, it would appear as a single image.
In this way layers give you the possibility to isolate content and adjustments from the rest of your image, allowing you to undo or modify it at a later stage. Separating the enhancements you make to your image, gives you an incredible flexibility in post-processing.
How to Activate the Layers Panel
If you cannot see the Layers panel in Photoshop, you can make it visible by going to the menu Window > Layers. This will make the layers panel visible.

When you look at the Layers panel in Photoshop, you will see the all the layers, groups of layers and layer effects that are associated with the current image. You can choose to hide or show individual layers, or create new layers or move layers into a group to keep the layers better organized.
At first, when opening a new image, you will only see a single layer in the layers panel, which is called “Background.” This is your main image layer.
Adding a new layer
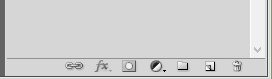
Let us try to add a new layer. You do this by clicking on the new layer icon in the bottom right corner. New layers will be added on top of the active layer if you have multiple layers.
![]()
With the new layer active you can use the brush or gradient tools without destroying the underlying image.
Per default new layers will be called “layer” + a number, i.e. “Layer 1”, “Layer 2” and so on. You can rename a layer by double-clicking on the layer’s name and typing the new name.
Holding down the Alt key (Windows) / Option key (Mac) while clicking on the New Layer button will bring up the layers options dialog.
When you got multiple layers, you need to begin to keep an eye out for which layer is selected/active as any changes you make will be added to this layer. You can always see what layer you are working on, as it is highlighted with a bright gray color in the layers panel.
Moving layers up and down
When you work with layers in Photoshop, you will soon find out that the individual layers set at the default opacity of 100% will hide what is on the layers below it. However, to bring an element in front of another, you can change the order of the layers, by moving the layer containing the element up in the layer stack. You can also move a layer down in the layers stack if you want to place it behind other elements.
You can do this by selecting and dragging the layer you want to move and drop it at between the layers, where you want it.
Hiding or Showing Layers
When working on a layer, that isn’t the top one; you might find it easier if the layers aren’t ‘in the way’ and blocking your chance to see what you are doing. In that case just click on the eye icon next to a layer, layer effect or group to hide the content on it. To show it again just click the eye icon again. If you plan to print your image directly from Photoshop, you should note that only visible layers get printed.
![]()
Deleting Layers
If you need to remove a layer, you can just click on it, hold down the mouse button and drag it to the trashcan icon at the lower right corner of the Layers panel. When the mouse is over the trash can icon, release the mouse button to delete the layer.
![]()
Changing The Opacity Of A Layer
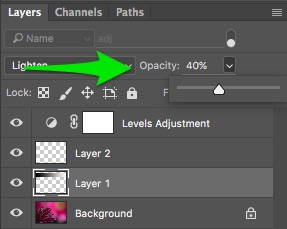
When adding new layers on top of your image, you might find that the effect the layer adds to the image is too strong. A simple way to fix this is by lowering the opacity of the layer. Per default, opacity is set to 100%.
You can change the opacity of a layer or group by selecting it and changing pulling the opacity slider in the top right area of the Layers panel.
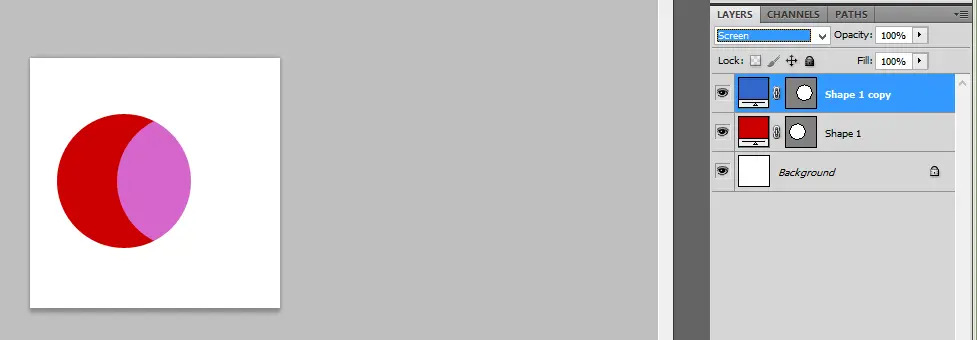
Blend Modes
Besides lowering the opacity of a layer to affect the way it interacts with the layers below, you can also change the blend mode for a layer. It is nearly impossible for anyone to clearly predict how a blend mode is going to look on your image. However, you can get an idea of which blend modes usually looks good on a specific type of image. To go into details about how the different blend modes work would be a topic in itself and probably a very technical minded one. Instead of using the time to get to know everything about blend modes, I would instead suggest that you use an experimental approach and try out the different blend modes and see what effect they give on your photo. You will probably find that blend modes like Darken, Overlay, Soft Light and Vivid light plus a few others will be the ones you use the most unless you are working with really complex and advanced Photoshop processes.
Organizing and Filtering Layers
When you begin to work with layers, you might feel that the layers stack up pretty quickly. Professional Photographers and designers, sometimes work with 10, 20 or even 100 layers.
To keep the overview you can bundle layers into groups, or you can filter which layers you want to see.
Grouping Layers
The easiest way to group layers is by selecting the layers you want in the group, right-click and then choose “Group From Layers…”
You will then get a dialogue allowing you to set the group options, like its name, blend mode and give it a color tag if you like.
![]()
You can also use the New Group button at the bottom of the Layers panel. Using this method will skip the group option dialogue.
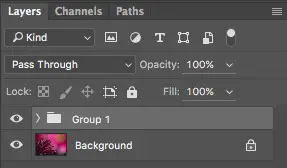
If you want to see the layers inside a group, just use the small collapse/unfold arrow to the left of the group icon.
Filtering Layers
To filter layers go to the top of the layers panel and click on the magnifying glass. Here you can filter display the layers based on its name, kind, effect, mode, attributes, or color label.
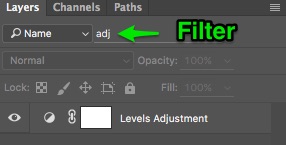
First, select one of the filter types from the pop-up and then enter or select the criteria.
You can toggle the layer filter on/off with the toggle switch on the right side of the layer panel’s filter bar.
Duplicating Layers
Often you will want to duplicate a layer to apply certain effects to it while preserving the original layers so you can always revert to a clean start.
To duplicate a layer, you can drag the layer and release it on top of the new layer button in the lower right corner of the Layers panel. This will also copy any layer effects associated with the source layer to the new layer.
Alternatively, you can also right-click on the layer and choose Duplicate Layer from the context menu that appears.
Locked background layer
You will find that there are certain things that you cannot do with the background layer.
The background layer is by default locked which you can tell by the padlock icon to the right of the name. This includes changing the stacking order, or changing its blending mode or change the layer’s opacity.
![]()
However, you can convert it to a normal layers and then apply the changes. To do this select the background layer and then go to the menu Layer > New > Layer from Background. This will change the background layer into a normal layer and the padlock will disappear.
Merging layers
When you are finished working on your image, you can choose to reduce the number of layers in the image document, in order to reduce the file size of the image. However, when you do this you will not be able to revert to the non-destructive workflow (after saving), so you should think twice before doing this if you have a habit of returning to your images to give them a final edit later.
Merging layers means that elements from the top layers replace anything that sits below it in the layer stack, in a way, so all visible elements are merged into a single layer.
You can merge layers or groups by selecting them and choose Layer > Merge Layers. If you prefer, you can also just right click on one of the selected layers and choose Merge Layers. You should make sure that the layers are visible before merging.
Alternatively, you can also choose to merge all visible layers by selecting one of the visible layers, right click and choose Merge Visible. This will merge all layers with the eye icon into a single layer.
Concluding words
Working with layers in is one of the most basic Photoshop skills, but it is also one of the most crucial to get a good workflow that can help you bring your images to a new level. Without using layers in Photoshop, you are bound to get a painstaking experience and find that Photoshop is unlogical. However, when you get a habit of working with layers in Photoshop and using it non-destructively, you will never want to go back. Hopefully, this introduction to working with layers have helped you to begin working with layers in Photoshop.
Click the following link to learn common causes for pixelated text in photoshop.


1 comment