Whether you’re a sports fan or not, if you’re a photographer, you’ll probably find yourself taking photos of some fast-paced competitive action at some point.
If you’re used to shooting in a nice, controlled environment, like a studio, or if you’re used to street photography, where your subjects are probably walking at a normal, relatively slow pace, shooting a sporting event can be challenging.
Your subjects refuse to stay still; the lighting is almost always far from ideal, and you often have to jockey for a good spot where you can see the best action.
Or maybe you’re a sports fan, or the parent of a young, aspiring athlete in his or her formative years, and you’d just like to know how to use that camera you got for Christmas to capture some great moments.
Whatever your situation may be, you can snap plenty of quality action shots, so long as you do a little prep work and keep a few things in mind. To help you with all of that, we’ve put together a list of tips and considerations for taking great sports and action shots.
It’s All About the Location
Get there early enough to stake out a good spot. Look for places where the most interesting action takes place. You’ve got to be able to see the action if you want to photograph it.
Be aware of your background. Try to position yourself so that your images’ backgrounds are clean and don’t distract from your subject.
Consider taking some shots of the venue itself. If you happen to have a wide-angle lens in your bag, snap it on and get a few big shots of the field, court, arena, etc. These are easy enough to take, so why not have a little extra context?
A Few Notes on Equipment
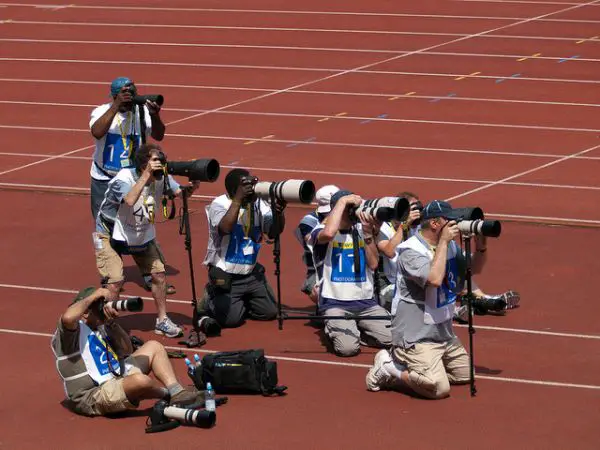
Use a zoom lens. Many photographers suggest having a lens that can zoom in to at least 200mm. You don’t want to have to crop your photos too heavily.
Consider using a monopod. I’ve extolled the virtues of the monopod many times before. They’re easy to carry around and move with while shooting. They provide a lot of stability without the mobility issues a full-sized tripod entails.
Set your camera to continuous burst mode, then shoot in short bursts. I typically like to take 3-5 pictures per burst. Bursts longer than that mean you’ll have a lot more nearly identical photos to sift through afterward. If that doesn’t bother you, feel free to shoot longer bursts.
However, if your memory card is on the slow side, your camera will freeze occassionally as the card saves the images. You can use a memory card with a fast buffer, however, to alleviate this issue. Make sure it has a lot of room, and pack plenty of extras. Those images stack up quickly.
If you’re still having issues with your camera freezing up while it processes photos, consider shooting in JPEG instead of RAW. You’ll lose some quality and some post-production options, but your images will save to your memory card faster, and you’ll have more storage space.
Know Your Camera
Know the exposure settings in your environment before the action begins. Don’t waste time checking your images on your camera’s screen. If you have your settings dialed in before the action begins, you won’t waste time looking at the tiny screen on your camera, subsequently missing the action.
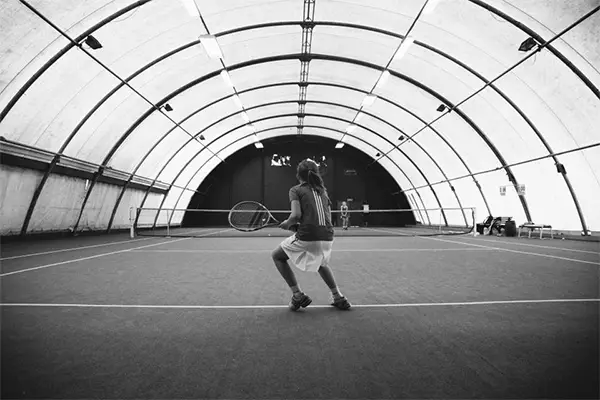
If you’re shooting an indoor event, also take some time to check your white balance. Indoor events, especially in gymnasiums, often have a mix of different terrible light sources, such as fluorescent and tungsten lights.
Get to know your camera’s shutter delay. On most DSLRs, this isn’t too much of an issue. But there is always tiny delays that can add up – the delay from your eyes to your brain, the delay from your decision to press the shutter and your finger actually moving, and the delay from when you press the shutter release to when the shutter actually fires.
When you’re shooting fast-moving action, these precious micro-seconds could mean the difference between the shot you’ve always dreamed of snagging and wasting space on your memory card.
Focus!
Use your camera’s zone auto-focus system. Practice with it until you can switch areas with little thought. Set your camera to Continuous Focus. In this mode, as you hold your shutter release button halfway down, your camera will continuously adjust to keep your selected subject in focus as he or she moves.
Practice prefocusing. This means that you predict where your subject is going and focus for that spot. This works best if you have a static object on the same plane as the spot where you expect the action to go down. Prefocusing might be tricky to get the hang of, and it might not prove useful in every circumstance. But knowing how to pull it off can really come in handy.
Shoot with shallow depth of field. Keep the focus on the subject; the person with the ball or the runner who’s out front. The key is to minimize anything that might distract your audience from the intended subject.
Conveying Motion
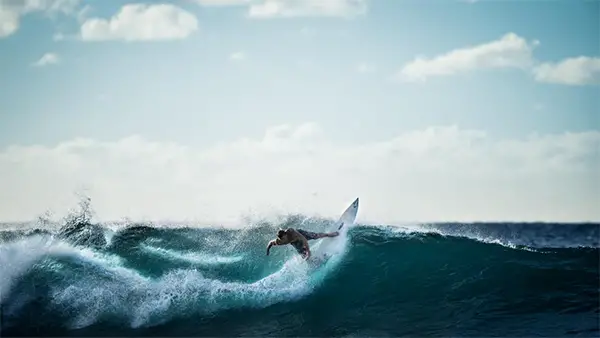
Action is all about movement, right? So what’s the best way to capture movement? Typically, this means using a high shutter speed. I’d personally keep it no slower than 1/500 to 1/1000. Don’t be afraid of bumping up your ISO if you don’t have enough light for a high shutter speed. Image noise is typically more acceptable than blurry subjects.
Master the panning shot. This means following your subjects as they move, shooting while you do so. Make sure to match your movement speed to your subject’s and follow through with the motion after you’ve got the shot. You might find a slower shutter speed helpful here. The end result is that your subject is in focus while the background is blurred, conveying a sense of movement.

Other Ideas
Keep an eye out for small, yet emotionally telling moments on the sidelines. Teammate and crowd reactions can sometimes provide some great context for the event.
Change your point of view. It’s often a good idea to get low and shoot up. This can add some drama to your shots.
Find out beforehand what the rules for photographers are. Many venues prohibit the use of flash, and many will have rules about where you’re allowed to be. Do a little research before going to the event to save yourself an awkward confrontation with a security guard later.
Do you have experience shooting sporting events? What are some tips you’ve found helpful? What gear do you use? We want to hear from you in the comments below.


0 comments