When it comes to your passion, there is nothing like a good trick. Being resourceful can bring you so much satisfaction, and don’t mind all the extra learning involved!
You may think that photographers take their time to research equipment, patiently saving money from all their commissioned work (haha) and finally invest $80 on the new flash modifier in the market.
The reality is that, for years, photographers have used their amazing creative monster-minds staring incessantly around their house to find what they can re-use, build or re-purpose to shoot with.
After these moments full of incandescent light bulbs, lots of cardboard cutting and even failed attempts, they have succeeded, and luckily shared so we can all benefit from their thrifty ideas.
We have gathered the best photography DIY tips and hacks in the web for you to test , shoot and have fun with.
Equipment
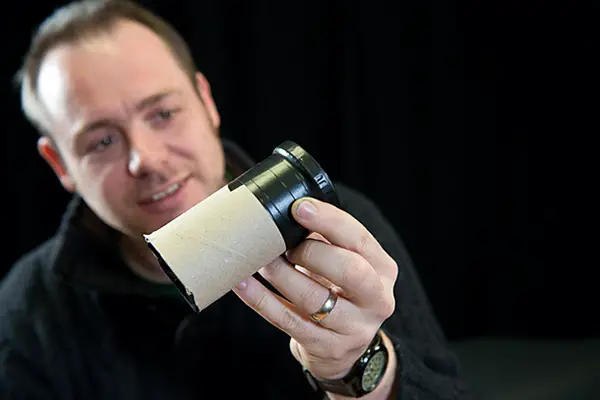
Make your own macro lens
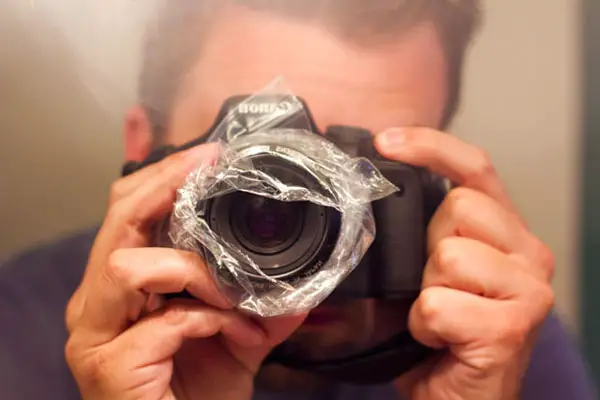
You might have heard of the reverse macro lens trick. This one tutorial takes it to the next level.
If macro photography is your dream, but can’t quite afford a macro lens right now (or in the next thousand years) , try this hack and make your own macro lens with a cardboard extension tube instead. Pretty neat!
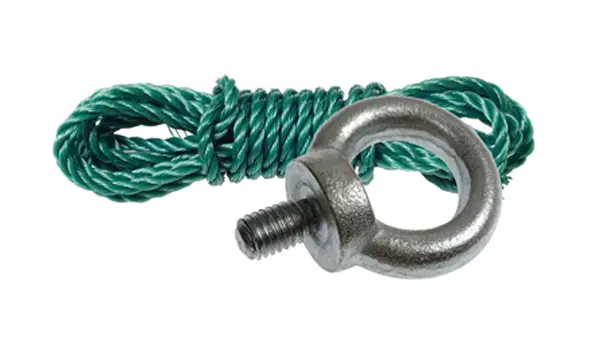
Impromptu tripod
An all-time favorite because how easy it is and how smart. How cool would it be to not carry a tripod, like ever. This trick might be old, but it’s hard to miss, it’s cheap, smart, replaceable, and small.
The science consists in tying a cord to your camera and then looping it around your feet for tripod-like stabilization.
Go ahead and learn to stabilize your camera with a piece of string!
Note: Someone sells this already on Amazon (But still, you can make it for under $5).
Crafty Expodisc
Do you like photography? Do you like coffee? Do you like coffee filters ? OK, maybe you don’t feel any particular thing for the coffee filters, but remember white balance? If you have ever dreamed of getting your white balance perfect in every shot, you can definitely pocket this one.
Using a coffee filter, you can turn your UV filter into an instant expodisc ! Set your white balance manually with this and enjoy all the extra time from NOT editing your white balance. Maybe have an extra cup of coffee while at it.
Tip: You could also use a Pringles Lid
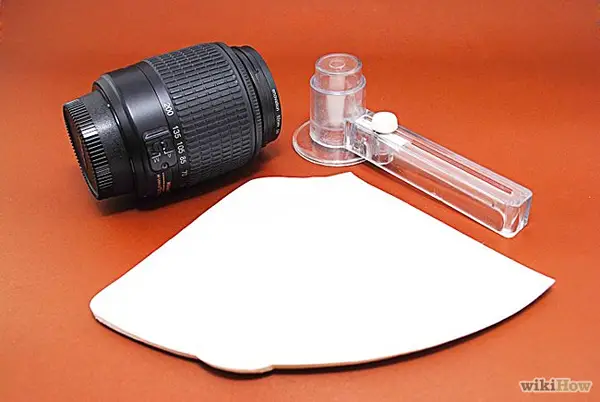
Image Modifiers
Magic filters
Unsure of how to edit magic vintage photos to appear slightly more professional than what you got on your Instagram Try this super cool trick with a sandwich bag and colored markers.
Oh wait! You can use vaseline as well (in a plastic bag preferrably), or even gauze! Anything can be a lens filter if you believe strong enough!
Flash Modifiers
DIY Gary Fong flash thingie
Many DIY Photographers have already done at least two or three flash diffusers. It’s like an art already. Milk Jugs, Cigarette Boxes, everything has been tested and put into a hundred tutorials.
We like how this one guy accepts he has tried all sorts of materials and while in his search of the all mighty one, eventually found the perfect material at IKEA . For a fraction of the cost you can easily make a Gary Fong style Silicone Shelf liner diffuser. Genius.
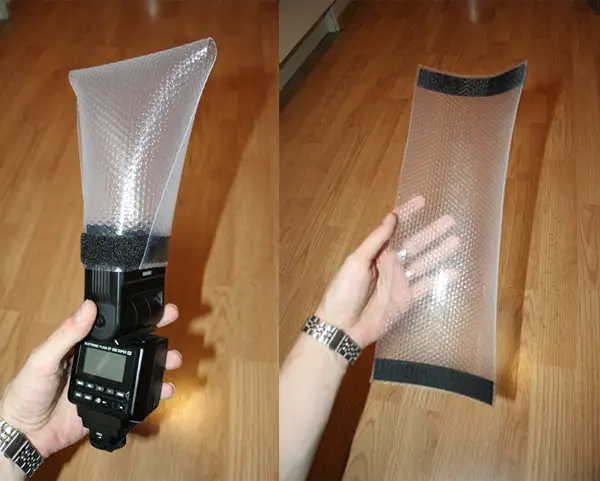
“You Don’t Just Eat ‘Em” Flash snoot
This is a really neat project that can help you with your Macro photography. This one trick will even help you solve that shadow that your flash is creating on your super duper close macro shots.
Try it! A Pringles turned into a perfect macro flash.
Extra tip: Add straws for a grid effect .

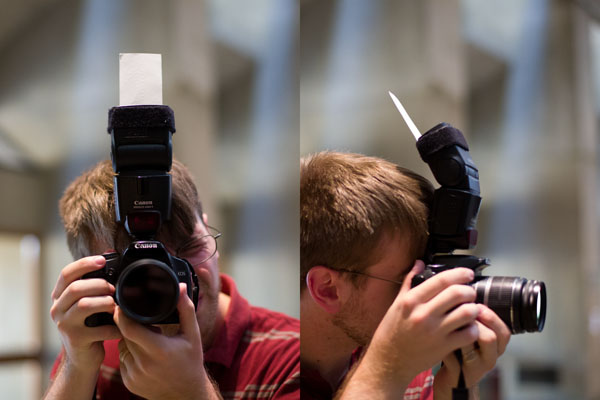
Multipurpose bouncing card
If you don’t know where to point your flash remember this useful phrase “When in doubt, bounce”. Ok, maybe that’s not a real quote, but really, bouncing your flash from a surface softens the light and creates a more desirable effect than shooting the flash to your models face. This is particularly true and useful when you have a white surface since you won’t be casting undesirable colors.
This technique works if you have a camera with a pop-up flash instead of a detachable flash unit as well.
Take that Business card and bounce from it!
Reflectors
– Shiny light, now!
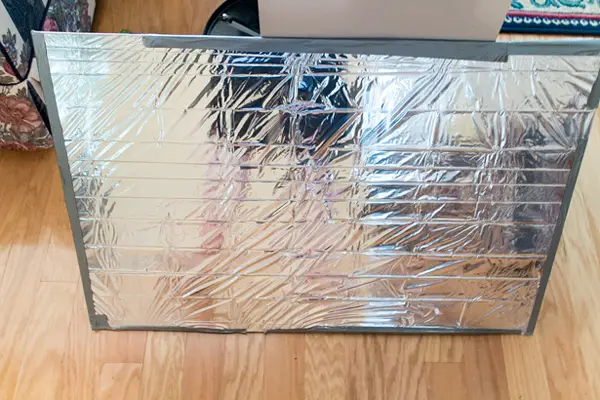
Another way to achieve good light is to have a good reflector. That’s a good word to study on, if you haven’t gotten familiarized with, as it might make a difference between a good portrait and a great one!
Different materials, give different results. When you are working with big light sources, like, THE SUN. You want large reflectors, and if you are smart as well, you will want to work with something that is cheap, and versatile.
Whatever you do, don’t forget to bookmark this DIY reflector using a camping blanket for later.
Note: You can also manage to make one out of aluminum foil or a white reflector using styrofoam.
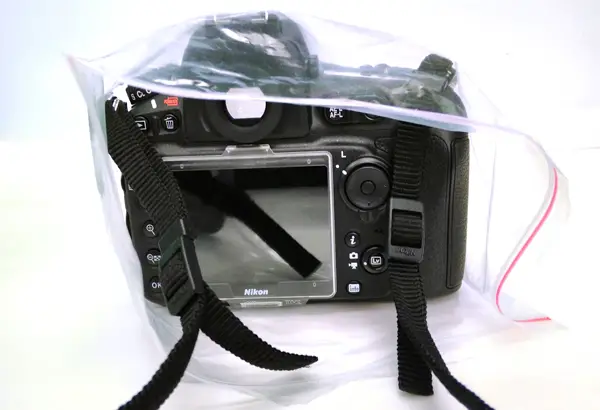
Weather Protection
The Not-so-glamourous camera case
There isn’t much to this craft, besides the amazing fact that you are protecting your equipment for a few cents.
All hail the Ziplog bag
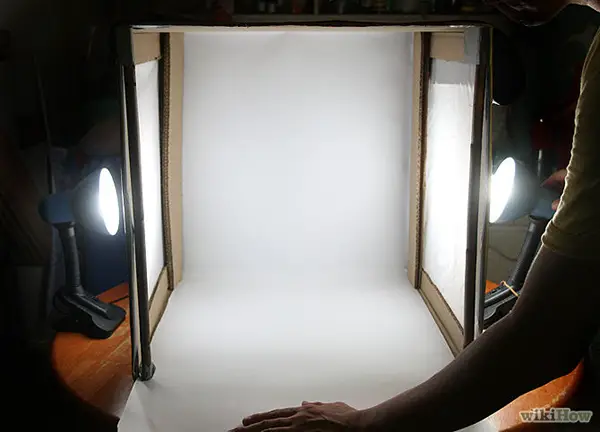
Studio
Home is where my camera equipment is
Last but not least, make your home a truly awesome studio that’s all DIY:
– Opt for white walls for giant reflectors and windows for the cheapest, softest light. Invest in artificial light later. These are pretty good DIY home studio tips.
– It takes really few elements to build your own light tent. Pretty useful for product photography.
Note: Look at this setup against a window
Do you have any good – good tips that you almost want to keep to yourself?


0 comments