One of the most used tools in Lightroom to bring attention to the subject is the vignette tool. However, unless you are very subtle with the vignette tool it will be very obvious what you did to the image to make the subject pop.
If you overdo it, the vignette tool will leave a distinct dark circular frame near the edges that fades as it gets closer to the subject. Additionally, in Lightroom, it is not possible to control the center of the vignette.
There are other and in my opinion better ways to bring attention to your subject and make it pop than using the vignette tool.
One of the best ways to draw attention to the subject in an image is to make more of your modifications local instead of global. For instance, instead of applying sharpness to the whole image, only add it to your subject.
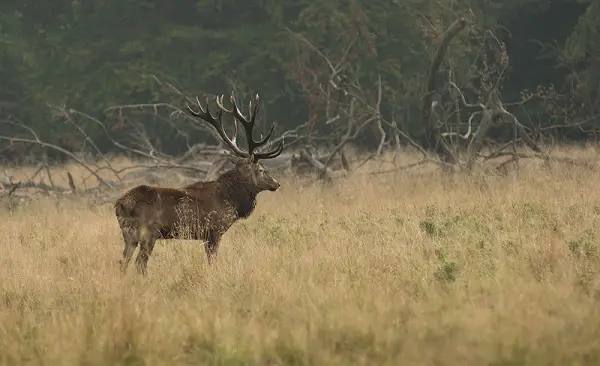
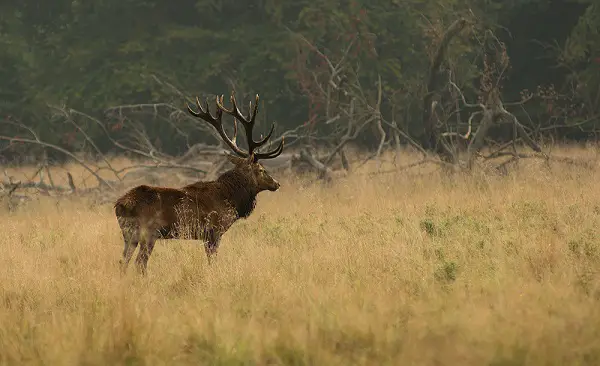
Take a look at this image of a stag. It looks rather flat, and the stag’s antlers are almost the same color as the branches behind it. Let us push a few sliders in Lightroom to make the stag stand out from the background.
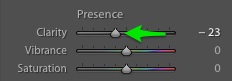
Begin with modifying the global clarity slider a little to the left. The background is not important so we can add a bit more softness by using a negative clarity value. This will enhance the effect of the local adjustments we are about to add.
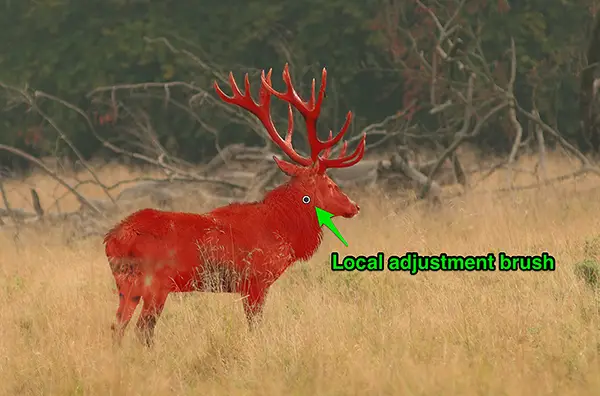
Next, pick up a local adjustment brush and begin to mask the subject. Remember to turn on auto-mask to let Lightroom try to detect the edge of your subject. This makes masking much easier.
Press O to toggle on/off what you have masked with the local adjustment brush. In this example, you can see a quite precise mask of the stag.
Next, change the settings for the local adjustment brush.
It is very common to brighten the subject to draw attention, but in this case, the subject is a little dark, and the background is relatively bright. Therefore, to make the difference greater, I choose to darken the subject a bit more.
Adding a little local contrast also helps to separate the subject from the background.
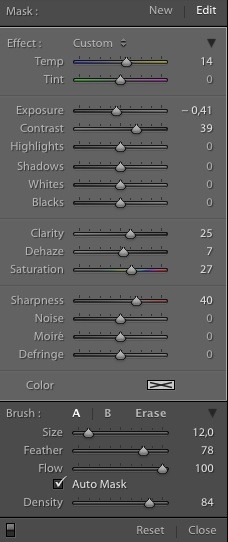
Increasing the clarity slider adds extra details to your subject, which is great when you wish to enhance the visibility of texture. However, try to avoid increasing the global clarity slider, as it will make everything look equally important.
Of course in some landscape images, where you don’t want to emphasize a particular subject, you might want to add a little bit of clarity to the whole image.
Adding sharpness to your subject is another of the subtle changes that together with the few other sliders used with the local adjustment will put more attention on your subject. Many seem to use the sharpening slider as a global fix instead of a creative touch. Even on images with a shallow depth of field, where the background is blurred, some choose to sharpen the whole image, making the out of focus areas sharper which doesn’t look good.
With the added sharpness, you’re done with the local adjustment brush, so just click Close.
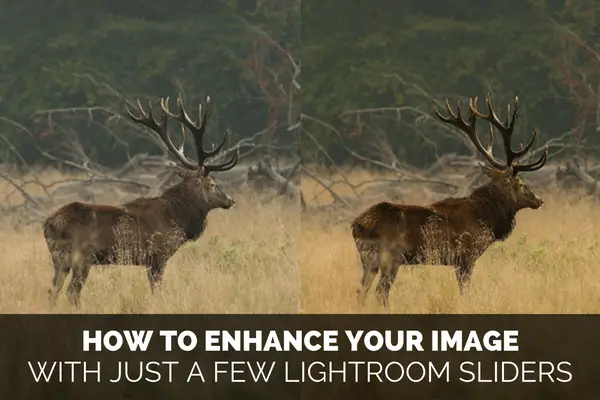
Here is the final result of just pulling a few sliders in Lightroom. Note the difference of how the antlers of the stag are much more separated from the background trees, than they were before the local adjustment brush was applied. Adding a simple vignette or global contrast wouldn’t fix this.
You can, of course, change the global sliders to make sure that the basic exposure is correct. However, the only global slider involved in making the subject pop was setting a negative value of the overall clarity, to make the subject stand apart from the background when the local adjustments were applied.
By just tweaking a few sliders you can make your subject pop more in your images. Clarity, contrast, exposure and sharpness sliders are great for creating interesting images. However, the key point is to use less global adjustments and more local adjustments if you want to create images with greater impact.


1 comment