Are dust spots ruining your photos and you don’t know how to get rid of them? If so, you’re not alone! Dust is a common issue when taking pictures and can be a huge nuisance that affects all your photos. Fortunately, there are some easy steps you can take to remove them.
In this article I will discuss methods to remove dust spots physically in camera and in software after the photos were already taken.
Lets get started….
In Camera vs in Software
When it comes to getting rid of dust spots in your photographs, first you need to determine the source. Second, you need to determine if you want to remove them repeatedly in the digital photos themselves or remove them at the source in the camera.
Of course, if you already have dust spots on your digital photos, cleaning the sensor or lens will only prevent dust spots in future photos. To fix existing digital photos you will need to work in software like Photoshop or others I will mention. If you have physical photos on the other hand, one way to fix them is to scan them into photo editing software.
Cleaning dust spots in the camera
Dust Spots on Lens
Before you start working on removing dust spots, it’s important to create a clean environment. Make sure you turn off any fans or other air circulation sources that could cause unwanted dust particles in your workspace. Also, use compressed air to blow away any dust you may have on your work surface.
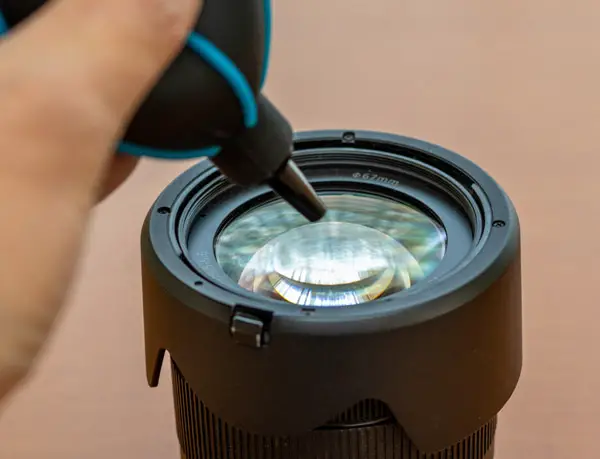
There are various methods to remove dust spots from a camera lens. One of the simplest and most effective ways is using a blower brush. This is a small, handheld tool you can use to gently blow away any loose dust or debris that is on your lens. Just hold the brush close to the lens and give it a few short bursts of air by squeezing. This should remove most dust and debris from the surface of the lens. You can use a blower on either end of the lens. You can find one here.
Another method you can use is to clean the lens with a lens cleaning solution and a microfiber cloth. Lens cleaning solutions are specifically formulated to clean camera lenses and are available at most camera stores or online. Apply a small amount of the solution to the microfiber cloth and gently wipe the lens in a circular motion. This should remove any dust spots or smudges that are on the lens.
It is important to avoid using tissue or paper towels to clean your lens as they can scratch the surface of the lens. Microfiber cloths are a better option as they are designed to be gentle on camera lenses.
It is also important to avoid touching the lens with your fingers, as oils from your skin can attract dust and cause spots to reappear. Always handle your lens with clean, dry hands.
Dust Spots on Sensor
Removing dust spots from a camera sensor is a more complicated process than cleaning a lens and it is a very sensitive one. Your lens is made of hard glass, your sensor’s surface is not. Professionals recommend that you take your camera to a professional for sensor cleaning, as it requires specialized tools and knowledge to properly clean the sensor without causing damage.
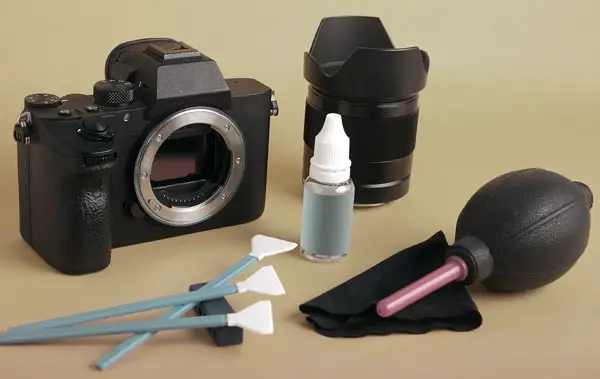
However, if you want to try to clean your sensor by yourself, below are a few things you can do:
1. Use a blower brush: Gently blow air onto the sensor to remove any loose dust or debris.
2. Use a sensor cleaning solution and a swab: Apply a small amount of sensor cleaning solution to your swab and gently swipe the sensor in a straight line. Use a new swab for each swipe you do.
3. Use a sensor cleaning pen: This is a specialized tool that uses a carbon-based brush to remove dust and debris from the sensor.
Keep in mind that cleaning a camera sensor can be a risky, and if not done properly, you can damage your camera. If you are not sure how to clean your sensor properly, it is best to take your camera to a professional for cleaning.
Also, a good practice to avoid dust on the sensor is to use a camera with a self-cleaning sensor or a sensor that has a dust removal function and use it often. Its also important to avoid changing lenses in dusty environments like the desert.
Ideally, sensor cleaning should be done before every photo shoot. Cleaning the sensor and lens will prevent potential dust problems from happening in the future. Avoid breathing directly onto the equipment as this could add moisture or oil which can cause further complications later.
Shooting in Manual Mode to Reduce Dust Spots
In order to minimize dust spots in your photos you should always shoot in Manual Mode. By doing this, the camera will have more control over the exposure settings which can help reduce any dust that may be present. When shooting try to set the highest possible f-stop and shutter speed and make frequent use of an anti-static cloth throughout the session. This will help stop particles from sticking to the sensor or lens, thus reducing the appearance of dust spots.
Using Software to Remove Dust Spots from Photos
If you find yourself with photos that are already full of dust spots, don’t worry. With modern editing software you can brush away any blemishes in a matter of minutes. Make sure to start off by duplicating the layer you will be working on so as to not permanently damage the photo. Then choose the appropriate tool which I will get into next and begin brushing away any imperfections. Don’t forget to check your progress after each step. Below are the tutorials for cleaning up dust spots in different programs using various tools.
Spot Healing Brush Tool in Photoshop
The Spot Healing Brush Tool in Photoshop is the perfect tool for handling dust spots (as well as other blemishes). This powerful tool can quickly clone over an area and blend it together, thus removing any unwanted dust spots without leaving a trace.

To use the tool, select it from the toolbar on the left side of the screen, or press the J key on your keyboard. Next, adjust the brush size and shape as needed. Then, simply click and drag over the area you want to repair. The tool will automatically sample surrounding pixels and blend them together to fix the blemish. You can also use the Healing Brush tool (press Shift+J) which allows you to sample a specific area to use as the source for the healing. You may need to experiment with different sizes and settings until you get the desired result.
Dust and Scratches Filter in PaintShop Pro
PaintShop Pro is another good tool for getting rid of dust spots. One of its most useful features is the Dust and Scratches Filter, which quickly finds any inconsistencies in the photo and smooths them over. All you have to do is select the area you want to edit, and then apply the filter. It’s extremely simple and effective. You can also adjust the strength of the filter to get more subtle results, or increase it if you need a more dramatic effect.
To use the Dust and Scratches filter in PaintShop Pro, follow these steps:
- Open the image you want to edit in PaintShop Pro.
- Go to the “Enhance” menu, and select “Noise” and then “Dust and Scratches.”
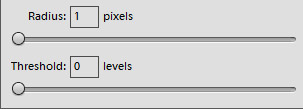
- In the “Dust and Scratches” dialog box, use the “Radius” slider to adjust the size of the area that this filter will affect.
- Then use the “Threshold” slider to adjust the level of detail that will be affected by the filter.
- Click “OK” to apply the filter to the image.
- Readjust the settings as needed and re-apply the filter if necessary.
- Save your image when the photo looks the way you want it to.
Spot Removal Tool in Lightroom
Lightroom has a unique and really helpful feature for spots called Spot Removal Tool. It’s a great way to quickly find and remove dust spots.
Here’s how to use it:
1. Open the photo that you want to edit in Lightroom.
2. Select the Develop module.
3. Scroll down to the Lens Corrections panel and click on the “Enable Profile Corrections” checkbox.
4. Go to the “Visualize Spots” button and click on it, this will show you the dust spots on your photo.
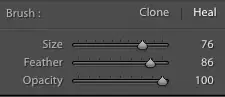
5. Select the “Spot Removal” tool, which looks like a circle with a dot in the center.
6. Use the tool to paint over the dust spots on your photo. Lightroom will automatically sample an area of the photo to use as a replacement for the dust spot.
7. Adjust the size and feathering of the brush as needed to match the dust spot.
8. Click on the “Visualize Spots” button again to turn off the spot visualization and check your image.
9. When you are satisfied with the result, click on the “Done” button to finalize
Clone Stamp Tool in GIMP
GIMP, short for GNU Image Manipulation Program, is another great photo editor with plenty of powerful tools. The Clone Stamp Tool is a great way to remove dust spots inside GIMP. It allows you to easily sample areas of the image and clone them over any dust spots or debris.
Here’s how to use it:
1. Open the photo that you want to edit in GIMP.
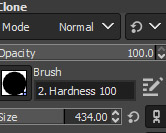
2. Select the Clone Stamp tool from the toolbar on the left. It’s represented by a rubber stamp icon.
3. In the tool options, set the brush size and shape to match the size and shape of the dust spot you want to remove.
4. Hold down the Alt key and click on an area of the photo that is similar to the area you want to clone over the dust spot. This sets the source point for the clone.
5. Release the Alt key and paint over the dust spot with the Clone Stamp tool. GIMP will use the source point you selected to clone over the dust spot.
6. You can adjust the brush size, shape and source point as needed to remove the dust spot.
7. When you are satisfied with the result, press ctrl+S to save your image.
It’s important to note that, the Clone Stamp tool works best on dust spots that are smaller and on flat surfaces. If the dust spot is larger or in an area with a lot of texture, it might be difficult to remove it completely. In these cases, you may need to use a combination of the Clone Stamp tool and other tools to remove the dust spot.
The Dust and Scratches tool in Neat Image Pro Plus
Another great tool for removing dust spots is the Dust and Scratches filter in Neat Image Pro Plus. This powerful plugin analyzes a photo and finds areas of dirt and debris. It fixes them with just one click. This plugin can be used to quickly clean up large areas of dust and scratches, even on raw images with challenging lighting conditions. It also offers an advanced mode which allows you to fine-tune settings for optimal results.
Here’s how to use it:
1. Open Neat Image Pro Plus and select the photo which you want to edit.
2. On the top menu, go to “Filters > Noise reduction”
3. You will see the “Dust and Scratches” tab which allows you to adjust the dust and scratches settings.
4. You will see a preview of the image on the left, and settings on the right.
5. Use the “Radius” slider to adjust the size of the brush used to remove the dust . The higher the value, the larger the brush.
6. Use the “Threshold” slider to adjust the sensitivity of the tool. The higher the value, the more aggressive the tool will be in removing dust and scratches.
7. Use the “Strength” slider to adjust the intensity of the tool. The higher the value, the more the tool will remove dust and scratches.
8. Use the “Color” checkbox to enable or disable color noise reduction.
9. Use the “Gamma” slider to adjust the gamma of the image.
10. When you are satisfied with the results, press “OK” to apply the changes and close this window.
Keep in mind that the Dust and Scratches tool in Neat Image Pro Plus can be really powerful, so be careful to not overuse it as it can cause artifacts and loss of details in your photo. It’s always a good idea to work on a copy of your original photo and compare the results with the original to see if you are satisfied with the changes.
I hope that this article has given you all the answers you need on how to remove dust spots from photos. Click the following link to learn how to clean camera lenses.


