A camera lens is arguably the most important part of a photographers set-up, to the point where most professional photographers would rather shoot with an ok camera body as long as they had a top-quality lens rather than the other way around. However, if you are just entering the world of DSLR lenses, at first glance they can be a bit overwhelming. Exactly what do all those numbers and letters on the side mean? Which lens should I get and exactly how do they work?
It may seem like magic, but it is actually pretty simple. Read on.
Choosing the right lens can make or break the image that you are trying to capture. This is because the lens is the part of the camera that controls the image which is projected onto the cameras sensor. Without a lens you would only be able to capture white light, which is not much use to anyone really.
To be able to confidently choose the right lens for any particular photographic situation, an understanding of how a DSLR lens actually works will be invaluable. Once you can decipher the code-like inscriptions on each lens, choosing which lens to get from the vast selection each camera manufacturer produces will become less of a headache.
What Is A Camera Lens?
The lens of any camera is simple a tool which is able to focus light on a fixed point. In DSLRs this fixed point is the digital image sensor. To do this the actual lens looks like a tube and contains multiple glass plates which are either curved inwards (concave) or outwards (convex). Each type of lens will contain a differing number and arrangement of glass plates to enable you to capture images in different situations. These lens elements basically serve to bend light in different ways.
The Anatomy of a DSLR Camera Lens
The science that makes a camera lens work is actually pretty cool. If you think back to your school days when you did those little experiments where you would split white light into its different visible colours using a prism, well a lens is a more complicated version of that.
In general, you do not need to worry about the inside of a lens. There are not any serviceable parts to worry about. However, to really understand how a lens works its important to have an idea of what actually makes up a DSLR lens.
At the front of the lens you have the front element and then there is another element all the way at the rear. These two elements basically protect the rest of the stuff inside the lens. Between the two elements you will find the lens group. This is the series of concave and convex glass plates which help focus the light. Inside the lens you will also find the aperture, which is the part of the lens which controls the adjustable opening that lets the light in.

When you look through the viewfinder on a dSLR (digital single lens reflex) camera or an SLR (single lens reflex camera), you see the image as it is being modified by the glass elements of the lens. On mirrorless cameras, there is no mirror to reflect this image up into the viewfinder, which allows these cameras to be smaller and lighter.
Below is a cutaway photograph of a Pentax 1.4 lens using fluorescence laser imaging clearly showing the 9 glass elements inside this particular lens.

Some of these parts will be fixed and some may move to help focus, zoom, and stabilize the image. The moveable, fixed and arrangement of parts changes from lens to lens.
The outside of the lens also has several different parts to it and again can change from lens to lens and between manufacturers. At the front of the lens you have the filter thread where you attach a circular filter followed by the lens hood mounting groove where the lens hood/shade can be attached.
Lens hoods are important especially in sunny environments. They help prevent flare and other unwanted effects from stray light beams.
Filter threads allow you to use any of a variety of filter types, whether its uv or polarizer, etc. Filters come in different sizes based on the diameter of the lens. They can be as small as 50mm and larger than 100mm. Because screw on filters are not quick to take off and have to be purchased in the exact size for your lens, square filters of a single size which utilize filter holders mounted on the lens are also popular, although more so in studio settings where dust and elements are not much of an issue.
Many photographers use a uv filter on any lens, especially an expensive one, to protect the lens when it bumps into something hard, whether its from cracks or scratches. I’ve personally had times when the lens hit a hard sharp object and my cheap uv filter shattered. It would have been much worse if that happened to the front element of the lens itself.
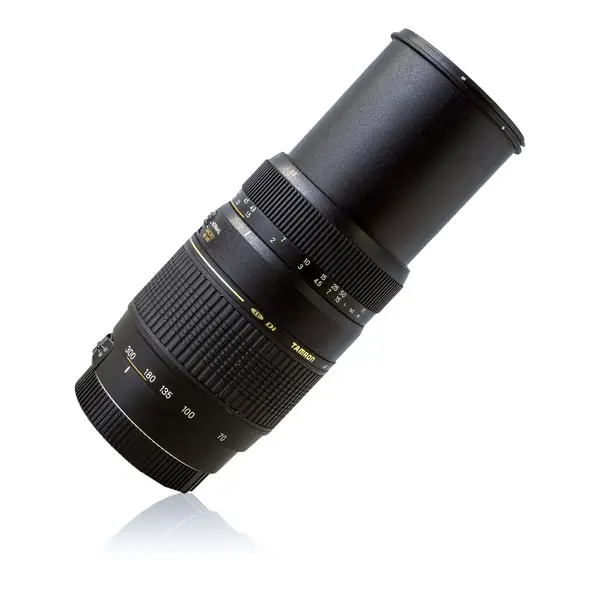
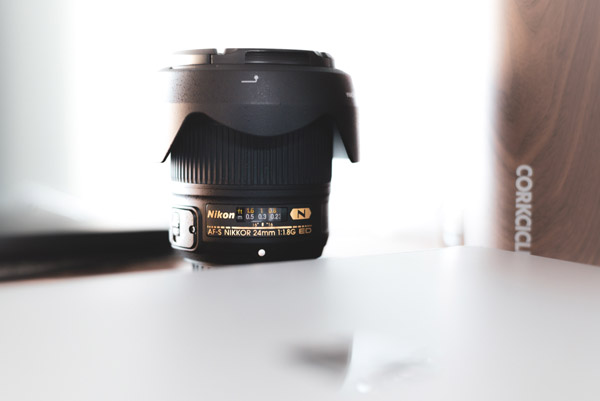
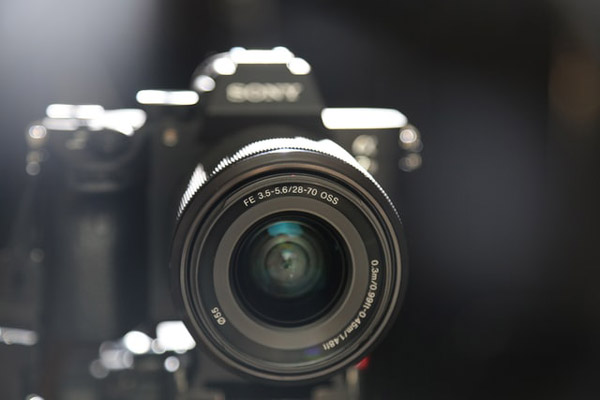
In the middle of the lens body there are several different settings and parts including the focus ring, zoom ring, lens specification markings, depth of field indicators, aperture ring and image stabilisation controls. At the back of the lens you will find the lens mount where you attach the lens to the camera body (which you want to make sure is of the right type for the camera). You may also find a “MF/AF” switch which allows you to switch between manual and automatic focusing of the lens.
Distance indicators show in feet and meters what distance you are to your subject. Not so much anymore with DSLRS, but in the past this was important when everything was done manually and you had to calculate hyperfocal distance etc.
The letters “USM” stand for an ultrasonic motor and these lenses are preferrred by many due to the fact that the motors are faster to focus and quieter. They can also be labeled as “HSM”, or high speed motor.
The letters “DX” on a camera lens stand for crop sensor lenses, discussed later in this article. DX is a Nikon designation while EF-S is the one on Canon lenses.
The letters “Asph” stand for aspherical lenses, and they basically mean some of the lenses are not spherical (just like asymptomatic means without symptoms), which helps in limiting aberrations.
Image stabilization markings are a bit confusing to some. VR stands for vibration reduction, IS for image stabilized, and OIS for optical image stabilization. Optical image stabilization is better than digital image stabilization and it involves a an actual floating glass element and not simply digital image processing.
Stabilization is a great feature and a really clever thing really. It allows you to photograph up to 2 stops slower, so you no longer need to shoot at the minimum recommended shutter speed of 1/125 second. It basically uses sensors and motors to counteract your shaky hands or other small movements. It is not made for large movements.
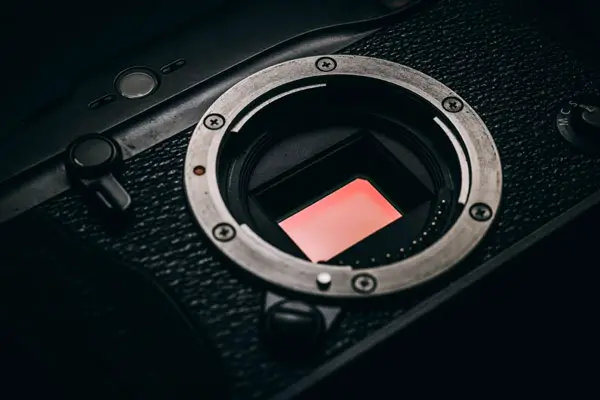
The lens mount is where the lens connects to the camera and holds it securely in place without letting in dust or dirt. These are mostly of the bayonet type now. Each manufacturer such as Sony, Nikon, Canon, etc has their own lens mount. Adapters, discussed later, allow one to use lenses made for one brand of camera on another brand body.
Some lenses such as fisheye ones actually have filter mounts at the back of the lens, since the large curvature of the lens does not allow a flat filter to be mounted up front.
How Does A DSLR Lens Work?
Quite simply, the series of glass plates within the lens tube allow the light to be focused on the digital image sensor which then records the light as an image.
The lens forms an image of the subject that we are trying to take a photo of on the camera sensor. Now lets get a little technical for a minute. Don’t worry, its not too complicated and will give you a better understanding of how lenses work.
As light moves through a convex lens and forms an image, it is affected by the angle of entry as well as the glass lens construction itself. When the subject distance to the lens is modified, the angle of light entry changes as well. The image of a subject which is far away from the lens forms closer to the lens and vice versa.
 Thick convex lenses (with a large belly) in turn make light bend at a sharper angle since the distance between various points on the lens is increased. As a result, light will converge closer to the lens. If the convex lens is thinner, the image is formed farther from the lens. This results in an increase in the size of the image.
Focus
When you focus a lens, whether manually or automatically, you move some of the lens elements farther or closer to the camera sensor (or in the case of SLRs, film). This alters how light is bent by the lens and relocates the position where light rays converge. You do this until you find a point where the object you want to be in focus is sharp, meaning where the light rays converge where the sensor or film is. Manual focus is what used to be the norm for years. Now autofocus and autofocus with manual adjustment has been popularized, and for good reason.
Although not perfect, focusing technology has allowed focusing to be much faster for action photography than us manually turning the ring, and many times this may mean the difference between a sharp image or a blurry missed opportunity. In some other conditions where we cant see well such as in dim light, the digital sensors may be better than our eyes.
Autofocus
Autofocus is an interesting feature. Other than having different options such as continuous or single autofocus (which usually has a selector switch and one of which using more battery), it works by the camera sending signals to the lens and vice versa. When the signal that the image is sharper after a focus attempt is made is sent back, the camera knows in which direction to turn the virtual focus ring. This process is repeated until focus is achieved, and it is much faster than i just described.
Another thing you may have noticed is some lenses get longer or shorter as you focus while others do not. The difference is internal vs external focusing.
Focal Length
This length is actually calculated when the lens is focused at infinity. But what does that actually mean? Well, when light travels through your camera it is flipped upside down. The point where the image is flipped (where the light converges) is known as the nodal point. The distance from that point to the image sensor is the focal length.
This is literally how far it is between the point at which the light converges to form a sharp image of the thing you are photographing and the image sensor. It is usually measured in millimeters (mm) and will be clearly marked on the lens.
The focal length lets us know how much of the scene that we see before us will be captured and how big, or magnified, the parts of the scene will be. The longer the focal length the more “zoomed in” the image will be. Whereas shorter focal lengths allow you to capture a much wider view with less magnification.
Focal length of a lens is what you see when you go to buy a lens- it is both the magnification of a particular lens and the distance between a lens and the created image. So a 1000mm lens will magnify much more than a 100mm lens. If you want a relatively neutral lens you can go with one that has a focal length of 50mm. The actual resulting image also will depend on whether you have a full frame or crop camera, and as the name suggests, it is not because of the magnification.
Crop sensors/ cameras seemingly increase the focal length of the lens because of this cropping. As an example, Nikon APS-C sensors have a 1.5x magnifier, so if you attach the same lens to such a camera, the image will be 1.5x larger than if you attached the same lens to a full frame camera, something you may want for details of birds but not for wide shots of landscapes.
This multiplier will give you what is called the equivalent focal length. That way you can find out what lens you will need to use on your particular type of camera crop as compared to someone else’s setup with a different type of camera.
Full frame sensors are equal to the size of 35mm film or 24mm x 36mm. Crop frame sensor means any size sensor smaller than the 35mm film frame. Crop frame sensors crop out the outer edges of the frame, meaning that you do not see what would be in the image at the periphery.
Full frame lenses cost more and weigh more because they are higher quality. So do full frame cameras. There are also more lenses made for full frame cameras because many photographers prefer them.
Back to lenses, more convex lens element gives a wider angle and a shorter focal length (for example 35mm). A telephoto lens with a flatter glass element gives you a narrower angle and a longer focal length (for example 200mm).
The very first lenses only had a single focus length (known today as prime lenses) until some pretty clever people thought it would be cool if you could have one lens that would be able to take photos of things that were close up and far away. They came up with a way to be able to change the configuration of the lens group and so change how close or far away the nodal point was from the image sensor. This is how the “zoom lens” was born.
Aperture
Aperture is one of those photographic terms that sounds really technical and can take a little while to get your head around. However, once you do, choosing a lens and getting the shot you want will become a whole lot easier and more fun!
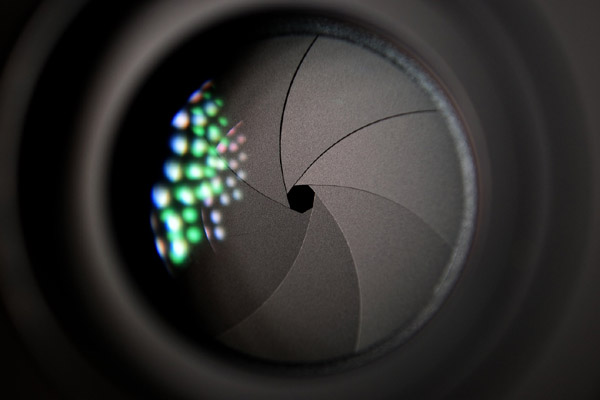
The aperture relates to how big the opening is that lets light in. Think of it like the iris (the coloured bit of the eye) that controls how big or small the pupils are. The aperture is expressed in f-stops and (confusingly) the smaller the number, the larger the opening. For example, a lens which has an f-stop of f/2.8 will have a larger opening and so let in more light than a lens with an f-stop of f/11.
F-stops have a funny name that many people don’t even know the meaning of. It is actually related to the focal length which I discussed earlier. F-Stops are simply fractions of the focal length. The way these fractions work is as follows: Let’s say you have a 300mm f2.8 lens (a nice bright lens). If you are set up to shoot at f2.8 aperture, we simply divide the 300mm focal length by 2.8 and get 107mm. This is the size of the opening in your lens.
The aperture also effects the depth of field in an image, or whether the whole image is sharp and in focus or not. When you go with a high number f-stop, you will be letting in less light and have a deeper depth of field. When you go with a low number f-stop, you will be letting in more light and have a shallower depth of field.
Adjusting this parameter will help you to create those cool looking portraits where only the person is in focus and the background is blurry. A larger opening (or smaller f-stop number) will allow you to create this. Whereas a smaller opening (or larger f-stop number) will allow you to have more of the image in focus which is great for landscapes.

The lens’ aperture is the other code-like inscription you will find on your lens. The f-stop number that is listed on the lens next to the focal length will be the maximum aperture. A lower maximum f-stop number (and so wider opening) will mean that the lens will be better in low-light situations. So, if night or natural light (no flash) photography is your thing then this is definitely something to consider.
A low f-stop number is also an indication of the quality of the lens. Top-quality lenses will have a constant f-stop through the focal range as opposed to lower quality lens (and lower price) which will have a f-stop which varies as you move through the focal range (like 3.5-5.6). In this case you will probably lose around one stop of light as you travel up the focal length from a wide angle to telephoto. These are called variable aperture lenses while the others are sometimes called fixed aperture lenses.
Because of the parts and mechanics involved, variable aperture lenses are larger and heavier. Some camera systems do not have an aperture built into the lens but that is rare and they require special lenses.
Here’s Think Media’s explanation that may help understand all this and go into some more detail:
Camera Lenses and Camera Bodies
Photographers always talk about their collection of “glass” more than camera bodies themselves. Cameras come and go. Lenses last longer. This has some limitations of course. While people are still using “bulletproof” Nikon lenses from the 1970s and 1980s, which are both inexpensive and of good quality, they have their limits. Many are manual focus, many with autofocus have been used for many years and may be worn out, including what powers them, lens mounts, connectors, etc. But you can still find barely used lenses that
This is not to say there are not great DSLR lenses coming out every year because there are. While they may not have many new features (there are only so many features a lens can have), as technology changes they become lighter, better performing, or less costly. While you may be able to get a small lightweight 50mm prime lens for around $100 that gives really nice quality images for amateur photographers, it will never replace a 100-300 mm optically stabilized single focal length lens.
Just make sure that when you start your lens collection, you do not fall into the trap of buying lenses with many different mounts, such as Nikon or Canon. You want to stick to one lens mount, for example Nikon, and use adapters that allow other brand lenses such as Canon on your camera. These adapters are getting better every year, and while they may only give mechanical functions using a 1970 Nikkor lens, with modern lenses they may give you autofocus, light and other readings.
Adapters should not be confused with tele-converters or macro rings. These do not adapt to different mounts but rather affect the way the lens behaves. Teleconverters have an optical element with a magnification factor which increases the total magnification/focal length, although causing loss of light due to the extra optical element.
Macro extension rings on the other hand are just spacers which allow you to put your subject much closer to the lens and still have focus. This is because the focusing range of your lens in decreased, no longer being able to focus at infinity.
Camera bodies are also replaced often (besides the fact that shutters dont last forever) because camera technology evolves so quickly. Camera manufacturers are in a high level of competition every year putting out new models that are better than last years, whether its the sensor, battery life, megapixel count, etc. Don’t forget that every time your camera body gets better, your existing lenses will also give you better photos when used along with it.
What you should keep in mind when buying new lenses if you are serious about photography due to what i described so far is you should buy good quality lenses with quality features, such as a low number fixed aperture. They will last if you take care of them, and you will be able to use them on different camera bodies.
While im on the topic of budget, third party lens manufacturers such as Sigma, Tamron and Tokina make lenses for other camera brands and these can save you quite a bit of money, while keeping image quality good. Always read lens reviews or try before buying, especially with third party manufacturers, to make sure you are satisfied with the photos.
Types of DSLR Lenses
Now that you have a greater understanding about how a DSLR lens works, understanding which lens is right for you and why will be an easier task. There are two main types of DSLR lenses:
Prime Lenses
These lenses have a fixed focal length meaning that you have to move around more when framing your shot. However, they are generally a much faster lens and produce a sharper image. They also tend to be lighter which is great for travelling.
Zoom Lenses
These lenses have a varying focal length meaning that you can zoom in and out of a scene without having to move your location. Their flexibility can be a great asset although they tend to be much bigger and heavier than prime lenses.
Zoom lenses work on the idea that you are moving various lens elements inside the lens with relation to each other, whether by turning the zoom ring or pulling it forward or back. This changes the focal length and the magnification power of the lens.
While prime lenses can help quickly develop your photographic skills, if you are not sure what kind of photography you will be doing, a zoom lens can be a great option. Within these two types of lenses there are several different more specialised lenses available. Again, depending on the type of photography you are going to be doing will depend on which lens you should choose.
Kinds of DSLR Lenses
Macro DSLR Lenses
These are the lenses that allow you to capture the tiny and intricate details of a scene. Often used in photographing small creatures such as ants and spiders, flowers as well as abstract images.

Macro lenses can be purposely built prime or zoom lenses or they can be classed as macro simply because their closest focusing distance is short. The prime macro DSLR lenses will usually have a wider aperture and higher quality glass than their zoom counterparts, therefore producing a higher quality image.
A more affordable option if you are just getting started is to choose a lens that also has a macro function. This means that you can still do your everyday photography but if an occasion to capture a macro image comes along there is no need to change the lens. On the other hand, these types of lenses often have a longer focal length which will lower the quality of the image.
Wide Angle DSLR Lenses
If landscape photography is your thing then wide-angle lenses will be your bread and butter. These lenses can often produce the images we find most visually fascinating as the lens can often distort what we see with our eyes in real life.

This distortion, however, can be linked to the quality of the lens. With the top wide angle DSLR lenses giving little to no distortion or chromatic aberration whereas the more affordable will see more. You are able to correct for this in editing software.
Wide angle DLSR lenses are available in both prime and zoom lenses with quality and affordability varying between the two. To determine which is for you, first you need to think about what you will be using it for. For example, if you are shooting portraits where you are able to easily move yourself around to capture the shot then a prime lens maybe best. However, if you are shooting a live performance where you are in a fixed position a zoom lens is probably going to be a better option.
Telephoto Lenses
If you are looking to photograph subjects from far away, then a telephoto lens is for you. They are generally lenses that have a focal length of 85mm or longer and like the other lenses they come in both prime and zoom.
When it comes to telephoto lenses though, it is the zoom lenses that are the most popular. This is because the situations that you generally need a telephoto lens require a little bit of flexibility and a zoom lens gives you that.
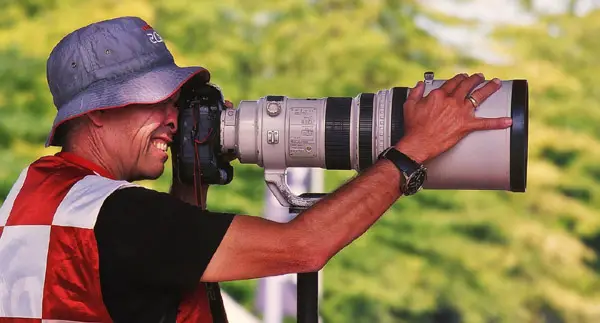
Zoom telephoto lenses are particularly popular with sports and wildlife photographers as they are able to follow a subject without having to move much themselves. These lenses also tend to have image stabilisation features which can be really helpful. It helps cut down any shaking or vibrations which become more obvious at longer focal lengths.
Standard DSLR Lenses
Your general purpose, all-round and kit lenses are great when you are just starting out. They allow you to do multiple different types of photography with just one or two lenses. This means you can figure out which kinds of photography you are most interested in before buying more specialised lenses. They are also popular with event and wedding photographers where the act of changing lenses can mean missing a potentially amazing shot.
These lenses are generally zoom lenses and because they are built to do multiple different things the overall image quality is not as high as a prime lens. However, there is a huge variety with some even having the ability to go from a wide angle to a long telephoto! Obviously the more you want the lens to do the lower the image quality will be. Nevertheless, it is a great option if you are just starting out.
Portrait DSLR Lenses

If shooting portraits is your jam, then bagging yourself one of these lenses is a no brainer. These lenses are generally prime lenses and so deciding on what kind of portrait you want to capture will help you decide which focal length to get.
In general, a great starting point is to go for a focal length of around 50-85mm. This is because you can capture the soft beauty of a subject while still being able to add some drama and vibrancy.
Fisheye DSLR Lenses
These lenses are ultra-wide-angle lenses and produce a full 180-degree radius image. These types of images are instantly recognisable as they distort the image and make everything look like its in a bubble. These types of lenses are usually prime lenses.
Tilt Shift DSLR Lenses
Also known as perspective-control lenses they allow you to shift and tilt the optical configuration of the lens relative to the sensor. Basically, it means that when you are photographing buildings you can correct for key stoning (an effect that makes buildings appear like they are falling over).
You can also adjust the depth of field without changing the aperture which can be helpful in landscape and product photography. On the other hand, they only have the ability to focus manually.
Other Things to Consider
Distortions
Not all lenses are perfect, and they all have varying degrees of distortion. Prime lenses usually have the least because they do not have to accommodate a range of focal lengths. There are two main types of distortion to be aware of when choosing your lenses: Barrel distortion and Pincushion distortion.
Barrel distortion is when the edges of the image look barrel-sized rather then straight. Pincushion distortion on the other hand is the opposite. It makes the edges bow inwards. You can also get an image that has a mixture of both which is known as a complex distortion.
As technology improves modern zoom lenses are not plagued by distortions as much. Although it is worth noting that these distortions can often be corrected for in photo editing software.
Aberrations
One of the reasons multiple lenses or glass elements are used inside a camera lens is because while a single lens could form an image, it would have aberrations.
Sometime the light that passes through your lens is not all bent in exactly the same way and causes what is known as aberrations or edges of the image that are not coloured correctly. There are some colours that are affected by this more than others and also some lenses. You can often correct for this using editing software though.

Chromatic aberrations are also diminished when different material lenses are used together in the group, therefore realigning the colors.
Lens Sharpness
Lenses are usually sharpest in the middle and sharpness also isnt the same throughout a lenses zoom range. As I said before, lenses have come a long way now that we use DLSRS, but they are not perfect yet. If you use your lens for many types of projects you will learn its sharpness qualities. One thing in common is lenses are less sharp when the aperture is wide open, so if you are experiencing that issue use a smaller aperture.
Well, that is it for my review of how DSLR lenses work and differ. I hope this article has helped you understand lenses more. As you can see its not all that complicated.
You can learn more about budget friendly lenses for aspiring professional photographers here


8 comments