Do you want to learn how to use light in photography? Photograph a flower.
A flower in and of itself is an interesting subject. Flowers have different textures, bright colors, and won’t get bored of sitting still while you adjust your settings.
But a quick snap of a flower, while beautiful, can be boring. If you really want to bring that photo of a flower to life, you have to be intentional about taking the photo. Think about the direction of the light, the angle of the photograph, and the other elements we’re going to talk about here.
 With this simple guide on how to take good pictures of flowers, you’ll be capturing gorgeous images in no time!
Equipment for Taking Pictures of Flowers
Before we get too deep in the technique of photographing flowers, let’s talk about the equipment that you’ll need. One of the wonderful things about flower photography is that you don’t need fancy equipment to get started. With a solid understanding of how your camera works, you can create gorgeous images with everything from a smartphone to a professional-level DSLR.
That being said, we’re going to assume that you’re at least working with a basic DSLR camera with interchangeable lenses.
Lenses
You can successfully use several types of lenses for photographing flowers.
Prime
A basic prime (non-zoom) 50mm lens is one great choice. Often called the “nifty-fifty”, many manufacturers, including Canon and Nikon, make an inexpensive, yet stunning quality 50mm lens. These lenses can go down to f/1.8 or even f/1.4 (if you want to pay a little more) to get some gorgeous bokeh (background blur) around your subject.
Zoom
A good zoom lens is a bit more versatile. You can try different focal lengths and see what you like. Shorter focal lengths allow you to fit more into the scene, perhaps adding a frame by shooting through other flowers, leaves, or other garden elements.
Longer focal lengths allow you to more effectively single out a single bloom. Both ends of the spectrum will give your images a drastically different look.
Macro
What if you really want to get up close and personal with those flowers? You might want to try a macro lens. You’ll have to invest a bit more in a good macro lens (check out this one for Canon EF-S mounts), but the results can be worth it. Macro lenses will magnify tiny details like the delicate stamen or the veins in a petal.
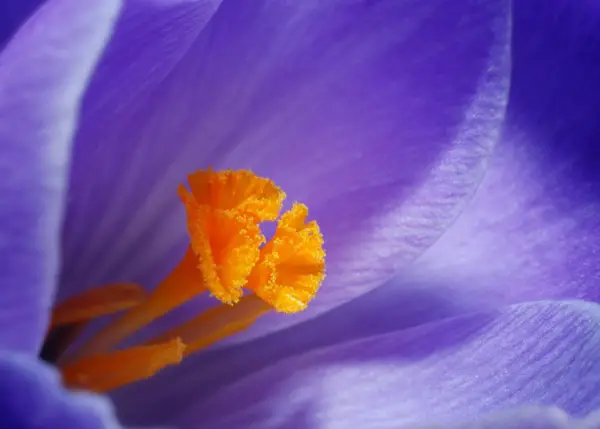
Alternatively, you can try macro filters that you screw onto the end of your lens. For less than $20 you can dive into the world of macro photography and see how you like it. With the right technique, you can get incredibly close details like in the image below.
Tripod
A tripod will help steady your hand as you photograph. This is particularly helpful in macro photography where even the movement of your breath can disturb the photo.
Additionally, if you are working in a low-light situation, a tripod allows you to slow down the shutter speed to capture a perfectly exposed image without having to crank up the ISO or open up your aperture too wide.
Remember, when taking macro photos you can’t shoot with your aperture very wide or very little of the image may be in focus. Of course, that might be okay if that’s the effect you’re going for.
Reflector
A reflector can also help you brighten up a dark subject or fill in the shadows by bouncing the light back at your subject. We’ll get into more detail about this in a minute. You can buy large, flexible reflectors or use something shiny like aluminum foil in a pinch.
Lighting
Now that we’ve got the equipment out of the way, let’s get to the fun stuff. Playing with light is a big part of photography. The word photography literally comes from the Greek words that mean “drawing with light”.
Photographing flowers gives you the opportunity to play with light in interesting ways. A flower is beautiful, but an image of a flower photographed with an understanding of light is downright stunning.
We’re going to give you some ideas to play with, but remember that there is no one right way to photograph a flower. Your unique eye and what is beautiful to you is what defines your images as your own.
Front lighting
Front lighting is a simple way of lighting your flower — but the results are lovely. The light source is coming from behind you, thus falling on the front of the flower. This fully lights the front of the flower and brings out the colors in all their glory.
If the light source is strong, such as on a sunny day, there will usually be strong shadows around the edges of the flower or behind the leaves. Done well, the use of shadows can create a dramatic effect that further makes the colors pop and strengthens the image.
More muted front lighting, such as in the evening or the early morning, will create a softer image. The colors will still be bright, but the shadows will be less contrasty.
Backlighting
Backlighting an image is a little more tricky because you don’t want the front of your subject to be too dark. However, when done well, it creates a hazy, dreamy image that is perfect when photographing flowers as the light filtering through the delicate, translucent petals of the flower is downright heavenly.
When taking a backlit photo, the light source is coming from behind the subject. As you can see in the example below, the flower almost seems to glow because of the light behind it. Look closely at the stem and you can see that the tiny hairs are lit up. The whole effect is quite ethereal and makes a lovely fine art photograph.
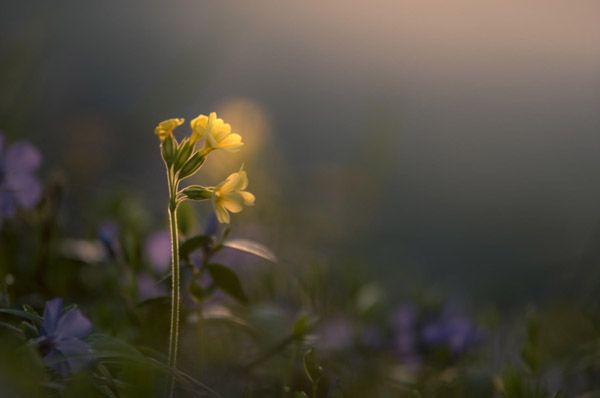
Play with taking backlit photos at different times of the day. Choosing a time late in the day when the sun is low in the sky gives the whole image a warm glow, which adds an extra special effect.
Sunny vs Overcast
You’ll often hear the advice to avoid photographing in bright sunlight or at high-noon. Strong sunlight casts harsh shadows, especially if the sun is directly overhead.
For this reason, outdoor portrait photographers usually schedule their sessions in the early morning or late afternoon to take advantage of the soft light given off by a low sun. People typically don’t photograph well with dark shadows under their noses and eyebrows.
But what about flowers? Does this rule hold true?
It depends on the type of image you want to create.
Overcast skies create a giant softbox that gives off even lighting. The whole flower will be lit fairly evenly and any shadows that appear will be faint and soft. This creates a soft, pleasing image. The lack of stark light contrasts means there aren’t any blown-out bright spots or harsh shadows and it is easier to correctly expose the image.
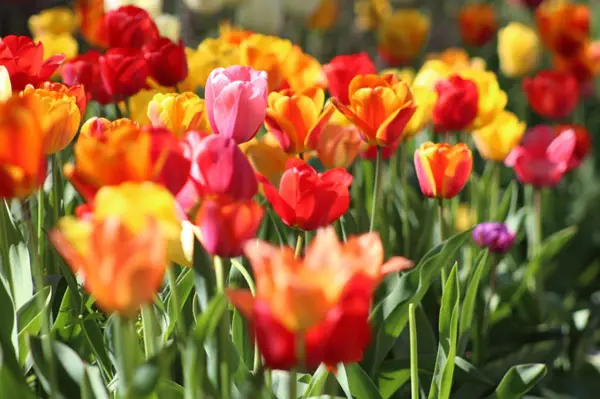
In contrast, photographing a flower in full sun can result in a strong, dramatic image. The colors will pop and the deep shadows give depth to the image. Check out the brilliant colors of the tulips in the image below.
Try photographing a flower in full sun, with the background in shade. By exposing for the bright flower, the background will be too dark, effectively isolating the bloom against a dark background in your image. This gives the solitary flower an air of mystery and strongly draws the eye to the beauty of the flower.
Time of Day
The time of day that you choose to photograph your flowers will also make a difference. In the early morning or late in the afternoon, when the sun is low in the sky, the light will be softer and create fewer shadows, and thus create a softer image.
However, if you want your flowers to be bright and the colors punchy, try shooting during the middle of the day when the sun is stronger. You can also experiment with photographing flowers in the shade vs in direct sun.
Using a Reflector
If you want to start getting fancy, try using a reflector. This is perfect for when you want to try backlighting your image.
Position the reflector in front of the flower. This will bounce light back onto the front of the flower, ensuring that the front isn’t too dark while still allowing the light to diffuse through the petals from the back.
You can also use a reflector to brighten flowers that are in the shade and give them an extra boost of vibrancy.
Dealing with the Wind
Say you’re all set to take a gorgeous macro photo of a flower. You have your tripod set up, the aperture is set for the perfect depth of field, and your shutter speed is slow to capture a well-lit image.
As you take the photo, the flower moves just a hair with the whisper of the passing breeze…and comes out blurry.
Try to avoid the wind as much as possible by shooting when it’s not windy. However, it’s Murphy’s law that a tiny breeze will waft through at the worst possible moment. To avoid this, try setting up a windbreak next to your flower. This can be as simple as a piece of cardboard or anything else somewhat light and sturdy that you have lying around.
Bonus tip: you can even use your reflector to both bounce light and provide a windbreak!
Composition
Now that we’ve got the technical stuff out of the way, let’s look closer at composition.
You can follow the basic tips here like the rule of thirds, but you also want to get creative with your flower photos.
Here are some great ideas.
Interesting Angles
It’s always a good idea to get down on the same level as your subject and photograph it straight on. But there are many more interesting angles that you can try.
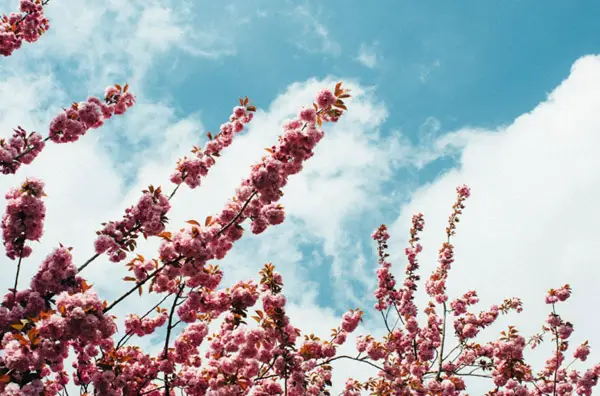
Try photographing straight down on a flower. Imagine showcasing the innards of a tulip or the endless coils of a rose. Go down low and shoot up at your flower. Get more sky in the background. (Hint: this technique will work best when the sky isn’t overly bright or if you light the flower to avoid blowing out the sky.)
Think about unique perspectives. For example, daffodils are typically photographed from the front or the side to showcase the “trumpet”. What if you photographed it from behind? Maybe with the daffodil in the foreground and another interesting element in the background that you see from the daffodil’s perspective?
You could also shoot through another flower or some leaves to add a bit of a “frame” to the image.
There are all sorts of interesting things to try. Have fun experimenting!
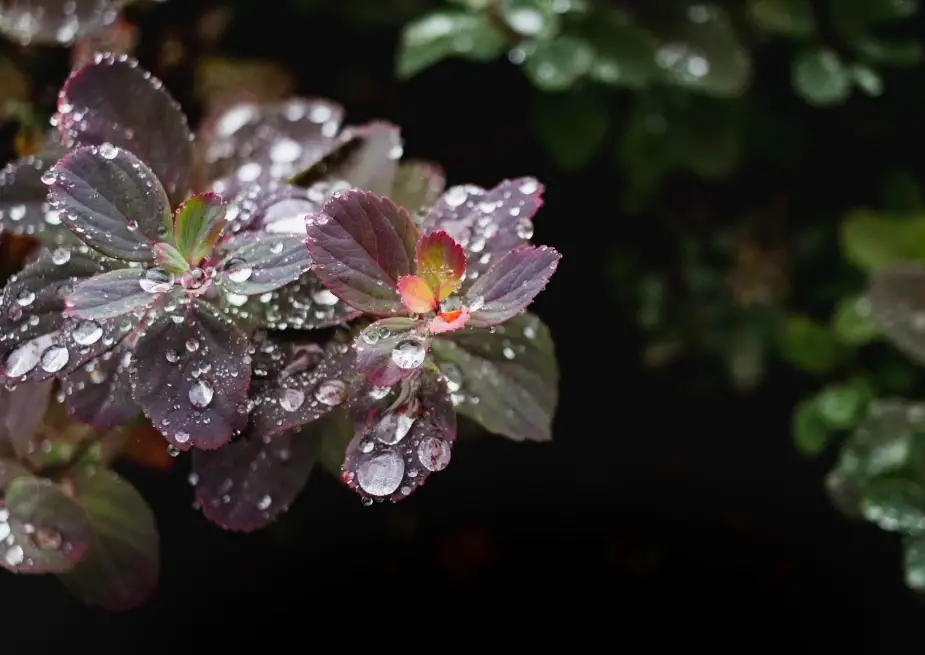
Water
Photographing flowers after a spring shower is a lovely opportunity. The delightful drink makes flowers put on a fresh face and the water droplets clinging to the stems and petals add a clean, fresh element to the image.
Of course, you don’t have to wait until it rains to get this effect. Spritzing your subject with a spray bottle of water will do the trick. If the flower is very dry and wilted-looking, water it a couple of hours before you want to photograph to help perk it up. Then, have your water bottle on hand to spritz the flower as you’re photographing.
Other Elements
Sometimes visitors like a butterfly or bumblebee will wander into your photoshoot. Don’t shoo them away, try incorporating them! You’ll need a faster shutter speed to capture their movement without blur so you might have to bring up the ISO a bit, but the resulting image will be worth it!
Background
As always, consider your background. You might focus on a single bloom, but fill the background with a myriad of out-of-focus flowers. You can also isolate a single flower by photographing it with a wall or fence behind it.
With a top-down image, you can use the grass or gravel or whatever is on the ground as your background. Look around and get creative, you’d be amazed at how many options you have even in a tiny garden!
The main thing is to avoid a cluttered background that distracts from the main subject of your photograph. Watch out for patches of sunlight in your backgrounds, in the photo they will show up as distracting bright spots.
Depth-of-field
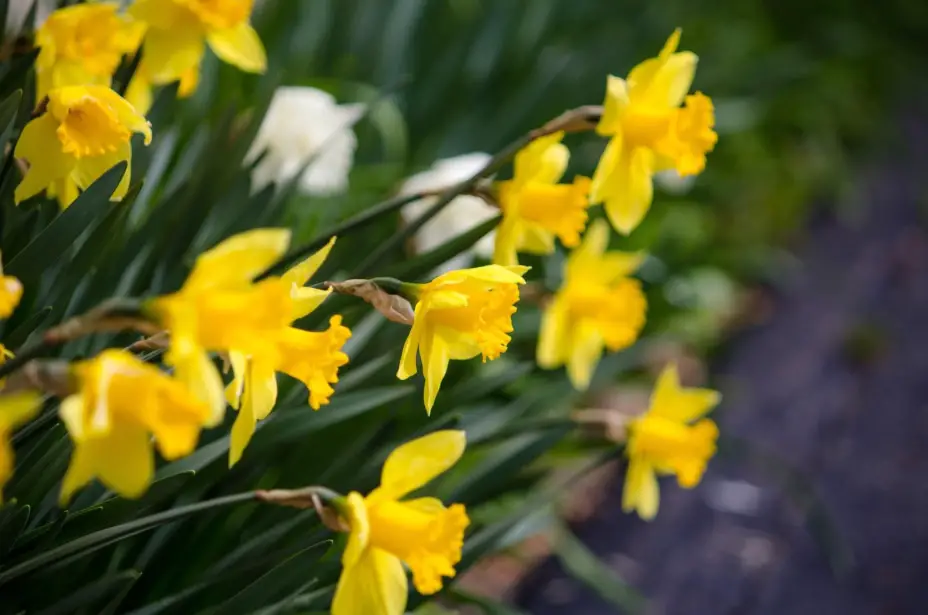
For a more advanced technique, you might want to play with a narrow depth of field. Break out your tripod for this one to help keep a sharp image, particularly if you use a macro lens. The part of the subject that you want to highlight has to be perfectly sharp or else the whole photo will just look out of focus.
In the image below, you can see how only the daffodil in the very center is completely in focus. All the daffodils around it are out of focus, allowing that central one to be the star of the image.
Alternatively, go small and focus on one tiny bud or a water droplet falling off the end of a petal. Or a ladybug climbing the stem. Be patient and don’t rush it. This is how you go from taking good photos to creating great photos!
Photographing Flowers Indoors
Another option is to bring your flowers indoors to photograph them. Perhaps the day is too windy or you want to create a lovely bouquet and photograph it in a different environment.
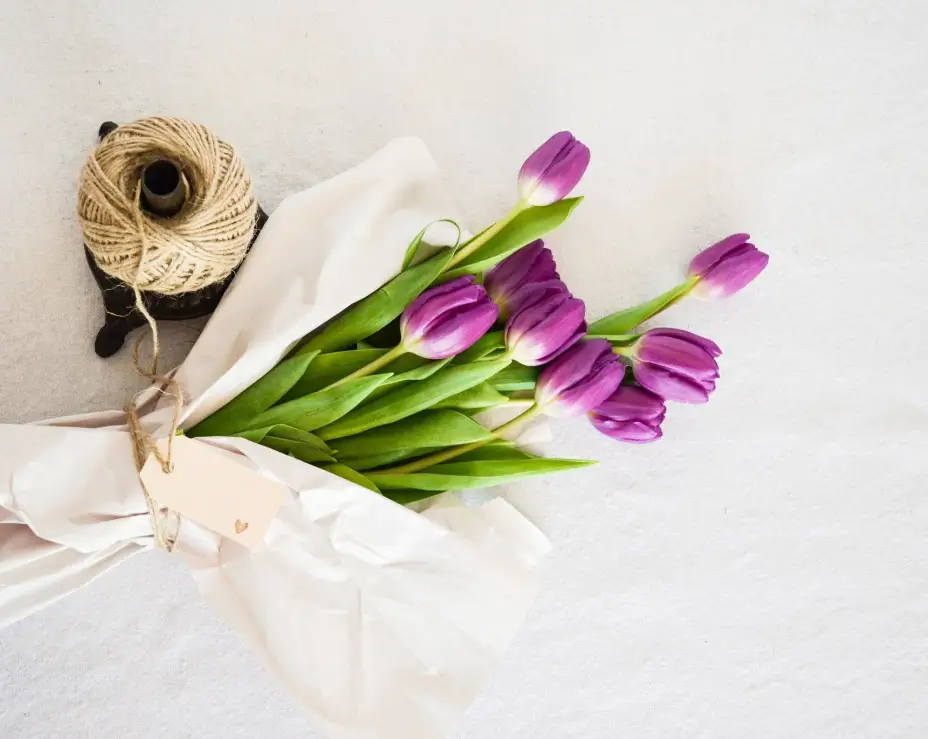
Try setting your bouquet next to a window. Examine how the light falls on the flowers from the side and play with taking some creative shots. Individual flowers against plain white or black backgrounds can also be fun.
In the studio, you can play with interesting types of lighting. Set up your flower with a lamp overhead (ideally find something to diffuse the light) and expose for the brightest part of the flower. The background will fade away and your flower will be lit by a gorgeous ray of light.
To learn more about how to make flowers look like they are coming out of the dark, check out this tutorial by Ray Scott at Visual Art Photography.
Alternatively, try shining a light into a flower like a tulip. You can get some interesting effects with this technique.
Flower Photography For the Win!
Perhaps you never thought flowers could be so interesting to photograph. Perhaps you’ve always admired creative flower images and were raring to try your hand at it.
Regardless, learning to take good pictures of flowers isn’t as simple as it might seem and it’s a great way to stretch your photography muscles. Try some of these techniques and let us know how it goes in the comments.
Interested to learn how to make money with your photography and how much you can expect? Check out our recent post on the subject to learn all about it!


1 comment