Whether you are using a smartphone or DSLR camera, there are times when you need to use the self-timer feature of the camera for triggering shots. With the variety of devices these days and their own camera control software, this is no longer as standard and easy to find as pulling the spring loaded self timer lever from decades ago.
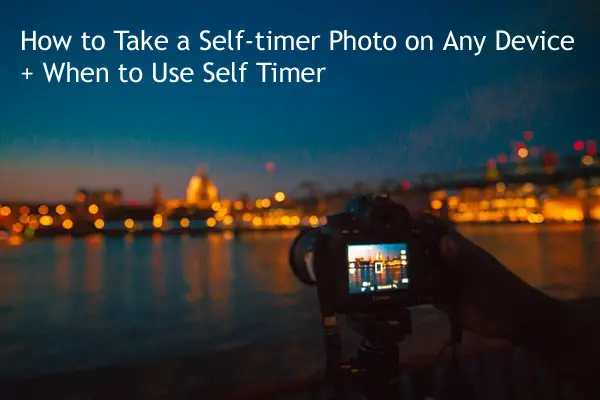
In this guide, I will show you how to set the self-timer on your android phone, Apple iPhone, tablet and DSLR/ Mirrorless camera. I will also share situations when you should use self-timer for capturing pictures. You will learn that most of the uses are not for taking selfies.
In general, taking a self-timer photo with a modern device requires going into self-timer mode, which for a dedicated camera involves selecting this “drive mode” from the rotating selector knob or in the camera’s digital menu, while for a phone or tablet it involves selecting the stopwatch icon. Details below.
Both smartphone cameras, as well as DSLR/ Mirrorless cameras, come with self-timer. Unfortunately, many don’t know how to put it to the right use.
How to use the self-timer feature of the Apple iPhone & Ipad?
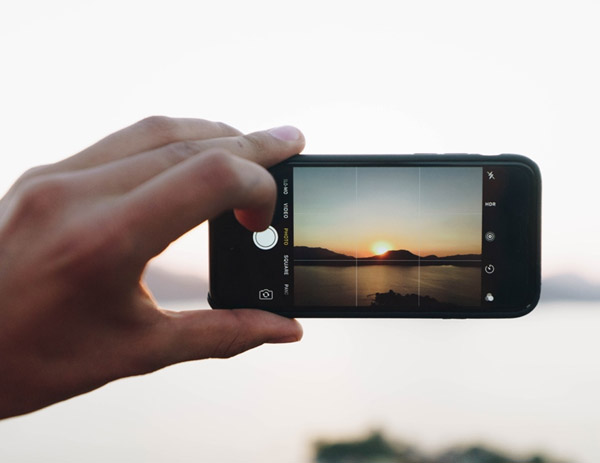
You can use the self-timer feature in your iPhone and Ipad for taking pictures. To use this feature, go to the camera app with a thumbnail that looks like a camera.
You can see a stopwatch icon on top.

Tap on this icon to view the different timer settings for the camera trigger. You can go for 3 seconds or 10 seconds according to your requirement. After setting it, you can click on the shutter release button at the bottom of the app to start the self-timer sequence.

That’s all there is to it.
How to set up the self-timer in an Android phone/ tablet
Let us see how to use the self-timer feature in your android phone or tablet. We will be using the default camera app available on the android phone. So, the procedure will be the same for all android phones.
First, open the camera app.

Click on the hamburger icon on the top left side. A new drop-down window will pop up. You can see the self-timer option in the second row of this window.

There will be a clock icon on the left side. You can see three different times- 3s, 5s, and 10s.
You can select any of these settings to get the required time delay for triggering the shutter button. After setting the timer duration, click on the photo capture button in the camera app.

You can see that the starting of the countdown for the set duration. The camera will capture the image after this delay.
How to use the self-timer in a DSLR/ Mirrorless camera?
All DSLR and Mirrorless cameras come with the self-timer option. We will see how to set it and use it for capturing images. DSLR and Mirrorless cameras come with different shooting modes for capturing images. It includes auto mode, aperture mode, shutter priority mode, etc.
The self-time feature can be used in any of these modes.
First, go to the Drive mode in your camera. This can be found either on the physical selector knob or in a digital menu.
Physical buttons:

Digital menu:

By default, it will be in single-shot mode. Once you click on the drive mode, you can see multiple options. You can see the self-timer mode option in this section. When you select this option, you can vary the time like 3 sec, 5 sec, or 10 sec. You can choose any of these time delays and enable the self-timer mode.
After enabling the self-timer, the camera will trigger the shot only after the set duration of time when you press the shutter button. You can hear the continuous beeping sound from the camera the moment you press the shutter button.
That’s it. Now you know how to take self timer photos.
Photo Situations where you should use the self-timer feature
Now that you know how to use the self-timer feature on different devices you might be interested to know when to use it. Below are the best uses of the self-timer:
1. For capturing self-portraits
Lets say you want to capture self-portrait shots. The best way to do it is by using the self-timer mode in your camera. You can place your camera in a stable place and set the drive mode in self-timer for triggering the shot. It will be very useful to capture profile pictures for your social media accounts.
When you use the self-timer for self-portraits, you need to take care of the focusing part. You won’t be there in the frame when you trigger the shutter button. If you don’t set the focus properly here, then the camera will end up focusing on the background. Here, you can set the focus on any element in the scene that is at the same distance where you are going to stand. This can be done manually with a lens of digitally with the shutter button halfway pressed or by clicking on the screen on a phone.
2. To capture group portraits, including you
When you are out for a vacation with your family or friends, you will be capturing a lot of group portraits that include you also. Here, you need to pose for the photo as well as be the photographer.
The self-timer feature of the camera will help you perform both the roles. You can make the group of people pose for the camera, leaving some space for you. Go for a 5 second or 10-second timer in the camera. Trigger the shutter button and come and join the group for posing and the camera will record the image for you.
3. For low light photography
The self-timer mode is extremely useful for capturing low light images. When you are doing low light photography, you will be using a tripod to mount your camera or a stable base where you can place your camera.
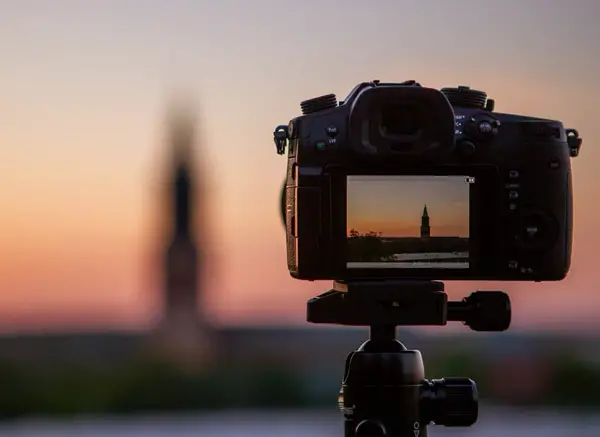
In low light, you need to use a slower shutter speed to capture the image with less noise. You want to eliminate all sources of noise in the picture. When you press the camera shutter button, it can create some amount of shake when you use slower shutter speeds. This shake can result in a blurry image. To avoid unnecessary blur, self-timer mode is preferred by photographers who shoot at low light.
4. For long exposure photography
In the case of long exposure photography, you will be capturing the image with shutter speeds in the range of seconds. You will be using the manual mode, shutter mode, or bulb mode in your camera for the capture.
Here, you are dealing with extremely slow shutter speeds that demand a stable camera setup. The self-timer mode will help to eliminate the camera shake due to the shutter button press.
5. For macro photography
When you are doing macro photography, you will be shooting at higher f-numbers. So, less light will be entering the camera sensor. As a result, you will be getting a slower shutter speed to get a perfectly exposed image. Most macro photographers use a tripod for their shots to nullify the camera shake, if any. They also make use of the self-timer feature to get a shake-free image.
How to take multiple pictures with a self-timer in a DSLR/ Mirrorless camera?
You can also use the self-timer feature to capture multiple images with a single timed click. This feature will not be available in all the cameras. It is available in many DSLR and mirrorless cameras.
To use this feature, you need to set the number of shots in the self-timer settings. By default, it will be 1. You can set the desired number of images in this setting to capture more photos with a single click. It is similar to the burst mode shooting that you might be using to capture action shots.
How to take multiple pictures with a self-timer in an android smartphone?
In the latest android smartphones, you can click multiple snaps using the self-timer mode using the in-built camera app itself. You don’t need any third-party app to do it.
Open the camera app. Click on the hamburger icon on the top right corner. A new window will pop up. Next, you can see the clock icon followed by different time delay durations. Finally, you can see the “Timed burst” option. Select this option.
By default, when you tap, it will select the “30 photos 5s” option. This option will trigger 30 shots with an interval of 5 seconds each. Click on the bottom notch of this icon to choose the number of images and the time interval between each picture according to the requirement. The minimum number of shots is ten, and the maximum number of shots is 600. The minimum time interval is 1 second, and the maximum is 60 seconds.
After inputting your desired values, you can go back and set the self-timer delay interval in the first menu. Once everything is set, press the camera shutter trigger button to initiate the burst mode sequence to capture multiple images.
How to take multiple pictures with self-timer in Apple iPhone and Ipad?
You cannot use the default camera app on iPhone or Ipad to capture multiple pictures with the self-timer mode. But still, you can do it with the help of external apps.
LapseIt is one such app that will help you to capture multiple pictures through the self-timer technique. It is available in free as well as paid versions. If you are interested only in using this feature, then the free version will be sufficient.
Self-timer photos without a tripod
People who use the self-timer technique to trigger the shots will mostly use it along with a tripod. What if you don’t have one? You can still use it.
You will need a stable base where you can keep your smartphone camera or DSLR camera. In the case of a regular point and shoot camera or a DSLR camera, or a mirrorless camera, you can keep it on top of a table, rock, ground and use the self-timer feature. You can use books to hold your smartphone.
Self-timer vs External Intervalometer for DSLR/ Mirrorless camera
When it comes to interchangeable lens cameras like the DSLR and the mirrorless camera, you can also use an intervalometer to trigger your camera. So, is it better to use an intervalometer or the in-built self-timer mode in the camera?
The built in self-timer mode in the camera can only help you trigger the shot for the set time. The intervalometer can also do the same job. But, there are certain other things that an intervalometer is capable of doing. It can make the camera shutter open for a defined time that can be more than the available settings in the camera. This feature is extremely useful for long exposure night photography.
You need to pay extra for the intervalometer, whereas the self-timer feature is available for free, along with the interchangeable lens camera. If you want to decide between the two, then you need to check and see whether the other features of the intervalometer are required for you or not. Certain high-end mirrorless and DSLR cameras do come with an internal intervalometer. So, check if your camera already has one or not.
Self-timer camera apps available for android phones and tablets?
I will share some android camera apps that come with a self-timer. You can install and use these apps if you want to try an external app.
Self Camera Timer App

The Self Camera Timer app is from Novta publications. This app will help you set a time duration of 5 seconds, 15 seconds and 30 seconds. So if you are looking for a 15 second or 30 second timer, then this app will be helpful for you. You can also set the number of shots to 1 or 4.
Timer Camera App
The Timer Camera app is from Three Star Fish. You can use this app if you are interested in capturing extreme bursts of images. This app allows you to set a time interval from 1 second to 2 hours. The time delay for the trigger can also be set from 1 sec to 350 hours. If you are interested in capturing multiple images for long hours and combining them later for a high-resolution image, then this app will be helpful.
You can use it to capture start trails using your smartphone camera. Another exciting feature of this app is the burst mode control. You can set and capture as many photos as you want using this feature. There is no limitation on the number of pictures in the burst mode. It also comes with a face detection feature. Thus, you can quickly get a good focus on the subject’s face.
Here is a useful video on customizing your iPhone self timer settings:
I hope this article has taught you all you need to know about the self timer.
Consider reading this article on solutions for blurry iPad photos.


