Fog Photography is an ethereal, atmospheric form of outdoor photography that produces some of the most beautiful photographs. Unfortunately, it’s also one of the most difficult to capture. From the wrong exposure to a serious lack of contrast, there are many ways fog photography at night can go wrong.
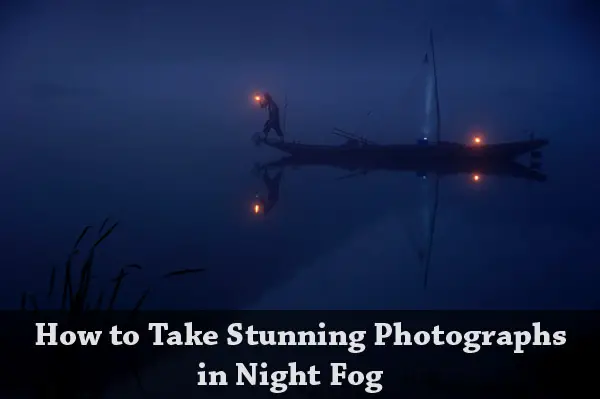
In this post, you’ll learn how to take stunning photographs in night fog for the best results.
Why Photograph Fog at Night?
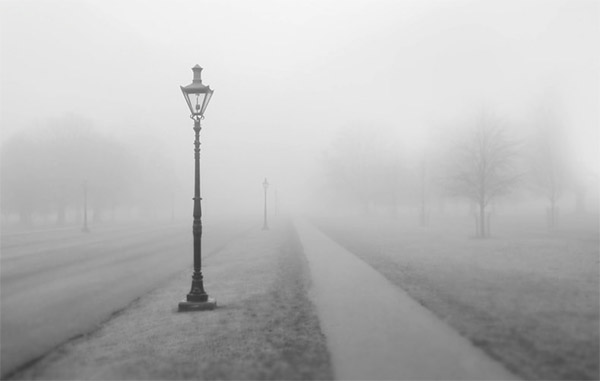
Fog has a unique ability to diffuse light. It can throw the light of the moon across an entire landscape, giving interest to otherwise empty space. It can make a single streetlight enchanting and a truly dramatic scene.
Unlike in the daytime, night fog can actually make capturing photographs slightly easier. This ability to diffuse light means pictures are brighter and more content can be seen than without the glow of fog present.
Because of this, you can use less extreme shutter speed/aperture/ISO combinations, allowing for more natural photographs.
Of course, this isn’t always the case. It’s easy to come home with blurry, dark photographs of cityscapes shrouded in fog if you get the settings wrong. There are some specific camera settings that will make capturing fog at night much easier.
Finding Night Fog
The toughest part of photographing fog at night is finding the fog. It’s a rare weather front and requires a little research and following weather forecasts to find. Many weather programs fail to mention when fog will be rolling in, but there are a few weather conditions to look out for that often signal fog may form.
Night fog is technically referred to as radiation fog. It occurs when the ground rapidly cools after sunset. The air above the ground also cools, reaching a dew point and thus forming fog. This type of fog usually doesn’t last long after the sun rises so it’s vital to find it as soon as possible after nightfall.
Autumn is a good time to find fog at night. As the nights begin to get longer, skies become clear and cloudless at night – the perfect conditions for radiation fog. It’s also most common in sheltered or valleyed areas with no wind or near a body of water.
If your local weather office reports calm, cloudless nights ahead with a significant temperature drop, it’s a good time to go on the hunt for fog.
Dealing with Low Contrast
Cameras using autofocus will detect subtle differences in contrast in order to find the best focus. However, when shooting fog at night, there is little to no contrast to work with. For this reason, autofocus simply doesn’t work in this environment.
Luckily, the solution is simple. Switch to manual focus. In this case, you will still need a subject matter to focus on.
Getting the Right Exposure
The second technical issue when shooting night fog is exposure. If you’ve ever photographed snow, you’ll understand the metering systems of a camera struggle in these blanketed conditions. The whiteness of the fog tends to be underexposed, turning out greyer and darker. This is how you end up with shadowy pictures that lose their magic.
To counteract this, overexpose the shot to make the fog look lighter. If you’re shooting near sunrise, make sure to continually adjust the settings to accommodate the light from the sun.
For more useful information on getting the right exposure, check out this guide on the exposure triangle.
How to Emphasize Light
Fog is simply water droplets suspended in the air. These cause light sources to scatter more than usual, making it soft. Contrastingly, it can also make light streaks much more defined and concentrated, such as those from car headlights or streetlamps.
If you want to emphasize light beams in night fog, it’s important to plan your vantage point. Position yourself close to the light source but not directly under it. This angled perspective helps the light scatter while being much brighter and more defined than further away.
However, if you are working with extremely thick fog and the light source is very bright, the light beams will be clear no matter where you position yourself. Of course, finding dense fog can be a challenge in itself.
How to Emphasize Silhouettes
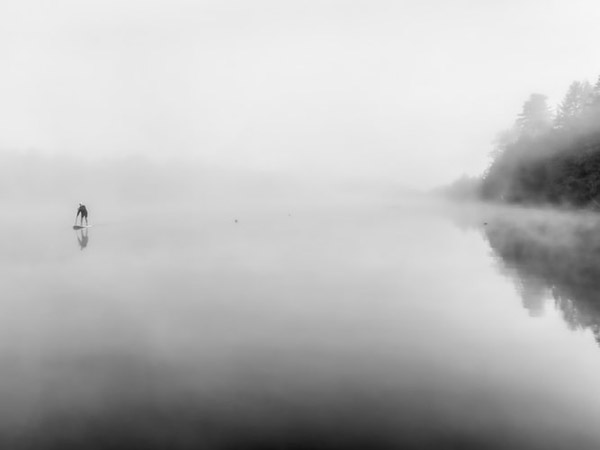
Fog is the perfect medium for capturing beautiful silhouettes and outlines because it reduces texture and contrast. It’s one of the easiest mediums to capture a subject as just a simple silhouette.
To achieve this, expose based on the fog and not the subject itself. This will give the appearance of a dark shadow-like silhouette.
If you want the subject to have some definition, dial in negative exposure compensation. This will ensure the subject doesn’t come out too bright in the shot. In this case, make sure to monitor the proximity of other subjects or objects in the scene. You may find the outline of one subject overlaps with your main subject, causing an unwanted merging effect.
Finding Focus
As previously mentioned, it’s best to work with manual focus when photographing night fog. This can be true when photographing at night in general because of the lack of light. If you’re unsure of the camera settings for night-time photography in general, it’s best to understand night time camera settings before shooting in fog to make the process easier.
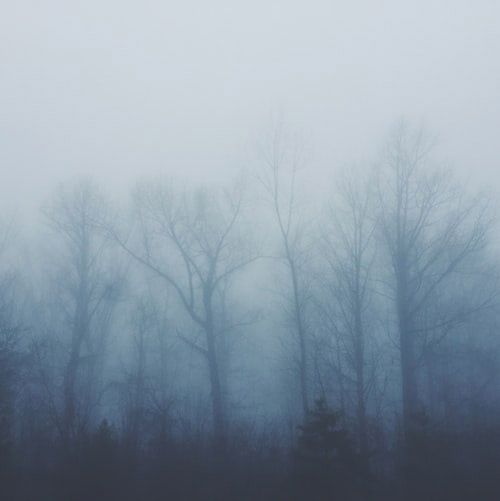
Choose a focal point or subject and adjust the lens by hand. If you’re photographing a landscape, a tree could make a good focal point to give contrast in the foggy landscape. Foreground focal points such as people, cars, lampposts, or other objects also work well to show the misty nature of the fog in the background.
Depending on conditions, you may be able to set your lens to infinity. However, if this doesn’t work and you still can’t get focus, stop the lens down to make sure you’ve got depth of field. This gives some space for error when trying to focus.
Using Shutter Speed to Give Impact
Using different shutter speeds is how you will give the fog different textures. You’ve likely seen photographs of fog that seem almost cloud-like and in large clumps. Whereas some have a more rolling mist effect.
If you’re looking for cloud-like fluffy fog, a short shutter speed works best. However, if you want the misty, ethereal look, a longer shutter speed will better capture the fog as it moves across the space.
When working with different shutter speeds, it’s important to keep the camera steady when taking photographs. You’ll be surprised how quickly the fog moves so it’s easy to blur the photos using faster shutter speeds.
Is a Tripod Needed?
To overcome the issue of blurred photographs, a tripod can be an excellent tool. As the contrast and focus are already compromised in the dark, using a tripod can make life a little easier.
If you want to take long exposure photographs, a tripod is a necessity. Although it can be cumbersome to take your tripod out at night when following fog, you’ll be glad you had it to hand.
Unlike night fog, if you’re shooting fog in the daytime, you may be able to capture good photographs without a tripod since the contrast and exposure are easier to manage. But in any case, since the tough part is actually finding the fog, it would be a shame to be out wishing you’d brought your tripod along.
Establishing an Anchor Point
When photographing fog in the dark, you need an interesting anchor point. Without a point of interest, it will be difficult to even decipher what the photo is of.
An anchor point gives the photograph much-needed interest and draws the viewer in. This is a great opportunity to use a vanishing point or leading lines to give the photograph added mystery.
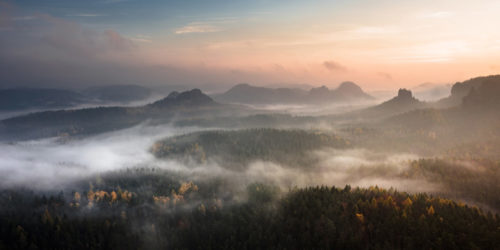
If you’re shooting a landscape, use an anchor point in the foreground to show the scale and distance within the photograph. A foreground anchor point will also give detail, color, and contrast to the night-time scene.
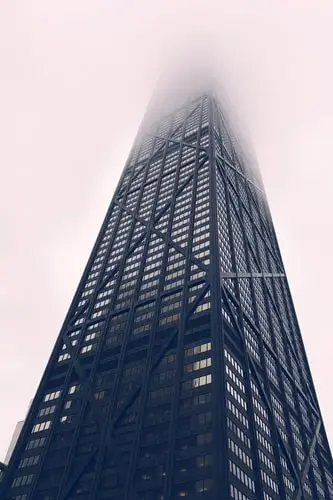
If you’re in a city, a fantastic anchor point is looking up at a building from below. This over-bearing structure gives wonderful scale and looks ominous in night fog.
3 Ways to Use Fog in Your Night Photography
1. Isolate a Subject
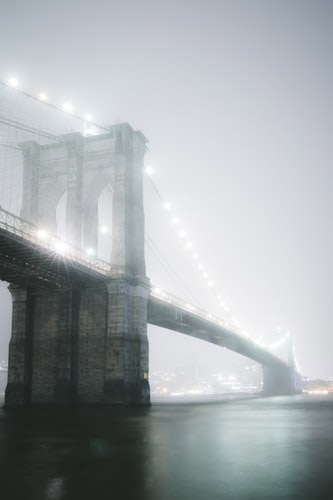
Fog is an excellent way to isolate a subject or object to give it dramatic definition. Some objects close to you may be in full view, whereas others might be obscured, like the skyscraper above. Framing objects using fog results in unique images that draw viewers in. Try isolating a single subject using the fog to frame the image.
2. Add Mystery and Drama
If the fog is extremely light on the ground, don’t feel disappointed. A thin vale of fog can actually add a beautiful element of mystery and drama to an otherwise pedestrian shot. Use the fog as a mysterious backdrop to evoke emotion in viewers. You’ll be surprised how even extremely light fog in the background can dramatically change the feel of a scene.
3. Create Layers in Images
A popular way photographers show layers or depth in images is to use a wide aperture and blur background components. But fog gives a natural way of showing depth that gives a more dramatic effect. When images fade away into fog, it instantly gives the image an almost eerie sense of depth and draws viewers into the photo. Try photographing a building, fence, or other long subject fading into the fog to test this dimensional effect.
Editing Your Night Fog Photographs
If you are planning on editing your night fog photographs in Adobe Photoshop or another editing program, the key is to avoid over-editing.
When editing other photographs, you might focus on maximizing black and white tones to improve the contrast. However, if you do this with your fog photographs is will ruin the natural look.
To make foreground objects more defined, lower the contrast slightly. To embrace the natural fogginess of the photograph, reduce the contrast. However, over-editing the contrast will take away the natural look of the photograph, so keep this to a minimum.
The point of photographing night fog is to capture the natural, hazy glow this phenomenon offers. Hence it really doesn’t need much editing to make it shine.
Final Thoughts on Photographing Fog at Night
Photographing night fog gives mysterious, magical and ominous photographs. It’s a great medium for honing night photography skills and testing out different exposures and shutter speeds. Overall, it’s an unusual form of night photography that can give truly unique photographs when done right.
Click this link to learn more about photographing the night sky


1 comment