Throughout my photography career, one of the most challenging aspects has been learning how to get the travel shots I really want. Faced with a limited window of time, unfamiliar areas, and unpredictable weather, getting the shot you envisioned can be difficult.
However, by planning ahead, being flexible and making any conditions work to your advantage, the end result of any trip can be a great photography series.
I’ve traveled to a wide variety of places in an effort to capture unique images. Through these ventures, I’ve learned what is required to make such a trip successful.
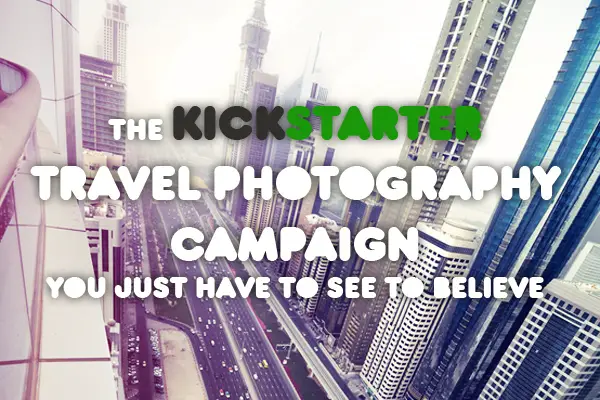
I recently launched a Kickstarter travel photography campaign, and if funded, I’ll be putting my own skills to the test this September as I travel for 23 days in an RV through California. My travel locations will include California’s Pacific Coast Highway, Napa, Yosemite, Sequoia and Joshua Tree National Park. You can view more details regarding my trip here.
The following are some examples of what I’ve learned over the years and will hopefully be implementing as part of my trip this fall:
Research & Prep Work – To cut down on wasted time, I consider what sort of images I want from a destination long before actually getting there. Think to yourself, what brought you there in the first place? What is it about a location that makes it special…what is its essence?I search through bookstores, libraries, the Internet, travel blogs and other photographers’ work for inspiration.
Once I’ve completed my research, I map out all my stops and write down useful notes before and during the trip. For example, location accessibility and hours, parking, restrictions on where you can shoot, unique events going on, vantage points, different times of the day to come back and anything else that will help me better manage my time.
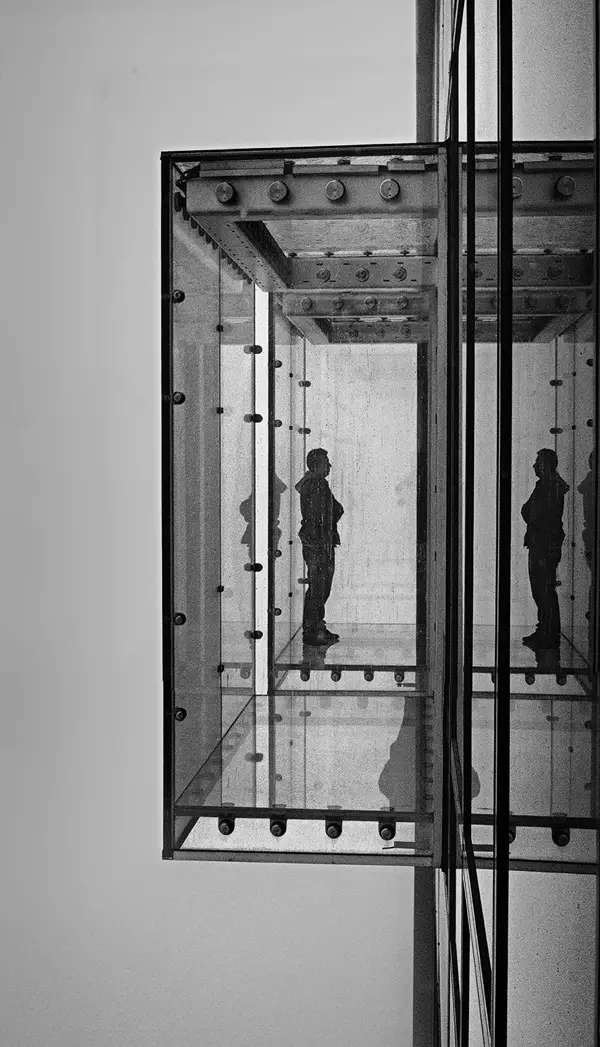
I had been envisioning doing a unique approach to the Willis Tower observation windows for months leading up to this image. I did all my prep work and waited for a low-cloud storm to come through the city, knowing it would produce the specific look I wanted. On a cold December morning, the conditions were perfect, and I knew I had a short window of time before the clouds passed. Luckily, I already had everything planned out, and the shot came out just how I had imagined it.
Equipment – I always bring a waterproof notebook to jot down ideas and first impressions, which help spark the creative thought process. I use a Lowepro camera backpack and bring my Nikon D90, two lenses (a zoom and a 50 mm), a tripod that’s light enough to carry around all day, batteries and memory cards.I usually bring some fruit or vegetables, so, if I am out for hours and need to eat, I don’t have to leave a location. I like to keep it light when traveling, so I can endure a long day. Comfortable walking shoes also make a huge difference, and I highly recommend them.
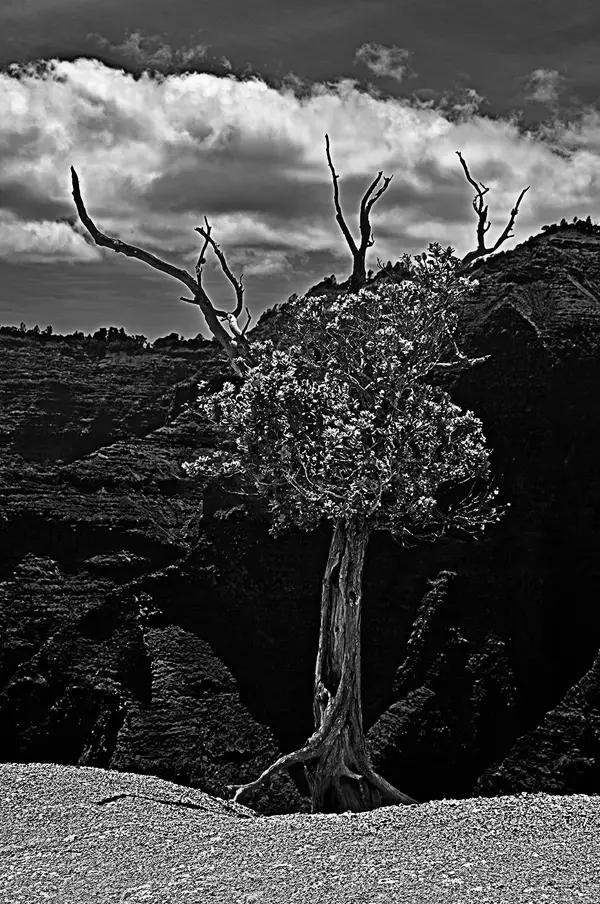
This image is the perfect example of why I like to keep it light. It was a long, steep, hot, and windy day when I journeyed through Kauai’s Waimea Canyon State Park, but definitely worth it to get the amazing views and images.
Lighting – Consider how the lighting varies at different times of the day. Take notes and come back if you have to.
Early morning and evening just before or just after the sun rises and sets provide some of the best lighting opportunities. For landscape shots where detail is wanted, find a location that offers side lighting to bring out the varying textures.I like to get distant landscape shots during the warm light of morning and dusk.
During midday, I typically head indoors for architecture shots or look over and jot down notes while they are fresh in my head. If you were up early for your sunrise shots and plan on doing sunset ones also, this can be a great time to catch up on some sleep. Depending on where you are, you can avoid the crowds along with the intense midday sun.
Here is a great example of the warm tones of sunset. I positioned myself not to only get great side lighting to bring out the detail, but also to get the amazing light of the late afternoon,which brought out the color and created remarkable shadows.
Get Creative – In order to turn a tourist spot that has been photographed to death into your own, think differently. Look for different views, walk around, get the idea of the subject you want to shoot and make it your own. Utilize the conditions – weather, light, angle, etc. – to best communicate your vision of it.
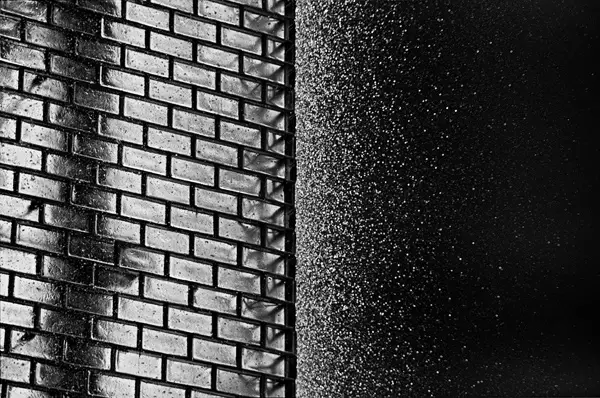
In this photograph, I used backlight to emphasize the shape and form of the crown fountain in downtown Chicago. I wanted to accentuate the opposites of the image. The light brought out the glass bricks, which normally would not be transparent, while my exposure and post processing allowed me to create a high contrast, turning the typically bright daylight into blackness. The fluid water was frozen in time in a random pattern, with a fast shutter speed, which differs from the rectangular man-made, brick pattern.
Prepared – Be observant and always have your camera ready. Sometimes you will stumble upon an area and discover a great picture opportunity you hadn’t planned. You need to be able, at all times, to set up and have all your equipment in working order, prepared to shoot.
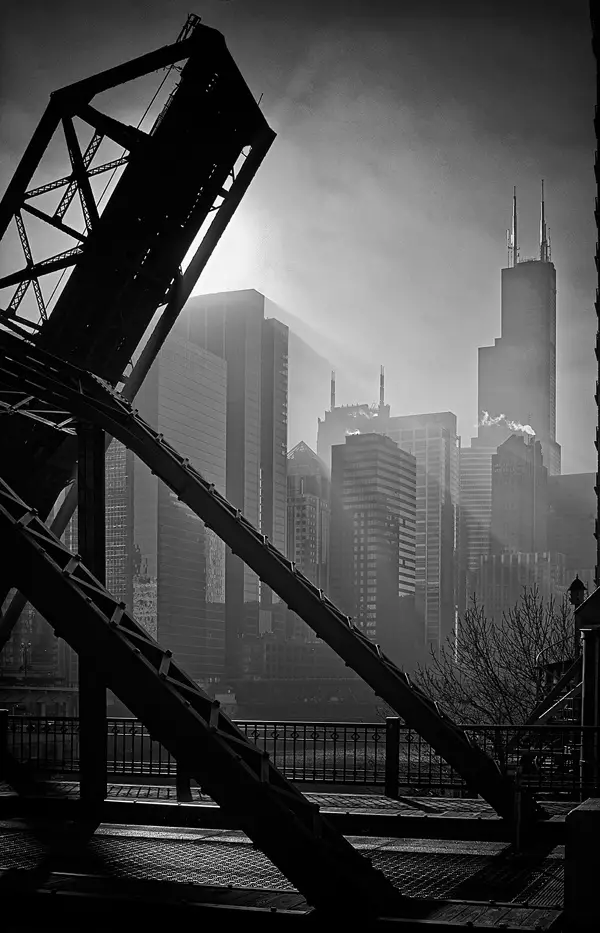
For this image, I had just finished up my morning shoot and was walking back across the Kinzie Bridge when the fog coupled with the position of the sun created magnificent light beams. I immediately set up and grabbed the image before it was too late.
I hope you will have the opportunity to capture some amazing photographs during your own travels. Please help make my next travel photography series a reality by visiting my Kickstarter page and backing my project.
It is a great opportunity to pre-order my book and get discounts on prints. Even if you can’t contribute, help spread the word by simply clicking the Facebook and Twitter buttons on the page in that link. Just two clicks make a HUGE difference! You can also see more of my work on my website. Happy shooting!
About the author: Jamie’s interest in photography began more than ten years ago when he first developed his own film and experimented with photographic processing. More recently, he has concentrated on fine art photography and in 2008, switched to a digital SLR. In 2011, he made his passion a reality when he started Jamie Surber Fine Art Photography, located in Chicago, Illinois.
Utilizing the skills he hasacquired over the last 13 years, he focuses primarily on landscape photography, both natural and man-made. His goal is to change the viewers’ awareness of objects and settings by creating new perspectives and producing images of the highest quality.


These really are quite average….
Love it! Thanks for the tips. Photos are excellent.