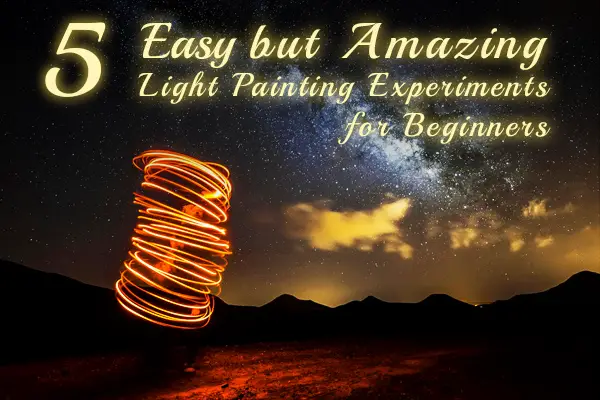
Light painting is a photographic technique using a hand-held light source to “paint” on the film or sensor of your camera. Essentially, you’re waving lights in front of your camera, and you never know what you’ve made until you’re done, so trial and error is required. If this sounds like fun, you’ll find five light painting experiments below you can start and finish in about 30 minutes.
This technique was created in the late 19th century by a pair of physicians who were studying movement. They attached lights to humans and animals, photographed them, then studied how they moved. Man Ray was the first artist to use this approach when he made a series of self-portraits and wrote his signature with a pen light. Later, the photographer Gjon Mili’s light paintings inspired Pablo Picasso, and the two collaborated to create some “light drawings” for some iconic portraits.
Today, light painting is exploding in popularity. Since so much experimentation is needed, the immediate feedback from digital cameras makes this technique much easier than it used to be with film. Plus, a diverse range of LED lights are being produced (thank you, rave culture! :)), and with the prevalence of social media, you can quickly get inspired, then publish your creation for an audience. From the looks of it, light painting is in its infancy, and there’s plenty of room for unique creations.
Light painting is also a fun group activity. Give your friends some lights, put your heads together and come up with an idea, and then make an original photograph. In fact, even if your picture isn’t a masterpiece, you might just have a cool bonding experience.
So, if you’re ready to get started, here’s what you’ll need:
- Camera with manual settings
- Light source (like a flashlight, glow stick or sparkler)
- Tripod or a flat surface, if you’re the DIY type
- Darkness
Having interesting LED lights, an intervalometer and an off-camera flash will help you make better paintings, but start simple.
Basic Steps to Make a Light Painting:
1. Collect your light, camera and tripod.
2. Dress in dark clothing, and go into a dark room.
3. Set up your tripod and camera.
4. Set your camera to:
- Mode: Manual
- ISO: 100
- Aperture: f/22
- Shutter Speed: 5 seconds (but you’ll vary this later)
5. Set the self-timer for at least two seconds, and then stand in front of the camera and make your painting.
6. Look at your photograph, and then make adjustments accordingly; take another picture.
7. Repeat, repeat, repeat.
8. The simple experiments below will give you ideas, but you’ll just need to vary your shutter speed based on the amount of light and the complexity of your painting.
5 Light Painting Experiments for Beginners:
1. Self-Portrait
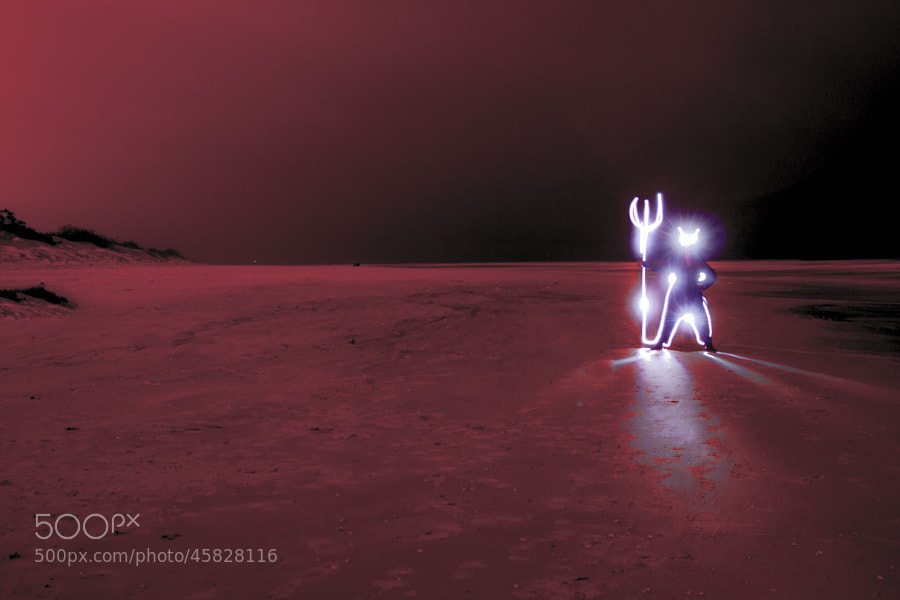
Start by drawing around yourself. You can do anything here, but if you want to create a self-portrait, then try to show who you are with light. If you’re new to this, it’s normal to be shy. But no one’s going to see your photos if you don’t want them to, so you have permission to be kinda crazy.
Examples: Make yourself a devil or an angel. Draw around yourself, do a circle around your face or make large squiggly lines behind your back.
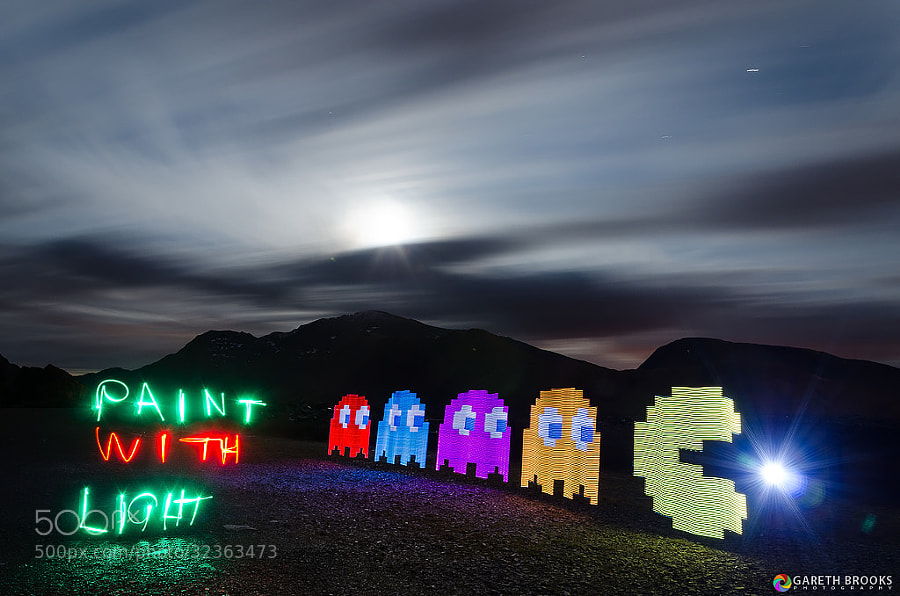
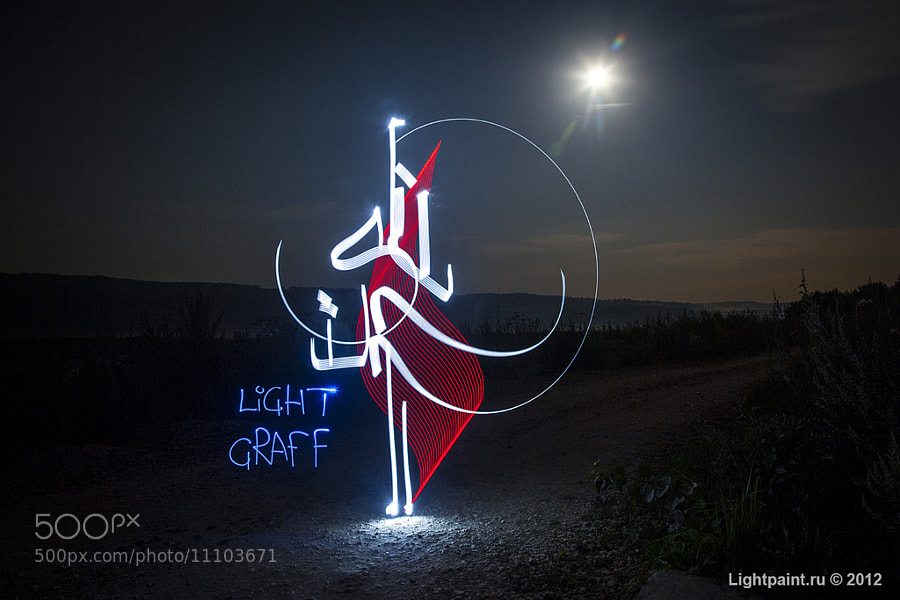
2. Write
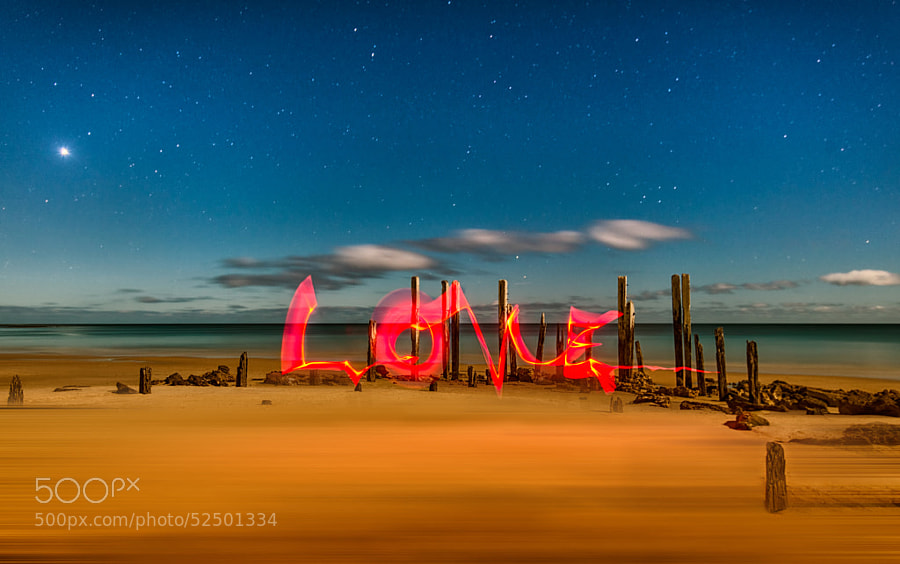
The word graffiti means “to write,” so we could call this light graffiti. But for this experiment, you don’t need to buy any spray paint, leave your home or run from any cops. Just write something in the darkness. You could write a word, a quote, your name or a phrase. Consider how much you want to write, and then set your shutter speed accordingly.
Examples: Try your favorite word, your pet’s name or a message to your girlfriend.
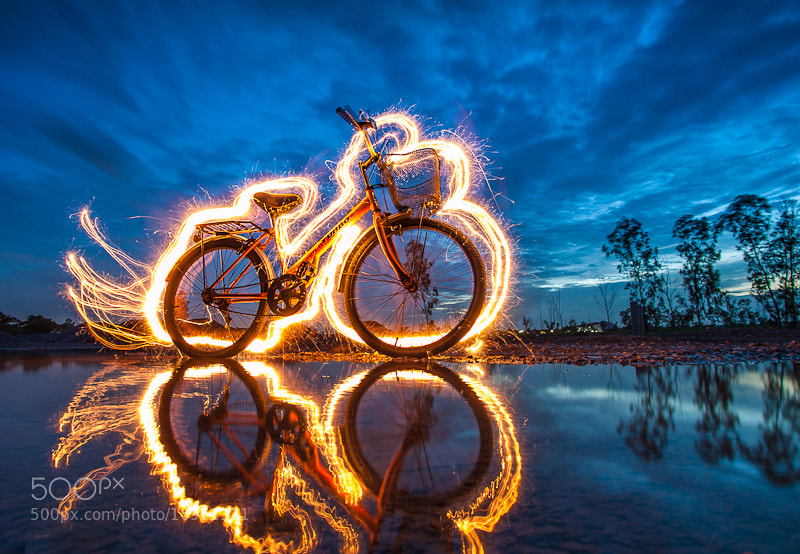
3. Draw
Draw something interesting, maybe a person, a symbol or an animal. Now’s your chance to make your own Pablo Picasso-like artwork.
Examples: Draw a star, heart, stick figure, your pet, your face, an insect, or get inspiration from other light paintings.
4. Outline
Grab one of your treasured possessions and use light to outline it. Make a wide arc or a tight silhouette. Try making wiggly lines or straight ones. Can you illustrate the “personality” of the object?
Example: Grab your toothbrush, your favorite shirt, your teddy bear or any object you’d hate to lose, and make something from your imagination.
5. Abstract
Time to get nuts. Do whatever you want and call it “art.” 🙂 Try short exposures and moving fast. Or long exposures and going super slow. Stand as far back or as close as you can. Choose a word or theme, and try to express it.
Extra credit: Take a portrait of friend

If you are the ambitious type, here’s one more: Convince a friend, family member or roommate to join you in your dark room and make a light painting of them.
If you have half an hour or so, why not give these light painting experiments a try right now? When you’re finished, please come back here and share one thing you learned in the comments below. Even if it’s just a short thought, we’d love to hear from you. If you have a question, ask away, and we’ll try to answer you personally!


Hey guys, at first I want to thank you for making such a grat web sites and posting so inspirative articles! Now about what I have learned during my practicing of light-taking-pictures. I had so much fun and I have learned that the imagination is endless. I will practice and practice a lot, I am sure of that. Thanks again
Cool Lucie, thanks for sharing 🙂
Hi Benjamin! Thanks for the post! I have a very simple point and shoot camera, but was able to follow your advice with a few modifications, and get some cool pics of flame throwers at practice. I had so much fun, now I want a “real” camera. 🙂
Hey Crystal, flame throwers… cool. I want to go to flame thrower practice 🙂