Family photos can be incredibly precious keepsakes. Most of us have in our possession old pictures of our parents, our grandparents, or ourselves, but unfortunately, as a result of time and poor protection, these photos often become scratched or torn, or lose their original spark.
 Thanks to Photoshop, we can easily restore our old photos in a fun and creative way.
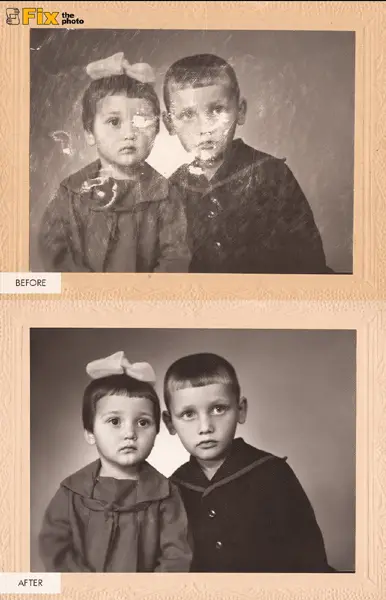
Photoshop suites have some incredible tools that can take an old, beaten-down photo from this:

to this:
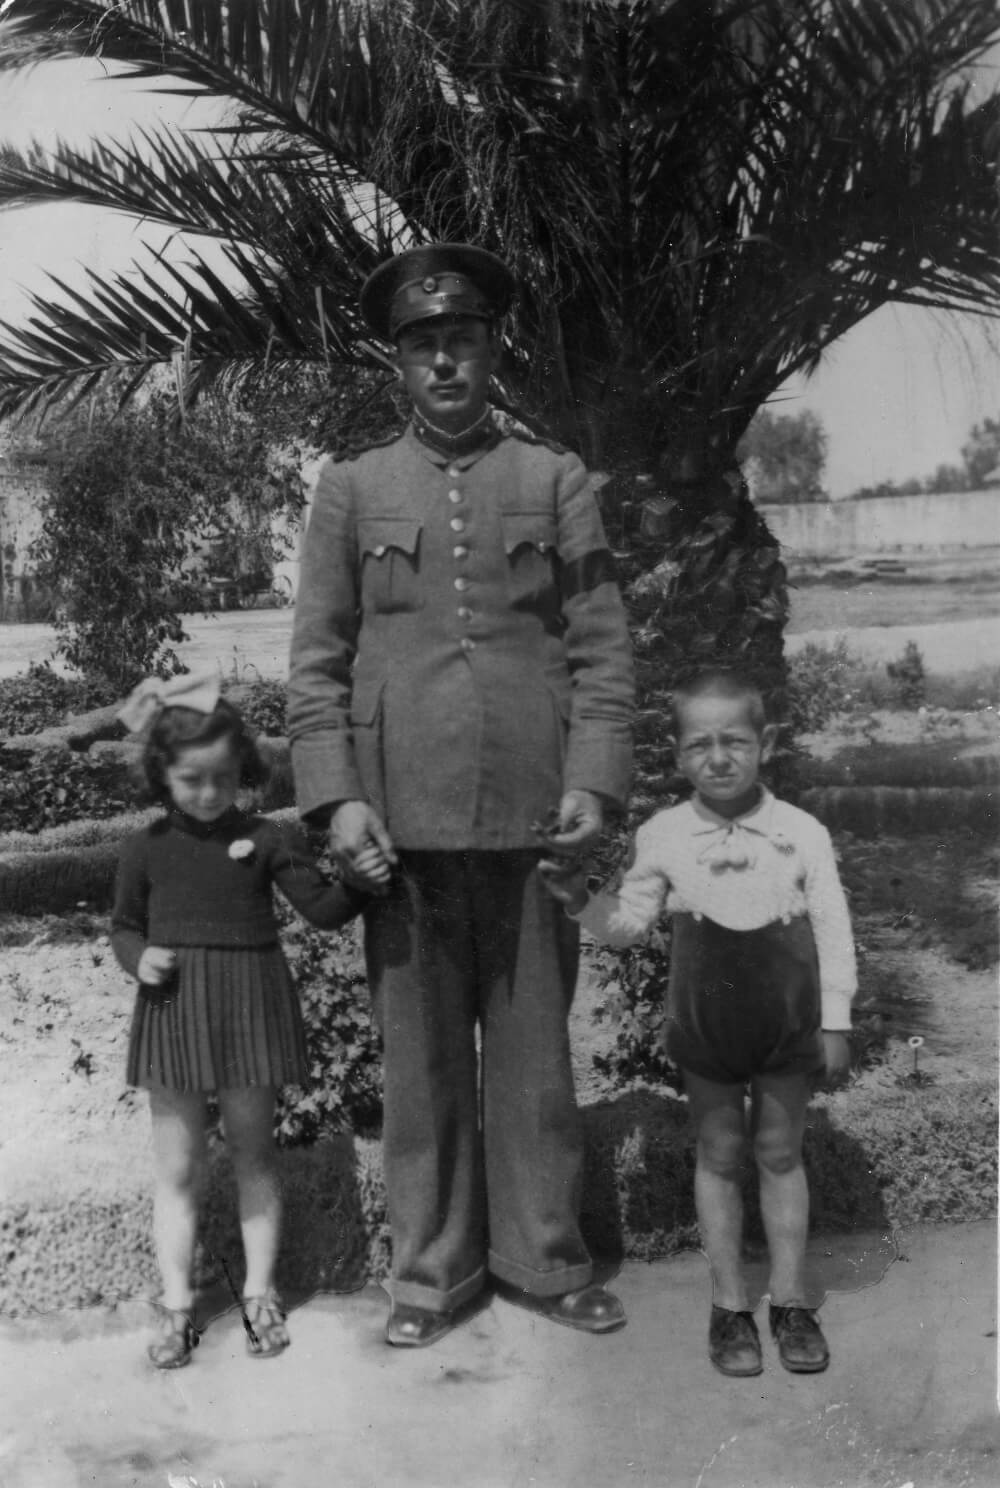
Image courtesy of Anna Kelaidi
What are these tools?
The Photoshop retouching tools we’re going to use in this tutorial include the following: the Spot Healing Brush tool, the Patch tool, the Clone Stamp tool, the Gaussian Blur filter, and of course, the help of the Channels Panel.
So let’s open our workspace and get started.
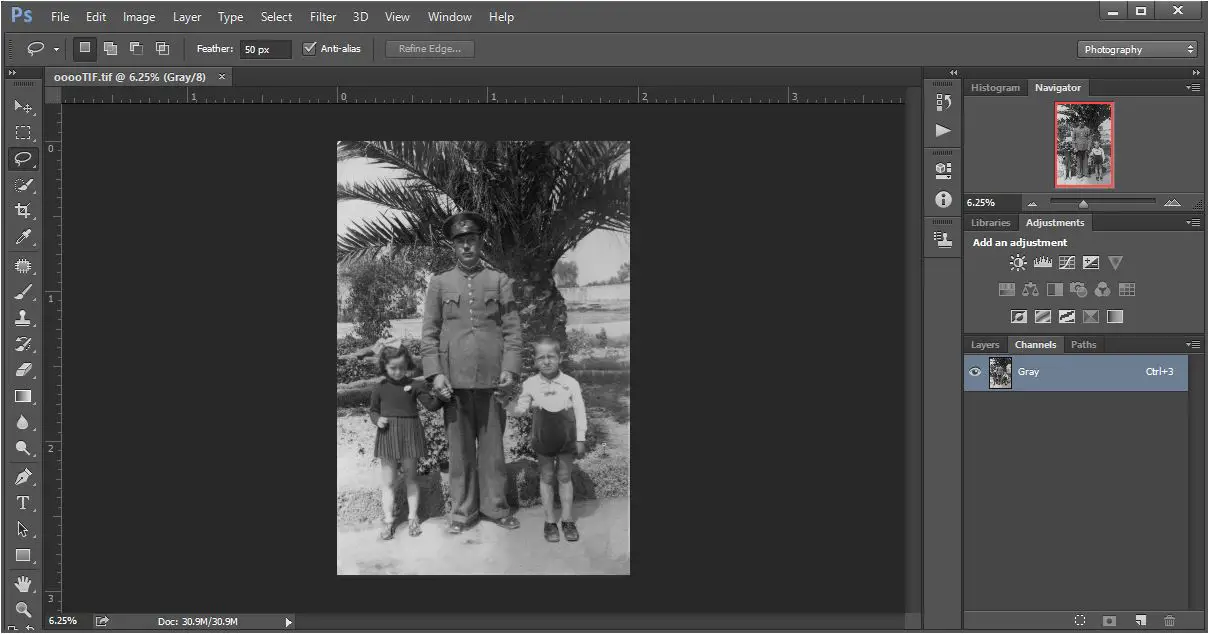
Scan the photograph
Once you choose the photo you want to restore, the first thing you’ll need to do is scan it in a good photographic resolution. You’ll have to scan this image in RGB mode, meaning scan it in color mode, not black and white.
This way, you can avoid a lot of colored stains and dirt simply by choosing the right color channel, as we’ll explain later on in the tutorial. If you scan a black-and-white photograph in grayscale mode, then all these colored stains and colors caused from time will merge into the original picture, and it will be much more difficult to get rid of them.
Open the picture
 Now that you’ve scanned the photo you want, open it up on your computer and look at it. Right away, you’ll probably notice all the photo’s blemishes and trouble spots. In the case of an old family picture, we have all kind of faults, such as scratches, oily fingerprint stamps that left an eternal mark on the picture, tears/breaks of the surface, folding lines, and even stains of unknown origin.
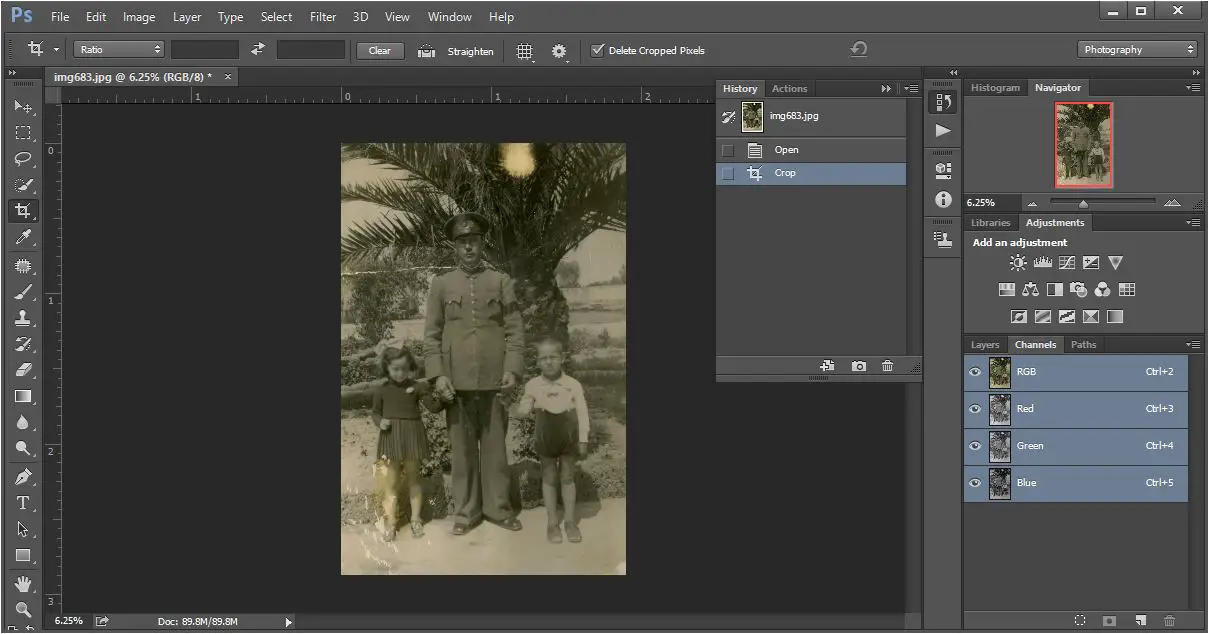
Here’s the great news—we can get rid of all these things and restore the photo to its natural beauty. First, open the History panel on the right side of Photoshop. The History panel keeps track of everything you do to the photo. Whenever you want or need to go back to a previous stage, just choose from this list without losing any of the other changes you’ve made.
Change the RGB into grayscale
The next step (after cropping your photo, if necessary) is to remove the yellowish hue that age has inflicted on the picture and return it to its original black-and-white tone. You do this by going to the Channels panel on the right, where you can see what kind of tonality each red, blue, and green channel gives.
 You’ll notice that when you click on each channel, the picture becomes totally black and white, but the tone is a bit different.
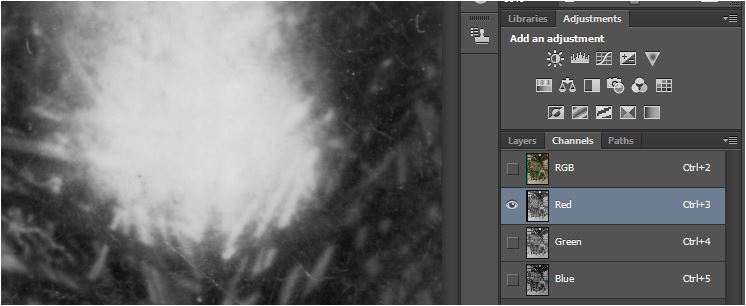
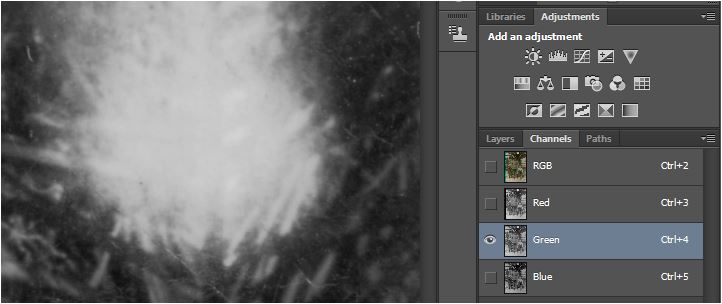
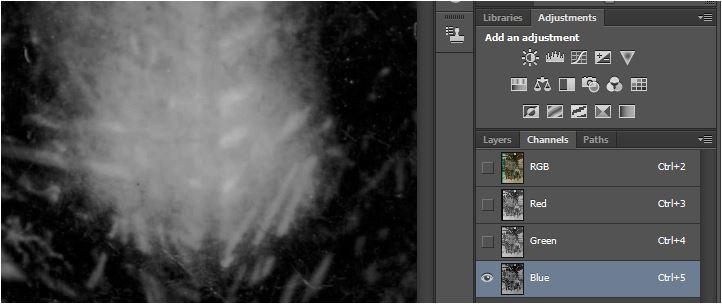 You’ll want to choose the chromatic channel that best suits the variety of your original picture. The reason for that is that every red, blue, and green filter contains only the hues that each of those tones gives.
Similarly, stains that, for example, are yellow, will be much fainter if you choose the blue channel instead of the other two channels. In this case, the blue channel is our best bet, so go ahead and drag and drop the other two channels into the trash can on the bottom of this panel.
Now it’s time to make this channel only black and white. Go to Image, then click Mode, click Grayscale, and that’s it. Your yellow channel should now be gray! Now we’ll go ahead and start the retouch process.
Start retouching with the Healing Brush Tool
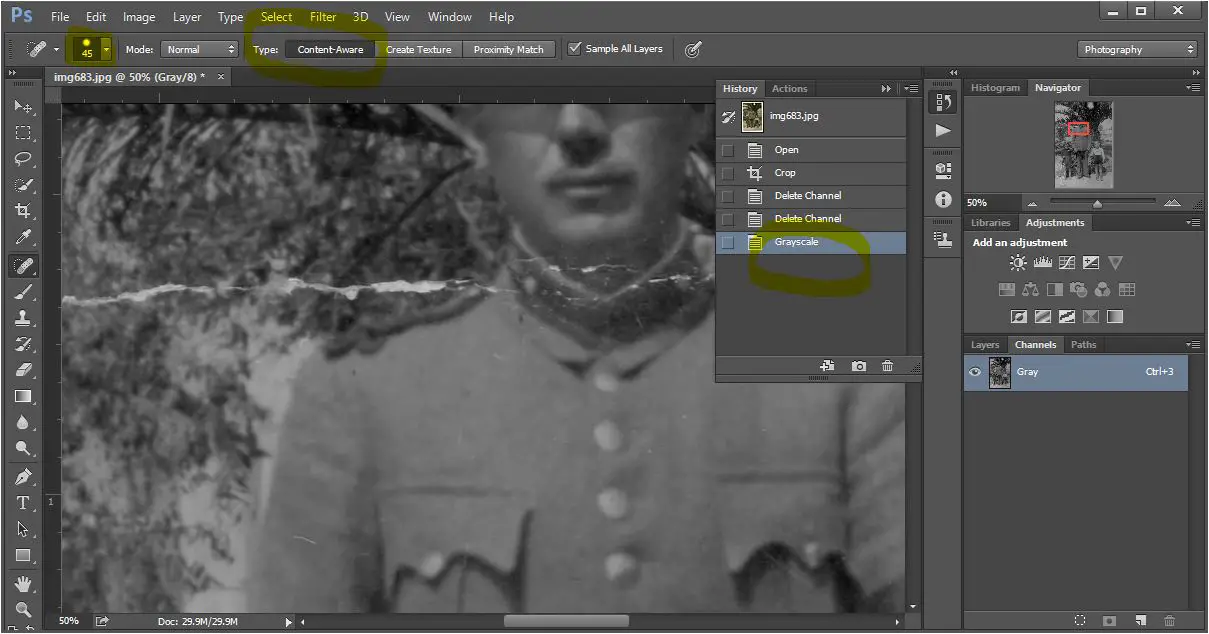 This is the handiest retouching tool of all. But it does have a downside—there’s a chance of distorting the selected area. This distortion can be visible and very annoying to the eye. You can avoid this by switching the Create texture and Proximity match features and experimenting with the hardness of the different brushes and the kind of brush you use. In this example, we’re going to use it shamelessly and click it on every little dot we see that is not part of the original photo. Magnify the size of the picture in the workspace up until 50% and start getting rid of the dirt and scratches!
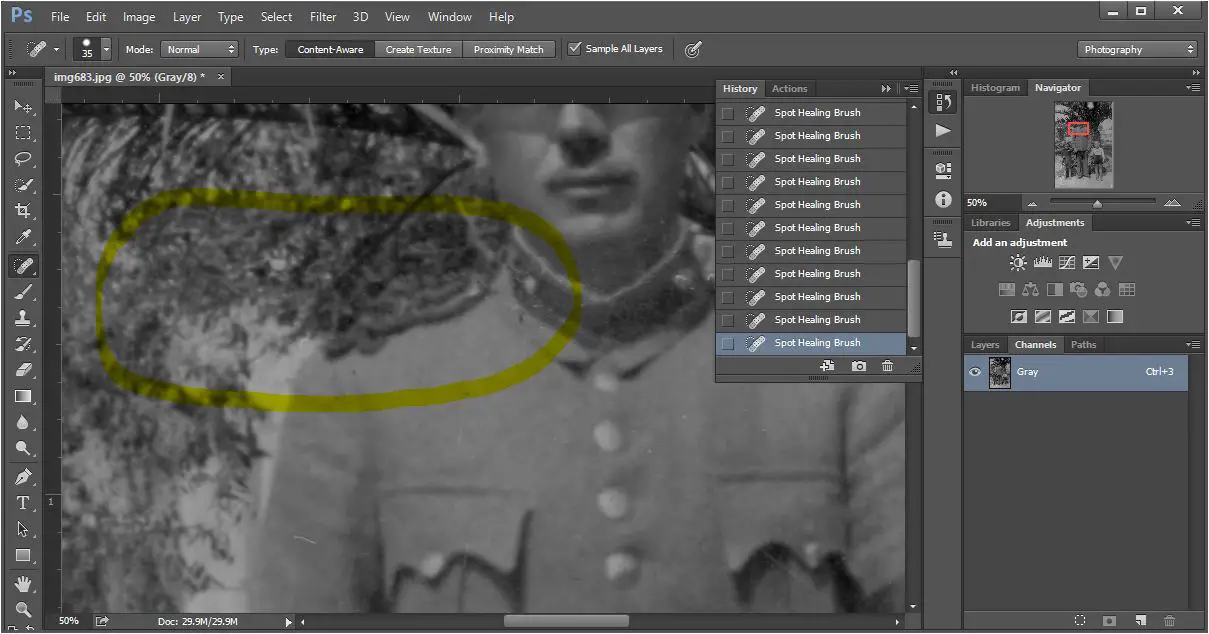
Cover linear scratches of different tonalities
Use the Spot Healing tool to draw a “healing” line over a scratch, or you can click on individual dust spots. Many times, you’ll find that you’ll need to conceal an area of the picture that has various black and white tonalities. When that happens, avoid drawing healing lines directly and nonstop, or else that line might look incoherent with the image’s initial gradient.
You can avoid this by drawing small lines that shift when the color or tonality changes. It’s better to zoom into the picture and change the size of the brushes you use, making them smaller for the details and to draw short lines. A nice shortcut to do it is to press [ to make the brush smaller, and ] to make it larger.
Use the Patch tool
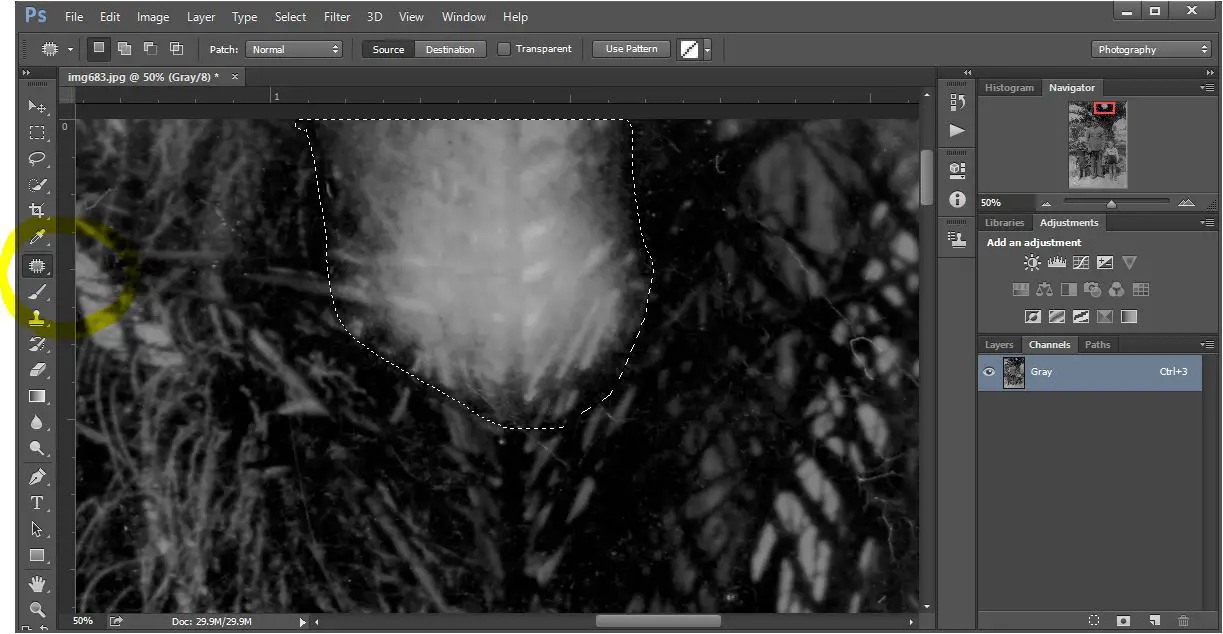 There are some, let’s say, “neutral” areas sometimes in pictures where you can find a lot of imperfections. We can see examples of that in the case of this photo—for instance, the light big circular spot on the top side of the image, or the scratches on the bottom side near the edges. While it was very difficult to cover these faults with any other tool, Photoshop now has an amazing Patch tool where you can select an area and then move it around so you can pick another space clean of scratches and replace it. Put the mouse on the selected area, and while holding it down, move it to the area you want to cover.
Retouch any large, affected areas
Lots of old pictures have some areas that either were underexposed or overexposed from the beginning, or the photo has lost its original vividness throughout time.
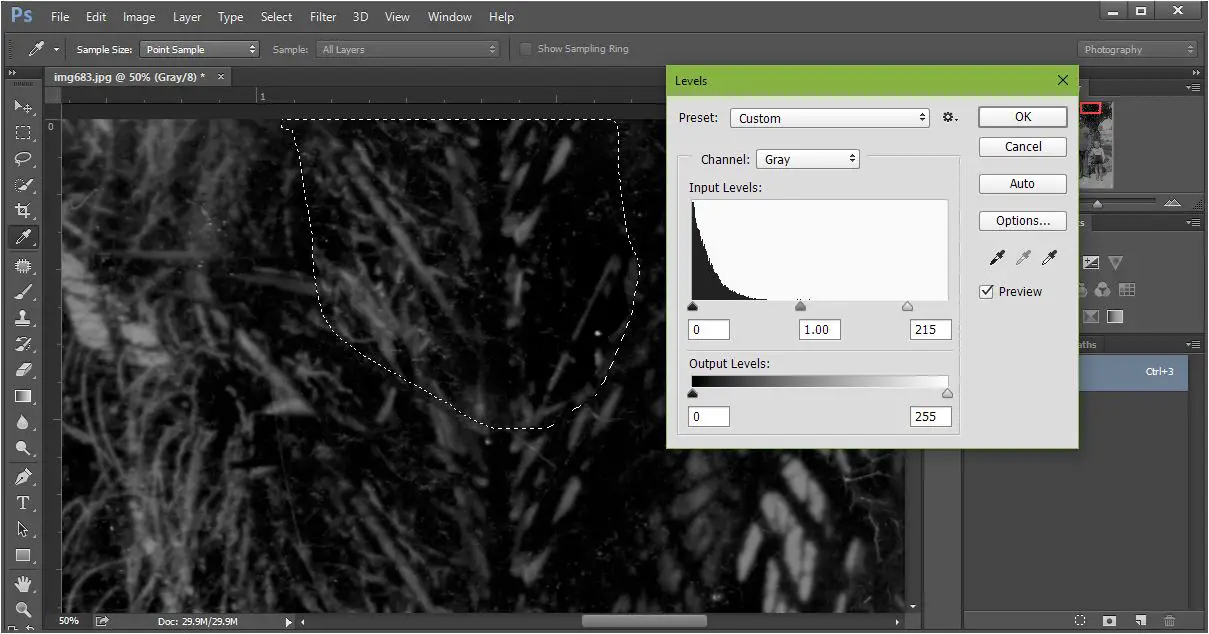
In the case of this photo, we’ll want to use the Lasso tool and then configure the tone levels. This will affect the dim area and brighten it up. All photos vary greatly in tone, and it’s entirely up to you how much of the original tone you want to restore.
For this photo, pick the Lasso tool from the left tool panel and draw a line around the area you want to fix by clicking and holding the mouse cursor. Normally, Photoshop gives you a preset of the feather of the line you’ll draw as you can notice on the settings of the top bar, but it depends a lot on the picture. In general, use a soft feather of 50 pixels and check if it works. If not, experiment with different feather amounts. When you have the photo the way you want it, press Ctrl+L and the Levels window will appear. In the chart that we see, we can drag the little arrows in black, gray, and white colors, and this way, we can alter the level of the tonality of the selected area. Levels are not a retouching tool, like the Spot Healing tool, but it does assist in recapturing the photo’s original tones. Even with black-and-white photos, the Lasso tool helps rearrange the black and the white tones of the picture and balance it.
Use the Clone Stamp tool
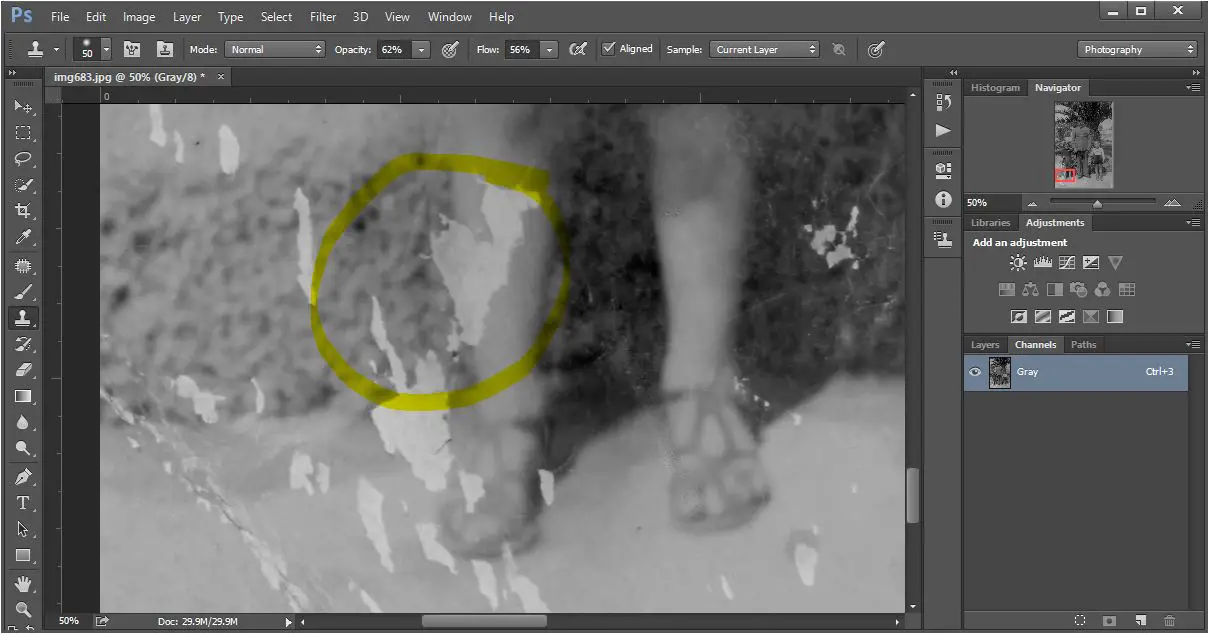
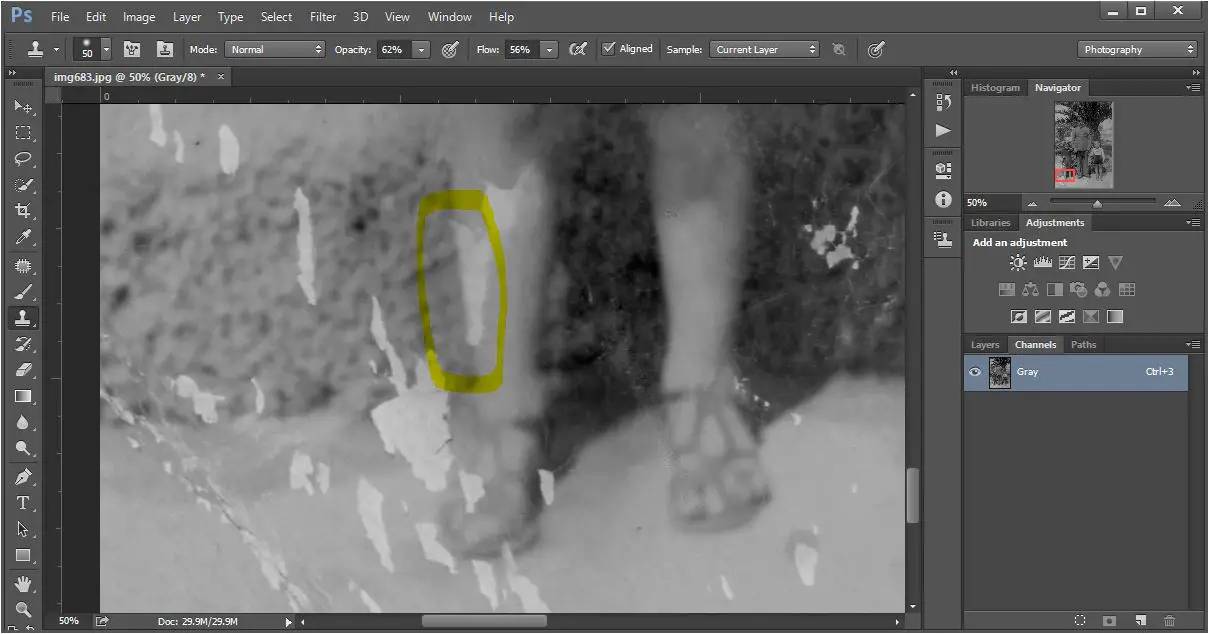 There might be some times that we have to recreate a special area, whereas neither the Patch tool, nor the Spot Healing tool can help. It’s when we need to reconstruct a detail or continue some pattern. In these cases we use the Clone Stamp tool where we can duplicate a spot near the place we want to change. By dragging this tool we notice that it duplicates also like a brush tool.
Keep in mind that we use it moderately because duplications are often very catchy to the eye. To use this tool press left or right Alt+ click on the spot you want to clone.
Be careful what you delete
Things that appear more blurry than sharp are most probably part of the photo and are not scratches or film damage. Remember that scratches, drops, and tears of the photographic paper usually show up very sharply in a scanned picture. For example, on the marked area of the initial photo, if we zoom in, we can see two or three white, blurry circles (where the green arrows are) and some other points that are more detailed and sharp (the yellow arrows).
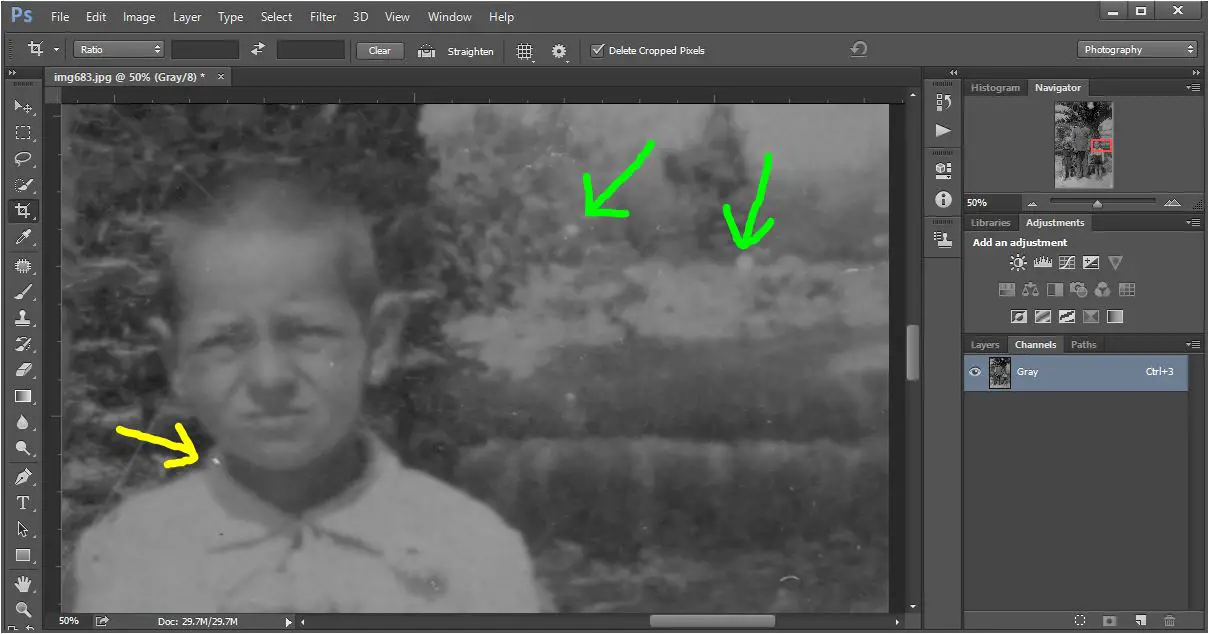 We understand that these blurry circles are flowers—probably white roses in blooming—so we want them in the picture because they add value—their presence tells us that it’s spring. Maybe this isn’t a particularly important detail to you, but some old photographs contain more significant details, and those tiny details can change history sometimes!
Realize not all areas of a picture are the same
Some parts of a photo can have the same plain color or tone, whereas other parts are much more detailed and have tonal differences. What do we do when that happens? If the picture has a very grainy texture or high-textured areas (such as the detailed fabric of a cloth), most probably the patches of the tools you’ll use to cover the spots will be visible.
In this case, we have to be creative and use the tools with patience, using small and soft brushes to recreate the same pattern of fabric or space. Simply zoom in the picture until the spots you want to fix are visible and their borders are clear on the screen. Then, choose the tool that meets your needs and select the size of the spot you want to change.
One more tool to go!
Last but not least, we’ll talk about the Gaussian Blur tool. This tool actually is a filter you can use to soften and diffuse a photo’s texture. Going back to our example photo, if, for instance, we want to eliminate those very thin scratches from the forehead of the man under his casket, we should magnify the area and select it with a widely feathered lasso.
If the feather pixels amount is not wide enough, then our selection will end up popping out of the image and look fake and strange. But if we have our selection as we want it, then we click Filter, then Blur, and then Gaussian Blur, where in the pop-up window we see a preview screen in a 100% magnification and a radius line.
You can decrease or increase the radius of the Gaussian blurring by dragging the cursor left or right, and see our selection in the photo to change. You’ll notice there’s a point where the scratches are no longer visible; instead, they have been blended with the tone. Keep in mind that the Gaussian Blur filter cannot be used widely because it significantly smoothes and softens the image and can alter the photo in a unrealistic way.
Try not to apply any filter on the image because it affects the photo as a whole and may not give you the outcome that you expect. It’s better to apply any changes or filters discretely in selected areas.
 Also, as tempting as it can be, try not to overdo your alterations. If you get lost in retouching the picture pixel by pixel, you’ll end up with a blurred, “plastic”-looking photo, meaning it will look very soft and unrealistic.
In my photography classes, one instructor always advised us to only correct what is visible up to 50% of the increased image size. The rest of the faults are too minuscule for the eye in a normal print size. Don’t forget that when a photograph is damaged, all you can really do is guess, copy and paste, and create some “makeup” to fill the empty and damaged spots. The more you retouch a photo, the further we set the image from its origin. Less is definitely more.
All in all, there are different levels of photographic restoration and retouching that mostly vary based on personal preferences. Some photographers excel in restoration and retouching of old photographs with an artistic touch, and others try to conserve the initial picture more than anything else.
Wrap up
It takes great precision and patience to restore every minute detail of a photo, as well as capture the photo’s original essence. Still, some people prefer to leave some scratches and dust spots here and there because they want the picture to have that time-weathered look. After all, today’s snazzy digital tools give us free reign to apply to new, spotless, high-definition images, turning an old photograph into a creative, futuristic work of art.
To purchase Photoshop click here
Click here for more on retouching using cloning tools.
You can send your old or damaged photos to FixThePhoto – a professional photo restoration service that will edit your photos for about $25 per image. Their retouchers will edit dull colors, fix missing parts, restore damage areas, do colorization, overall photo enhancement. High-quality results are guaranteed so you can print old photos for your family album.


Thanks for the article, it was really interesting. Photo restoration is my new hobby so these tips are especially useful for me. Thx again 🙂
Hi Jack, thank you for your comment! Photo restoration is a field of great importance and interest. I am very happy I could help a little!
Thank you, Anna Kelaidi to publish a useful tutorial. But One think you not clear that how can I make it colorful? can you explain it…………